


Hi Chelle’s fans! This is Cheryl sitting in for Jenn (jk703). Unfortunately, Jenn was among those who lost power during Hurricane Sandy. She is still without power, so she isn’t able to check in with us here, but we do know she is safe. When her power is restored, we know she will be back with us, and until then, the rest of Chelle’s team will try to fill in the gap. Jenn had already given the team the steps for this terrific technique, so I’m going to post Jenn’s words and images here to share it with you. She used Photoshop to make the tutorial, but I and several other team members have tested it in PSE, and it works the same way in that program, as well.
Step 1. Choose a patterned paper – Jenn chose Chelle’s quatrefoil paper from Eeeeek!
Step 2. Save the paper as a .psd file, and remember where you saved it. Keep the name the same so you can give proper credit to the designer.

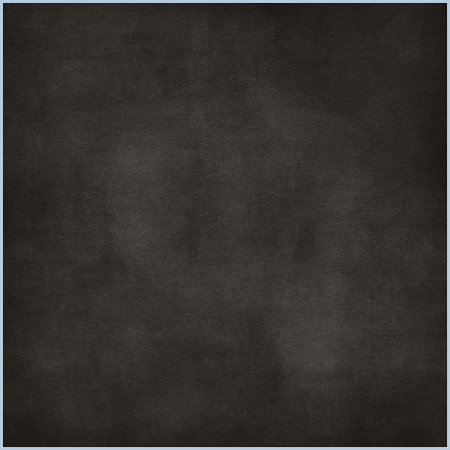
Step 3. Close the quatrefoil papers, and then open a new solid paper. Jenn used the black paper from Eeeeek!
Step 4. Go to the File Menu>Filter>Texture>Texturizer
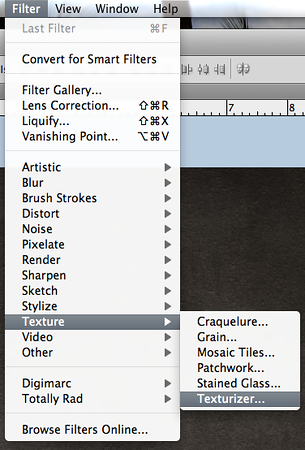
Step 5. The texturizer menu screen will pop up. On the right, under the word Texturizer, click on the little lines near the type of texture, if you’re in Photoshop, or if you have PSE, look for the circle with an arrow in it. A new pop up menu will open, and you’ll choose “Load Texture.” A new window will open in which you will navigate to the paper you saved as a .psd file in Step 2.

Step 6. Once you load that .psd file,

it will show your paper as “dry embossed,”

and you can play with the sliders to change the scaling and relief. You can also choose the direction of the light source,

and you can invert the pattern by checking the “Invert” box.

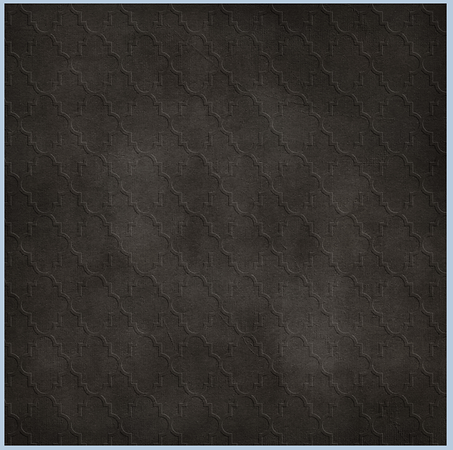
Here’s her final paper:
Several of the team have made pages using Jenn’s instructions for embossing papers. Leslie embossed the eagle paper pattern from the Military Bundle onto a solid to use for her title block. 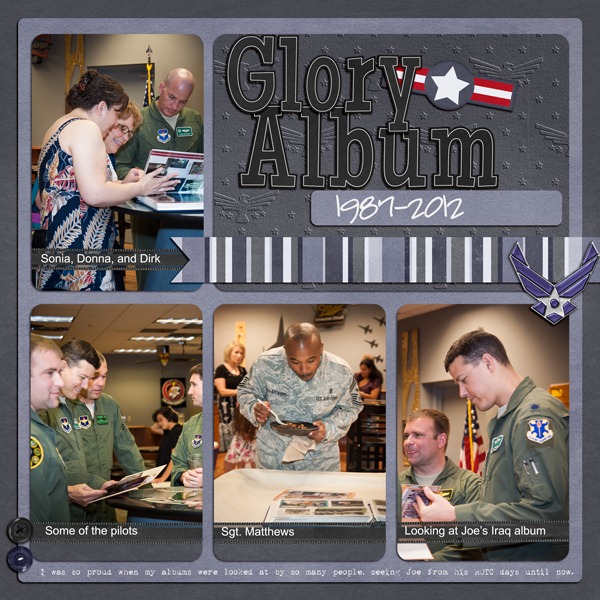
Kayla used a dot paper from the Rainbow Collection to make her background embossed. She also used Money Money and the Photo Stacks on her page.
And, Kassie used a striped paper to make her background paper embossed, and she used Celebrate! Bold.
I hope you’ll try this technique. It is super easy, thanks to Jenn. Be sure to let her know you appreciate it, next time you see her around the forum.


 Hi! I'm Chelle: a 40 something mom of 7. My husband & I live in a rural community in the rocky mountains with our 4 children still at home. In the winters we enjoy sledding & snuggling by the fire. I the cool fall evenings we love relaxing around the campfire & meeting friends at the county fair. Admiring the stars


Thank you so much for this tutorial. It opens up a whole new world of ways to create my open papers or add some design to old papers.
Fantastic tutorial. I never thought of making my own embossed papers!!! Thanks. …and I hope Jenn gets her power back very soon. <3
This is absolutely cool! Thanks for posting!
Thanks so much for the tutorial. I really like the embossed papers and can’t wait to make some of my own!
This is wonderful! I had no idea you could load your own textures like that. Off to play…
So cool and so easy! Thanks for the tutorial!