


Hi Everyone! This is Jenn, aka jk703 here for today’s Tutorial: Heat Embossing. Hope you are all doing great! I’m on vacation and hanging out in the lovely state of Vermont with family and friends! I’m so happy!
Have you ever paper scrapped and stamped? If so, this is a super easy technique that we are replicating – heat embossing. Heat embossing is usually an inked stamp on paper, embossing powder sprinkled all over that stamp so it adheres. Then you would use a heat tool to heat the powder, and it melts to become a smooth, yet dimensional image.
Here’s how we can get that same look digitally! For my example, I used Chelle’s Zoo Crew Safari and Jungle Kit. For the other item examples, Jump Zone and At The Beach. Unfortunately, this tutorial isn’t easily copied in Photoshop Elements BUT I’m testing out a style that you guys could download In the future!
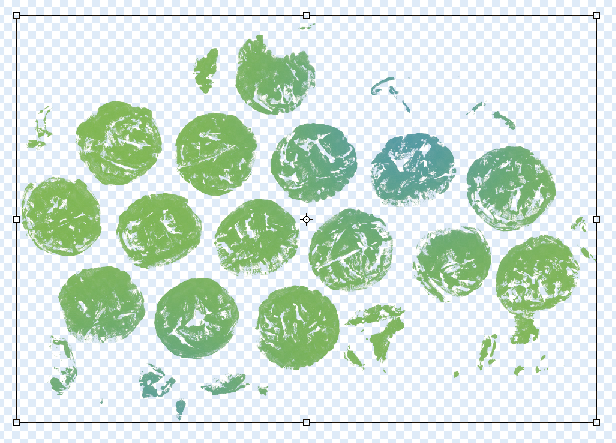
Here is the bubble Wrap straight as it looks from the kit. We will be adding a lot of styles and settings to make the embossed look.
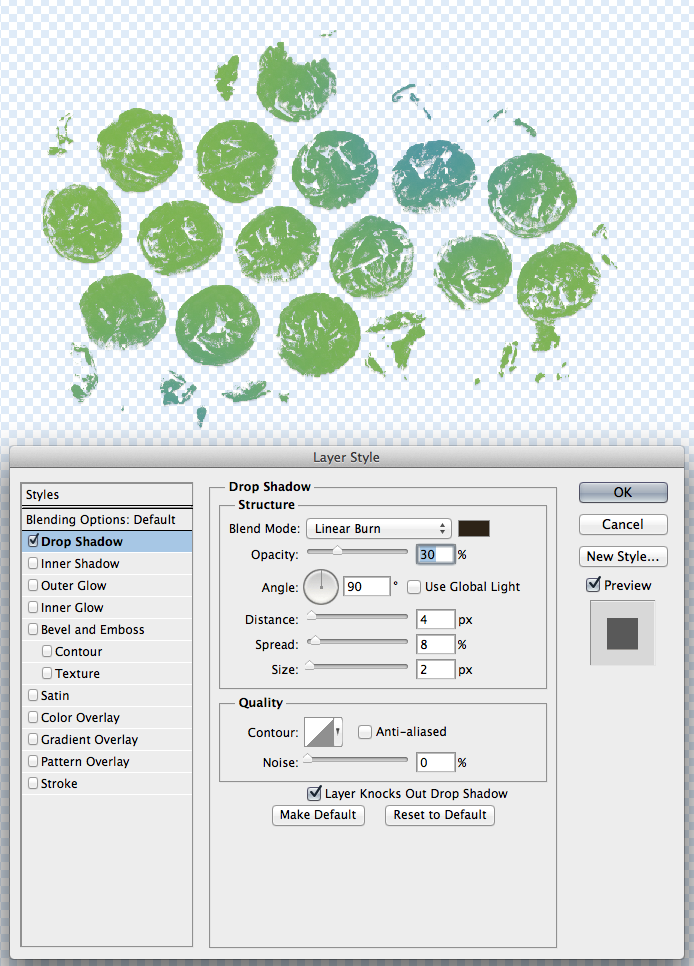
First, I add a little shadow to the bubbles. Normally, when I’ve used a heat tool with embossing powder, it raises the image, and then it will leave a slight shadow. Here are my settings:
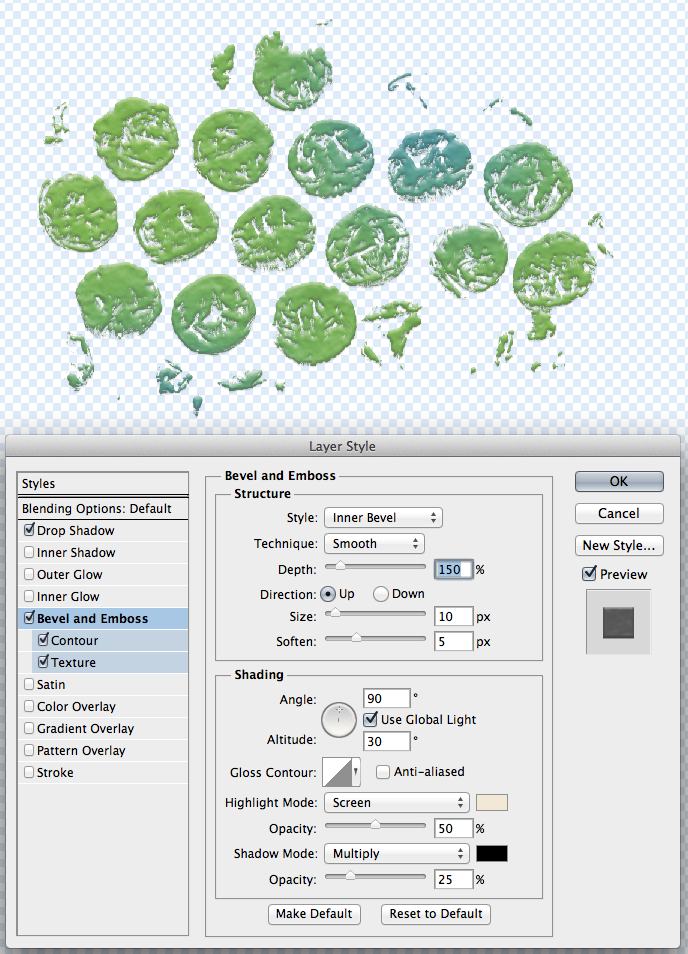
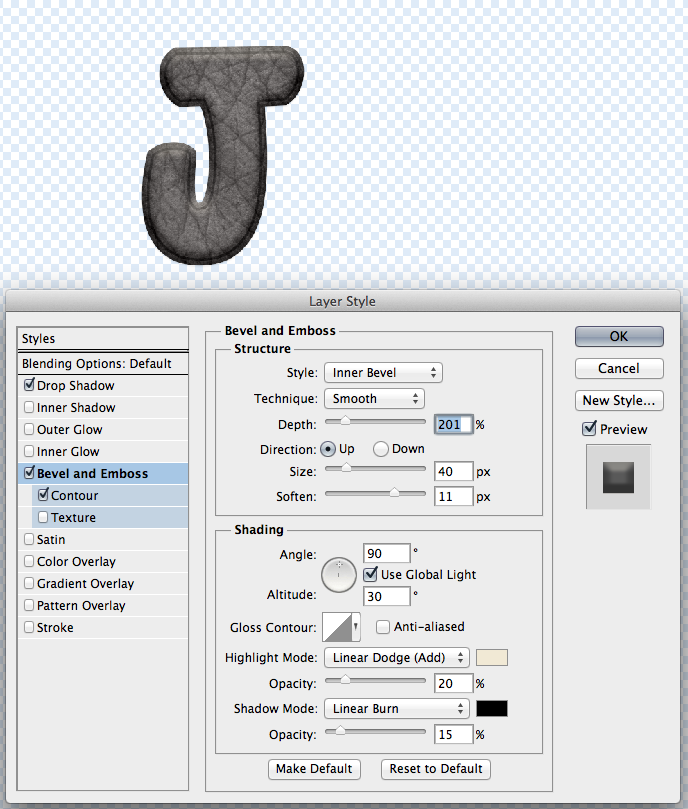
The next part that I will change my settings for is the Bevel and Emboss. I’ve chosen the Inner Style Bevel. Here is an explanation of the different choices:
Outer Bevel: Applies the bevel to the outside of the shape
Inner Bevel: Applies the bevel to the inside of the shape
Emboss: Applies the bevel to both the outside, and the inside of the shape
Pillow Emboss: Applies the bevel to both the outside and inside of the shape, but in opposite directions
Stroke Emboss: Only works when you also have a stroke effect applied to your layer, and applies the bevel only to the stroke
I also have chosen a Smooth Technique. An explanation of these techniques:
Smooth: Smooth, rounded edge bevel
Chisel Hard: Hard, chiseled edge bevel
Chisel Soft: Rough, chiseled edge bevel
The others are dependent on what you are doing. Depth, would be how large of a bevel and emboss you would like. The direction would let you decide if you want it to come toward you, or away from you, more like raised or pressed from the paper. Size allows you to determine how much of the effect is seen – subtle or more dramatic. Soften slider determines how soft the edges are.
My depth of 150%, Up Direction, Size of 10 pixels, softened to 5 pixels.
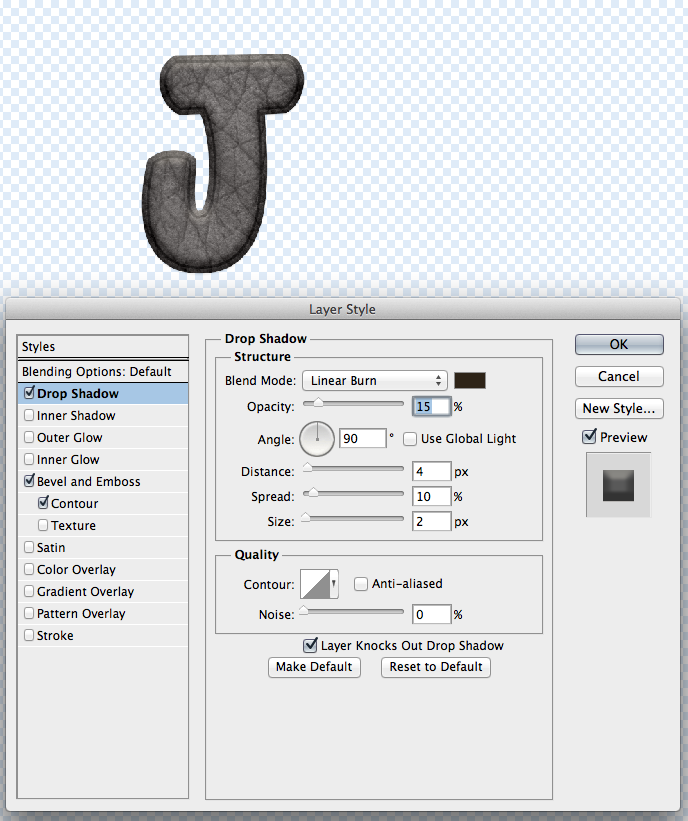
Below the Structure Box is the Shading Box. The Angle and Altitude work with your lighting and shadows. The Global Light check will match it to other settings that you have in the file. The Gloss Contour can create fun and interesting effects. A linear contour creates more natural looking effects, while choosing something like the sine wave contour can create reflective effects. Anti Alias means it will smooth out any jaggies in the gloss. The Highlight Color may usually be white, but you can change it up depending on the light source that will highlight the item. Similar for shadows and the Shadow Mode.
My settings for this are 90 degree Angle, with a 30 degree Altitude, and Global Light is checked off. The Gloss Contour is the diagonal line – aka Linear. The Highlight Mode is Screen, with 50% Opacity, and a color of #f1e9d4. The Shadow Mode is Multiply at 25% Opacity and the color #000000.
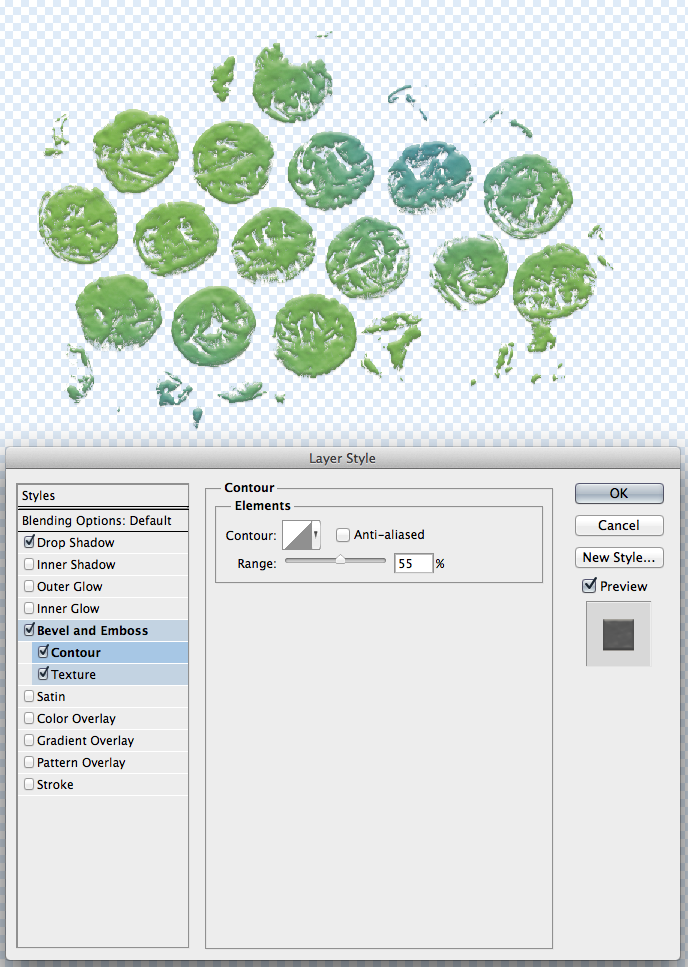
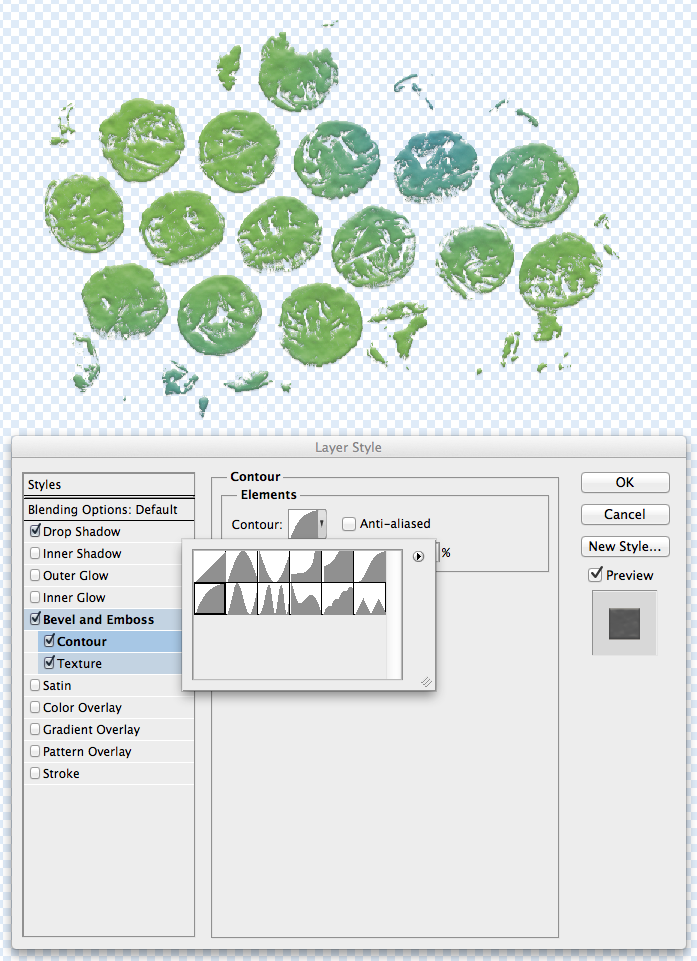
Under the Contour sub menu of Bevel and Emboss, you can choose what count our you like. It is easier for you to play with this setting than it is for me to actually give you a good description. Give each a try.
Here is the Half Round Contour.
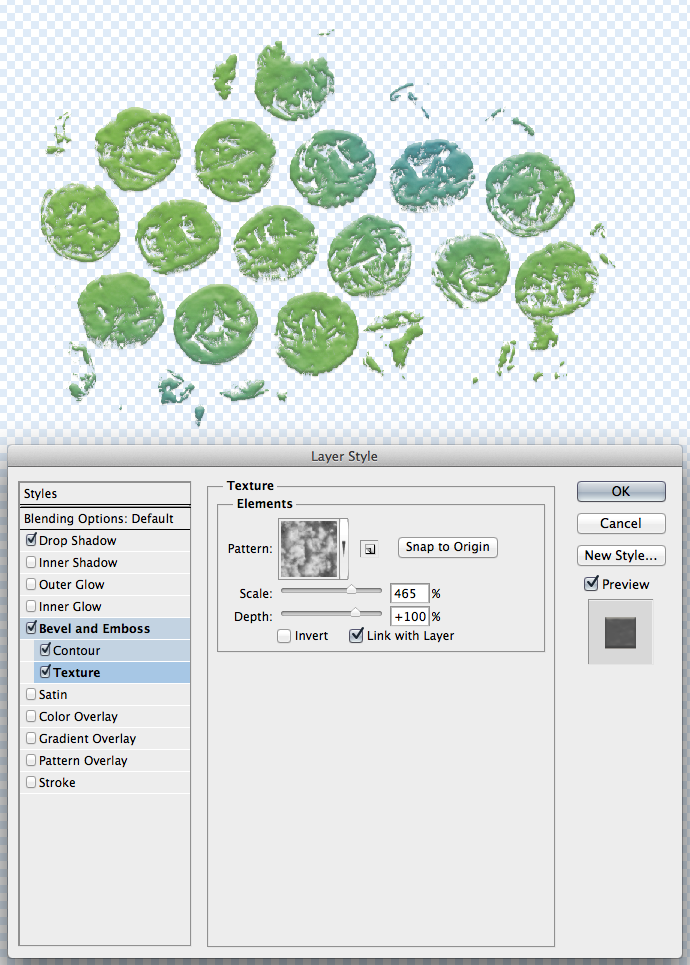
Next up is Texture. Adding a little texture allows you to mimic what the embossing powder does when heated and then when it dries. It does not dry smooth always, may have slight bumps and give the appearance of rises and ridges. Here are my settings with the Bubble Texture.
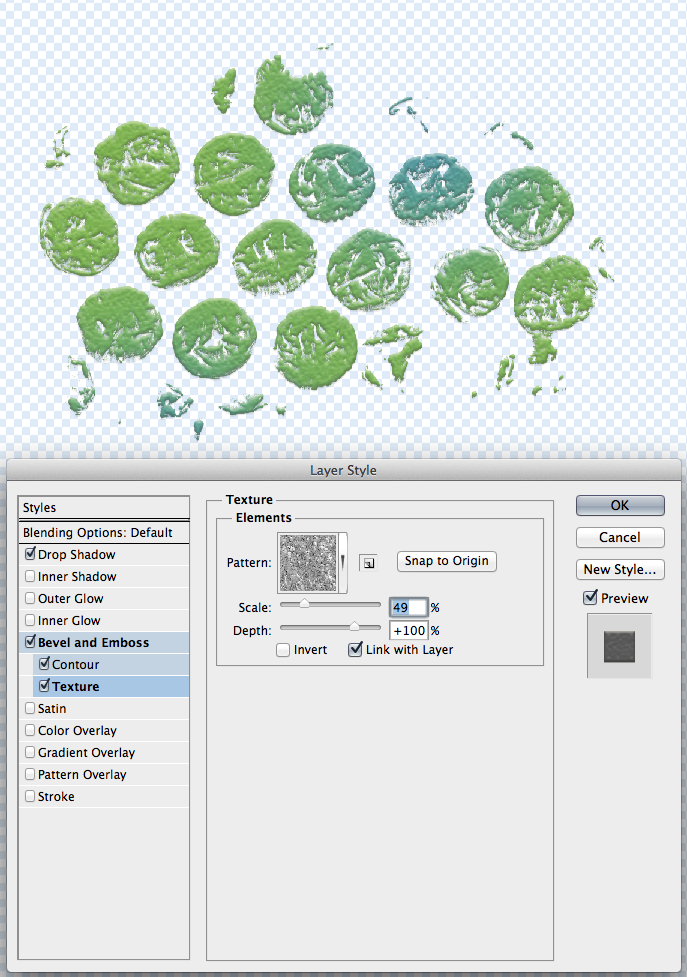
Here is another one, called Rust Flakes.
That is pretty much it. You play with the settings and when you like on, save it. You can just click then and it will be done! This technique can also be applied to other elements and things. Alphas even look good with a little Bevel and Contour.
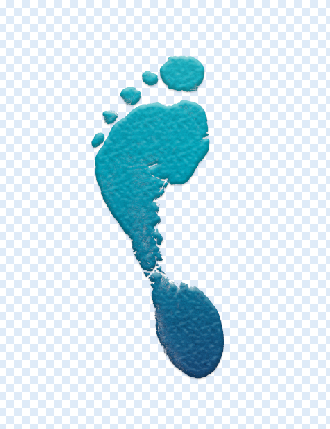
Here is the footprint from At The Beach – with a paper clipped to it. Then I copied the settings on the paint above, and this is what it looked like.
Here is a star element from Jump Zone.

Some other tips:
Bevel and Emboss effects can be applied to text layers as well as shape layers.
Many times, the shape of the Bevel is determined by the Contour you choose, and the Smooth Technique that you choose.
When you’re applying a Texture to a Bevel and Emboss, you can Link with Layer checkbox, which lets you move the Texture and layer in complete together.
Kayla (keepscrappin) found this work around for Photoshop Elements – Thank you Kayla! Since PSE doesn’t have all the options you had, she did a simple inner bevel on the alpha and the floral border. She then modified the bevel down to 10 pixels, simplified the layer and then added the drop shadows. Kayla used Boho Summer and modified a LGFD template.
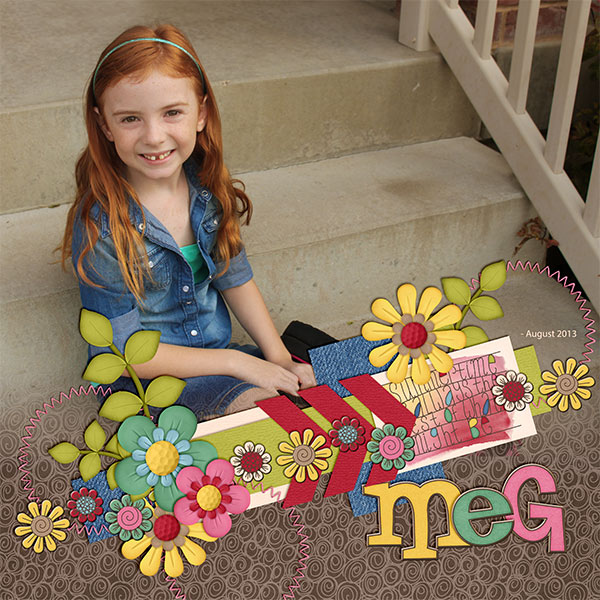
Look at that smiling face! I love the blend of background paper into the photo – it is perfect! I think it does give it the raised effect, but not totally sure if it looks embossed with a heat tool. What you do all think?
I hope you give it a try and remember to play with the settings! Have a great week! Thanks for visiting!


 Hi! I'm Chelle: a 40 something mom of 7. My husband & I live in a rural community in the rocky mountains with our 4 children still at home. In the winters we enjoy sledding & snuggling by the fire. I the cool fall evenings we love relaxing around the campfire & meeting friends at the county fair. Admiring the stars


Pingback: CraftCrave | DigiFree | CraftCrave
Thanks again for another great tutorial.