Hello Friends!
Recently I was browsing on Chelle’s Blog. I came across a tutorial I had never seen before. I’m always up for sharing ideas. So here is a re-post of “Inked Edges,” in this case tags. With Christmas around the corner, I know all of my digi friends could have a blast with digital scrapbooking tags for presents. Paint splats, glitter, things like that. Think of the mess you won’t have to clean up!
Perhaps the best thing about digitally “inking edges” is that my fingers are clean. Or maybe it’s that I don’t need several colors of ink pads. Either way, here are some step by step instructions for simulating inked edges.
Step 1: Begin with an element that you wish to “ink”. Create a blank layer above the element. This is the layer that will have the “ink” so it can be “clipped” to the shape.
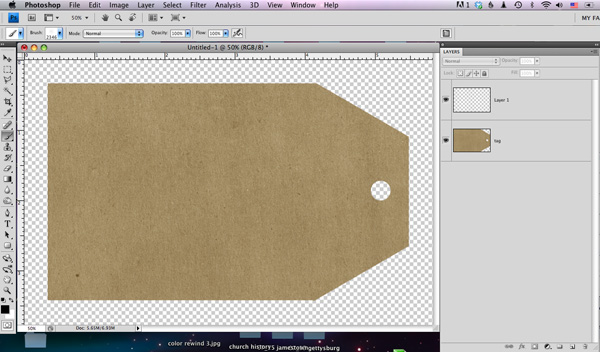
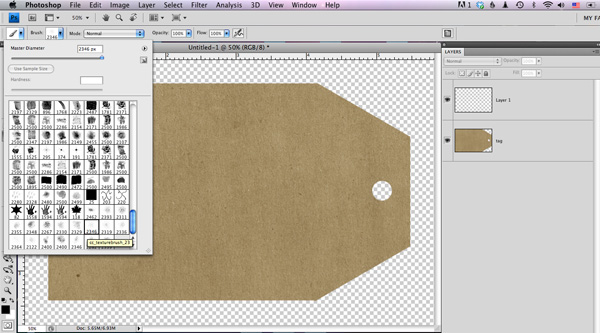
Step 2: Use a texturizing brush. I chose number 23 and lowered the size to about 100.
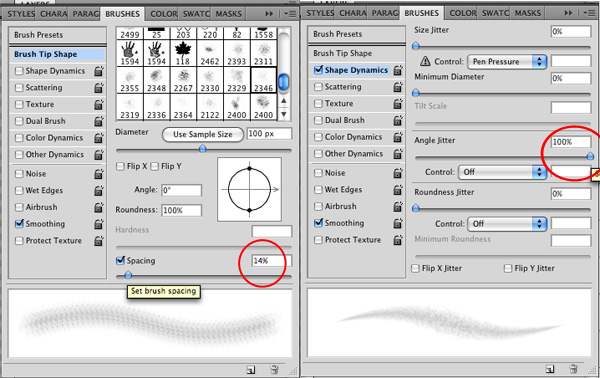
Step 3: Make some adjustments to the brush–these adjustments work in the full version of photoshop. Some adjustments can be made in Elements. Lower the spacing adjustment to about 15%. Raise the angle jitter to aover 50%. The actually numbers are not critical–differences will result in unique “ink”.
Step 4: Brush along the edges of the element. I click on the corner, then move to the next corner, hold down shift and click again. You CAN create a path and stroke the path, but I believe the uniqueness that results from doing it “by hand” adds to the realism. Especially on circles. Inking with a square/flat inkpad on a circle does NOT turn out smooth or even.
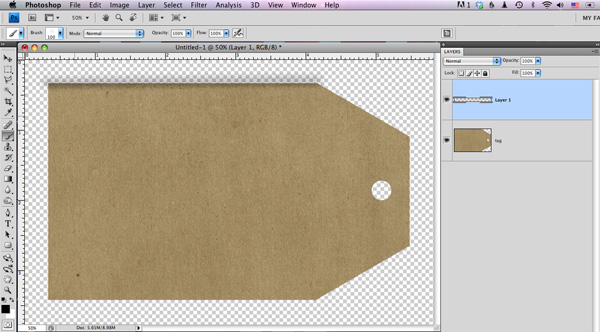
Step 5: Go around the element twice to establish a “base”. Clip the ink layer to the element. It will be easier to see your results.
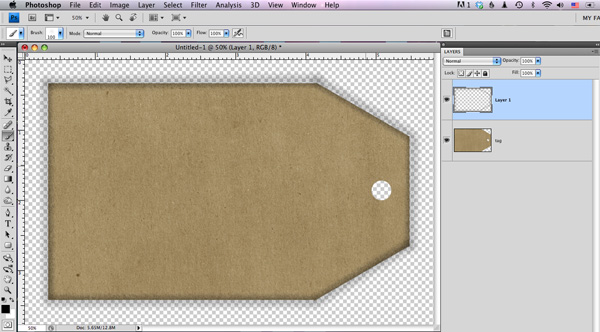
Step 6: This is where you get to be creative. Change the size of the brush. Brush it up here and there. In this screenshot I’m getting started on the left edge.
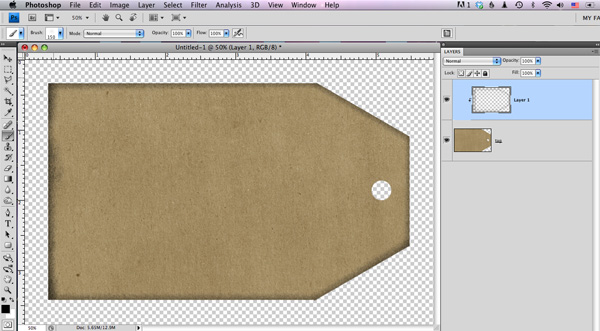
Step 7: Keep going until all edges are tweaked. Go a little thicker on the corners.

Step 8: Not really a step…change the color of the inked layer…adjust the blending mode…try a light color & screen to simulate sanding the edges.
Enjoy!


 Hi! I'm Chelle: a 40 something mom of 7. My husband & I live in a rural community in the rocky mountains with our 4 children still at home. In the winters we enjoy sledding & snuggling by the fire. I the cool fall evenings we love relaxing around the campfire & meeting friends at the county fair. Admiring the stars


Pingback: CraftCrave | DigiFree | CraftCrave