I LOVE photobooks. I love how easy they are to look through. I love how compact they are compared to my drop-in pocket page albums and my strap-hinge bound albums. I’ve been printing photobooks for more than 10 years with at least 6 companies. I own over 100 photobooks, several are multiple copies of the same book.
I was recently contacted about doing a photobook review. Since I’d already created several books with both of these companies, I was happy to agree to share my findings.
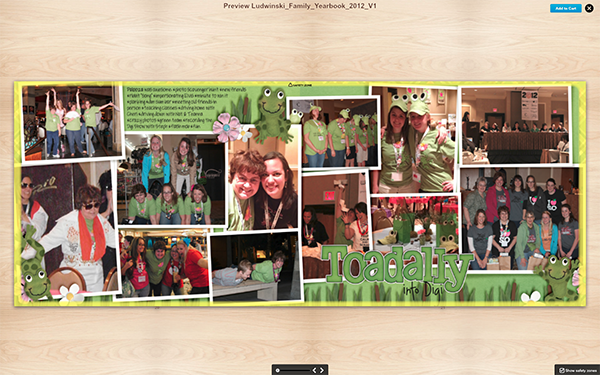
Prior to this review, I usually printed my annual yearbooks with Picaboo. The primary reason is that they had the highest maximum pages allowed. Every year I have to limit the layouts I include because of that maximum page number, so it is a big deal to me. However, this past year I decided to try the seamless lay-flat photobook printing 2 Volumes per year instead.
Prior to this review, I usually printed all of my other photobooks (vacation & design portfolios) with Adoramapix. In the past albums were limited to specific page quantities, however recently they changed and the # of pages is flexible. Adoramapix photobooks are all seamless lay-flat and they are gorgeous.
So in February I determined to order the same album with Picaboo & Adorampix to compare them. Here are my experiences:
Uploading and Ordering the books.
In both cases uploading is fairly straight forward. I create all of my layouts as double page spreads (even if they are separate layouts) and save them as flattened .jpgs. I name them 2012_pg_01_02.jpg, 2012_pg_33_34.jpg, etc to make creating the book simple. (This means when they are in alphabetical order, they are also in numerical order, which makes creating the book simple as I’ll show below.)
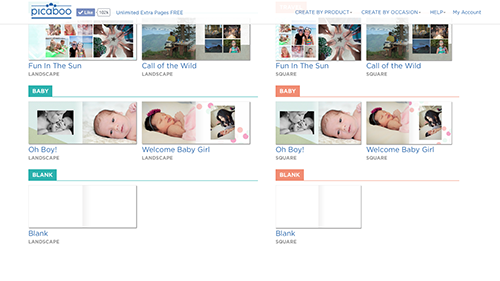
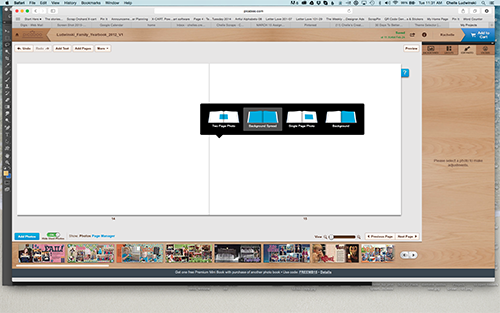
Step 1: Choose the type of book you want to create: (from Picaboo – choose the bottom blank one)
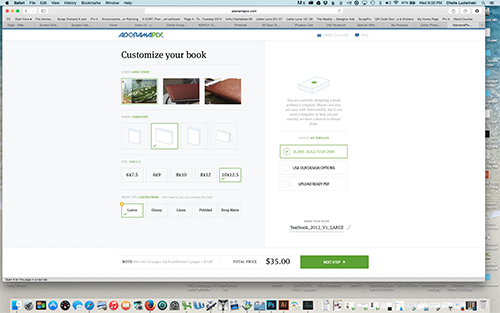
From Adoramapix, choose shape, size, cover, and BLANK
Step 2: Upload the layouts: (from Adoramapix, browse or drag & drop. Get them from your computer or several other sources on the left)
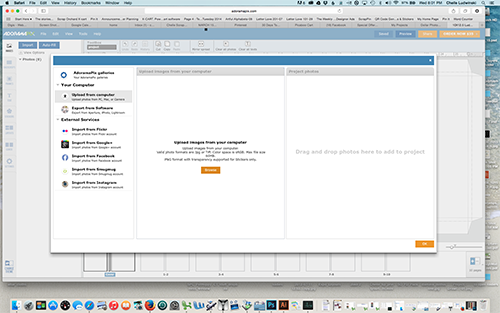
I usually do this in stages. Depending on my internet speed, I may upload in batches of 10 layouts or 25 layouts. Then I get busy working on something else while it uploads.
Once the layouts are all uploaded, the procedure is slightly different for each company.
Album Cover. I almost always choose a photo cover and I design those in photoshop as well. And therein lies the problem.
Adoramapix provides .psd templates for their photobook covers with bleed and wrap lines well marked. They are the “old” templates based on the specific number of pages in the book, but you can choose the one closest to the number of pages you will have and it will work quite well. You can find them here: http://forums.adoramapix.com/entries/21499630-Where-do-I-get-book-sizes-for-Photoshop-
Picaboo provides no templates or directions. For 2011 (prior to this review) I took a screenshot of the cover page of the book creation page (where I could see the guidelines) enlarged it and used it as a general guide. I created a cover, uploaded it, and checked for placement. Then made adjustments to my PSD, flattened and saved, uploaded and checked again. It took about 3 tries to get everything lined up correctly. The final result was not perfectly centered when printed. For this review, I just used the cover I created for the Adoramapix book.
As you can see, the album cover design I chose was not particular near the edges of the cover. Neither album ended up with the design perfectly centered. This matches my past experience, however, I am able to make a much more accurate approximation with the Adoramapix templates & book creation guidelines.
Title Page. Picaboo requires a cover page. Adoramapix does not have cover pages unless you specifically leave the first side of a page blank. I repeated the front side of my cover for the title page in the Picaboo book.
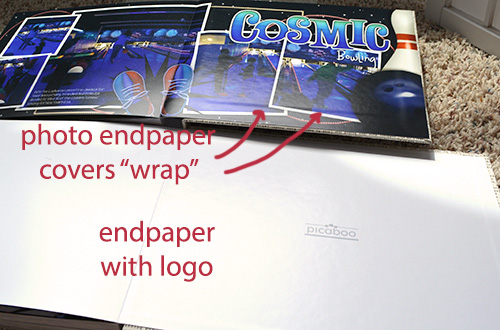
Picaboo requires end pages (blank page on the inside of the cover front facing the title page, and a blank page facing a Picaboo logo on the inside of the cover back.) Adoramapix allows the user to choose blank endpages or have the inside of the cover be the first page in the album. I always choose the later. This means the outside layout is a little bumpy where that photo covers the “wrap” of the cover. This is primarily noticeable when you hold it up to the light just so.
Regular pages
PICABOO
The layouts will appear along the bottom of the book creation page. They will be in alphabetical order. If you turn on “HIDE USED PHOTOS”, the photos will “vanish” as you add them to the album and the next ones will always be at the beginning. This makes creating long albums very speedy.
Drag the layout onto the “book”
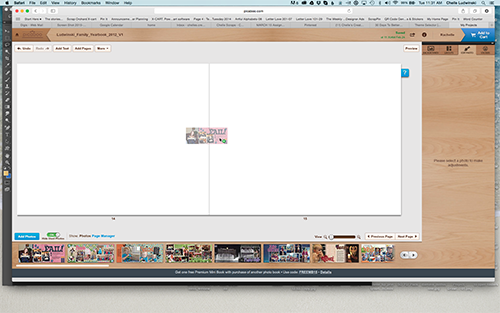
click on Background spread…
Wait just a moment for it to “load” then Click on “next page”
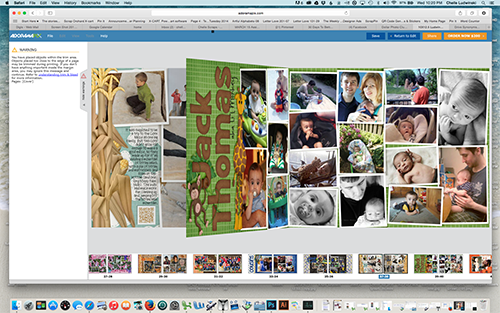
ADORAMAPIX
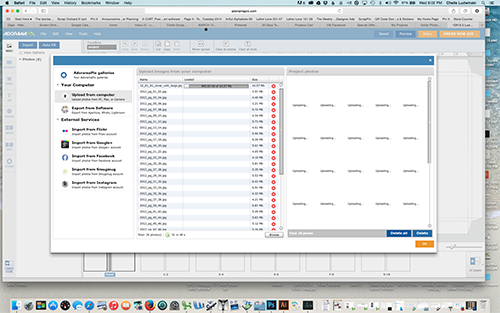
The layouts will appear along the left side of the book creation page. You can sort to a specific order, I prefer alphabetical. These are the settings I prefer:
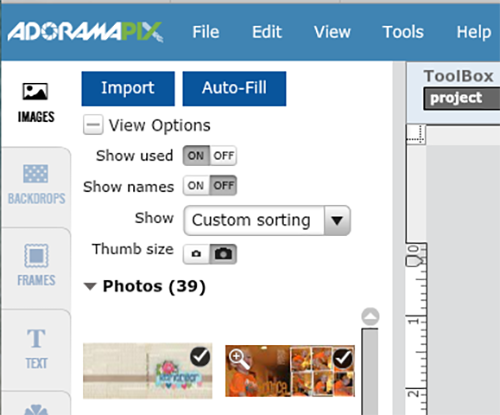
- Show used OFF
- Show names ON (actually sometimes I turn this one off as well)
- Thumb size LARGE
Drag the layout onto the “book”. From the menu at the top, click Fit/Fill and drop down to “Fill the Spread”
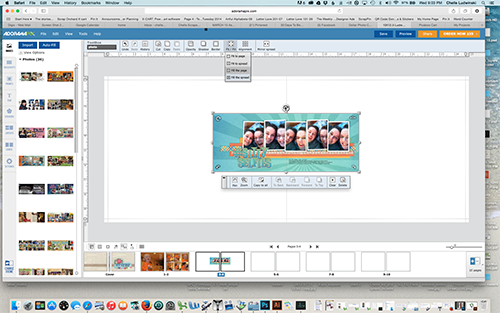
Note: If you were uploading the sides independently, you would drag them on and choose “Fill the Page”
As you can see, on each page Adoramapix has a bleed or crop zone identified. This area of each layout MAY be cropped, but also may not. The lines appears “on top” of layouts you upload so you can verify that you do not have critical information in the crop zone as you are creating the book. (Picaboo does not have guides at this stage of book creation.)
That’s it. Repeat those steps for each layout in the album.
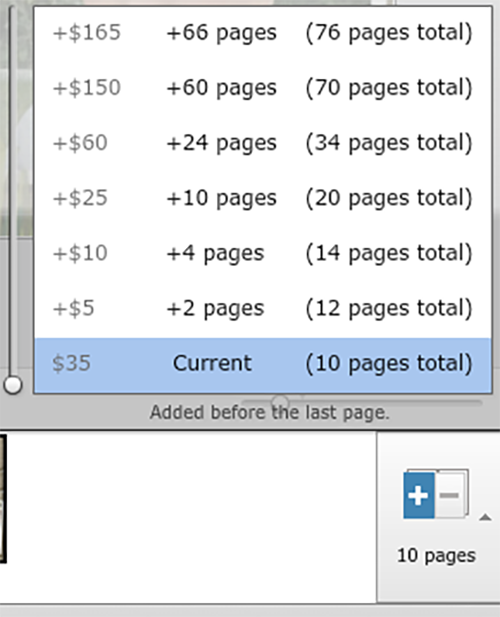
Each book includes 20 pages. To add additional pages…
With Picaboo:
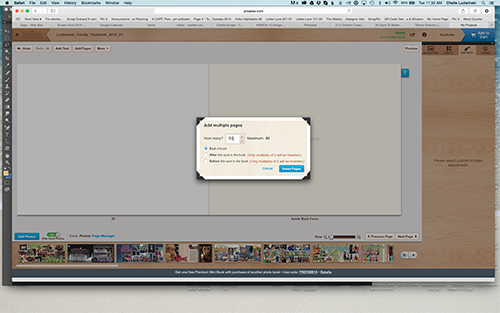
With Adoramapix: (common additional page amounts are shown, but you can choose any even amount.)
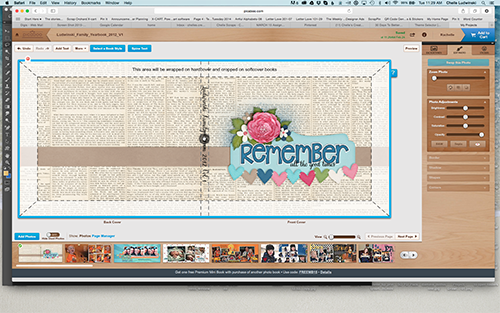
Once the book has been created, it can be PREVIEWED before an order is placed.
Picaboo’s previews show one spread at a time with a bright yellow “safety zone” over the edges of the photos. This zone is not particularly accurate. For example, it shows an area approximately .375 inches in the “gutter” of this spread, when in fact nothing was cropped from that side. I’ll share more examples in later in the review. Previews are shown in low resolution, but you can click to view the higher resolution (and wait for it to load).
Adoramapix preview is similar to looking at the actual book. When you click on a corner of the page, the page appears to “turn”. Thumbnails of the page spreads are visible along the bottom of the preview. The warning in the upper left-hand corner indicates that I have items in the trim area because my layouts “fill” the spread instead of “fit” to the spread. Fit to spread may result in thin white lines on the borders of you pages.
PRICING: For a number of years I knew that Adoramapix book prices were expensive (in comparison to a non-layflat book from a budget printer such as Artscow). But I believed it fit with the adage “you get what you pay for”. I was shocked to compare the actual prices for lay-flat books. Before coupons, discounts, etc:
Adoramapix: $131.60
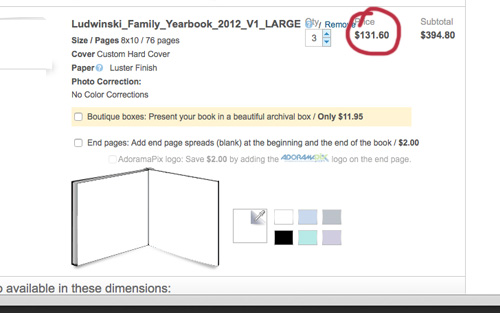
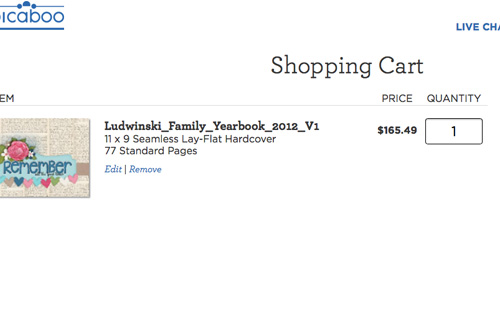
Picaboo $165.49
And for the record, Shutterfly is approximately $178.09 for the same cover/number of pages.
However, coupons and discounts can and do affect those prices. When I completed my purchase of my 2011 albums from Picaboo on December 7th 2014, I was offered a deal to purchase discount “vouchers”. It was a great deal, similar to this one:
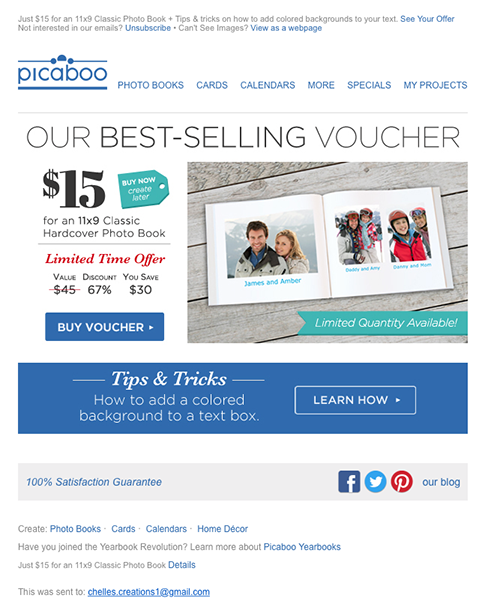
So I purchased enough to completely pay to print my 2012 albums in the spring of 2015.
Note: I’d purchased similar vouchers in the spring of 2014. I’d planned to use them when I finished my 2011 yearbook (and I print 4 copies of both volumes), so I carefully read the fine print. Multiple vouchers could be used and if I missed the deadline, the original cash value would never expire. I missed the deadline. I was confused about the date. However, Picaboo was having a different deal in December so I used my “original cash value” on the sale prices. This positive experience influenced my decision to purchase the vouchers again.
HOWEVER, when I went to place my order on the last day before the deadline in Feburary, the terms had changed. Only one voucher allowed per order. This meant that the $200 I’d spent could not be used to pay for my entire order, but instead on 8 different books…until after the deadline expired at which time they would return to their original cash value. Fortunately for me that deadline was the following morning. I contacted customer service and they confirmed that sometime in 2014 the terms had changed and I had not noticed the fine print. However, they also informed me that my coupons would not revert back to their “original cash value” for at least a week or more. Three days later after several phone calls, speaking to a supervisor, insisting they honor their 100% satisfaction guaranteed, etc they re-issued my “original cash value” vouchers and I was able to purchase the 2 volumes for this review AT FULL PRICE.
Because those voucher prices imply that the actual cost of a book with Picaboo is substantially lower, I felt it necessary to add this part of my experience to the review.
I used a %off coupon on my Adoramapix book. I have also used Groupon discounts on printing Adoramapix books. I typically pay the difference for additional pages I add to the books.
I purchased my Adoramapix books 1 day later than the Picaboo books. They arrived 1 day before the Picaboo books. Both books arrived within 1 week of ordering.
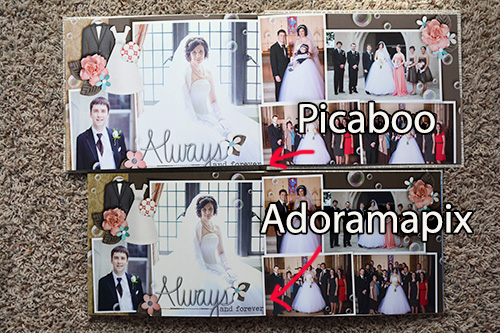
There was a HUGE difference between the two books.
Cover:
Note: it was difficult to capture the cover differences in a photograph. I took photos of my other Picaboo books and photos in the light to show the differences.

The cover of the Picaboo album is dull and slightly gray. It looks like it has a thin plastic film covering it. (it does not…at least not one that is removable.) The surface feels dull…almost slightly dirty. There is resistance as you rub your hand across the surface. The interior pages of the Picabook album are at least ¼ inch smaller than the cover on all 3 sides.
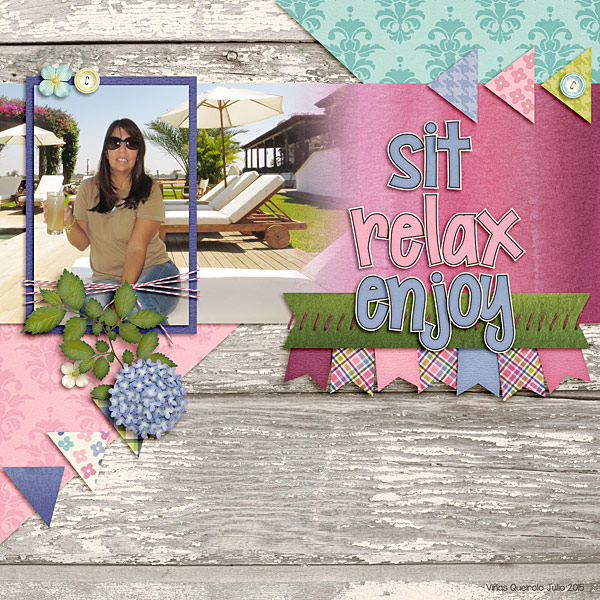
The cover of the Adoramapix album is saturated and shiny. It has a very slightly pebbly finish like a photograph. It is smooth to the touch.
The interior pages of the Adoramapix book are very close to the size of the cover.
Paper:
The Picabook paper appears to be a heavy cardstock with a glossy magazine-like surface. I could not find specific information about the actual paper on their website.
The Adoramapix paper is actual photo paper and it looks like it.
Both books are nearly the same thickness, both in the cover and in the overall thickness of the photobook.
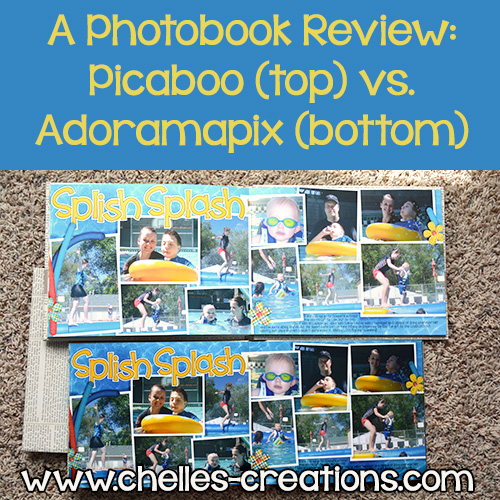
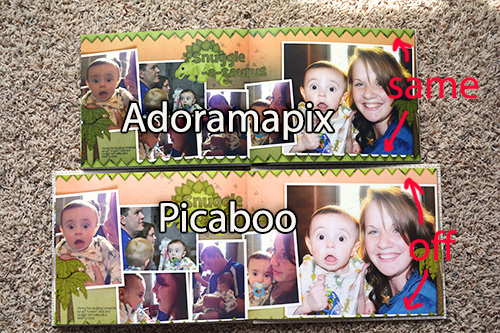
Images on the inside pages:
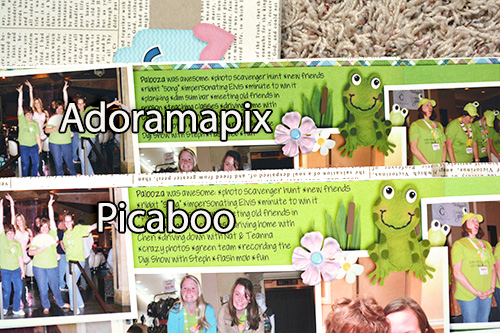
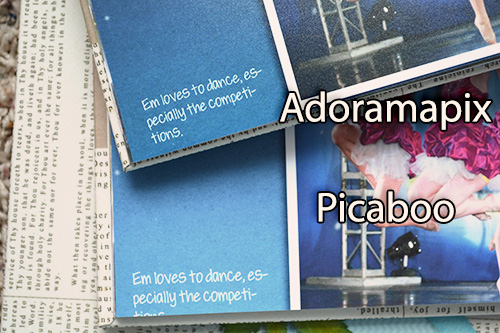
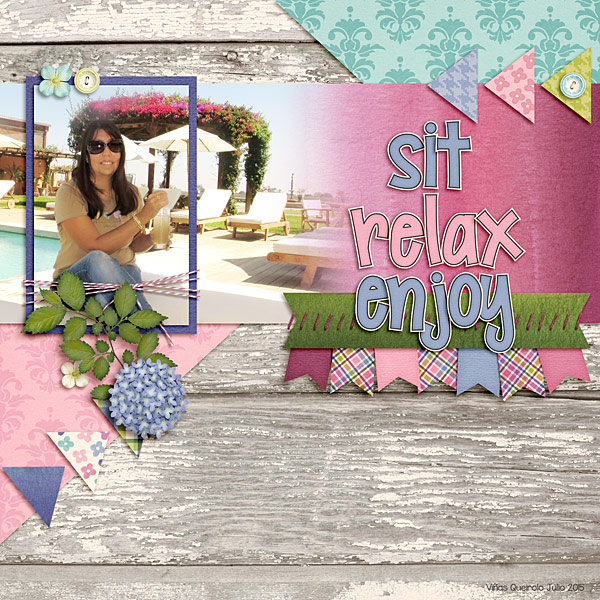
The Picaboo images are much lighter, almost washed out in comparison to the Adoramapix images.
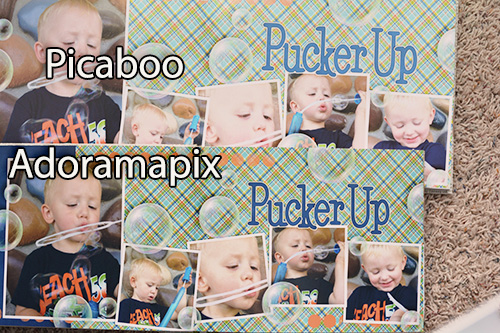
On some pages there is almost a light blue, washed out cast to the images.
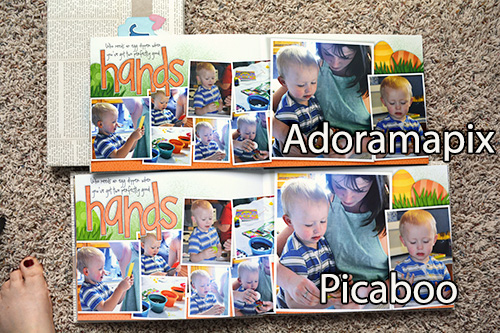
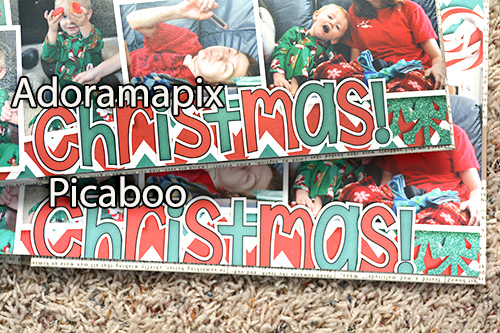
Note: The adoramapix images match photos I have printed professionally. However, printed images are typically slightly darker than they appear on a back-lit screen. This is universal and a common difference between printed photos and photos viewed on a bright screen. You can adjust for this difference if you use a monitor calibration device such as a Spyder.
Trim:
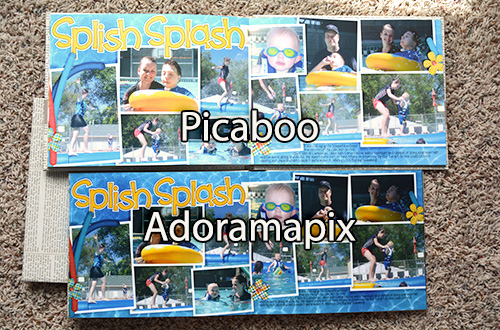
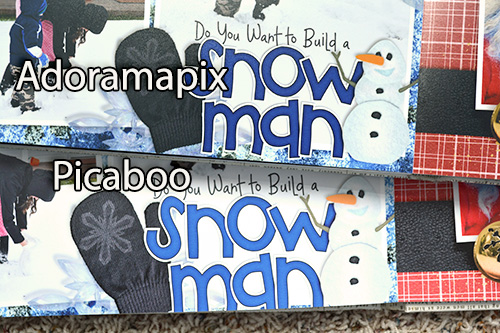
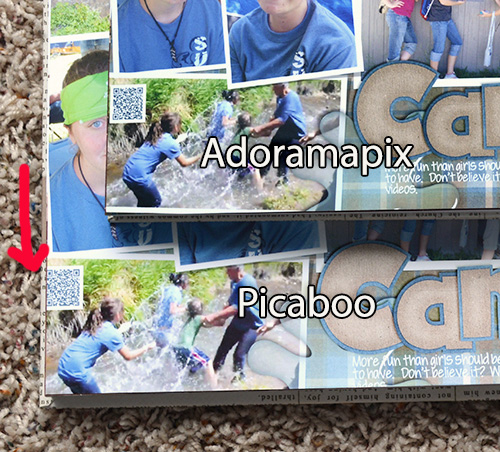
I was most disappointed with the trim/bleed/safetyzone in the Picaboo album. Some of the pages I uploaded had items in the bleed area that were cut off in the Picaboo book, but not cut off in the Adoramapix book: (note the stripe of plaid paper on the very top of the layout)
Since they were in the yellow “safety zone” I was aware they might be trimmed.
However, even if I did not have the Adoramapix album for comparison, I would still be disappointed. There is a section of Volume 1 in the second half of the book where the bleed is very off centered. This page is a good example. The peaked trim was visible in my original layout evenly on the top and bottom of the page, however, in the Picaboo book, it is mostly visible on the top, and mostly Invisible on the bottom.
This is true of several pages in this section of the book. MUCH more is cropped from the bottom of the pages…MORE than what was in covered in yellow in the book preview. Nearly 3/4 inch is cropped off. In many cases this cropped some of the text. I allow 1/2 inch on all edges for text and important “stuff”. With Picaboo, that was not enough.
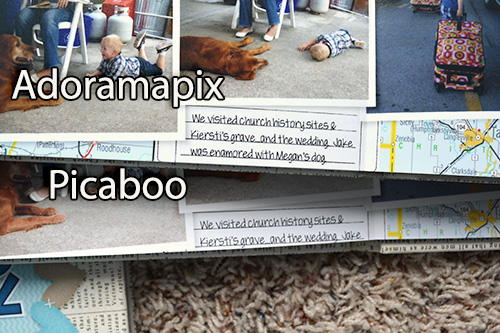
In fact, on 2 pages the edges of my QR codes were chopped off.
In my opinion:
I was pleasantly surprised at my results. I expected the Adoramapix albums to be outstanding and they were. I’ve always justified spending what I believed to be “more” for the higher quality albums. In doing this review I learned that I am NOT spending “more”. Adoramapix albums are in line with other companies seamless layflat books, yet the quality is OUTSTANDING in comparison. I don’t want washed out photos. I don’t want off-centered photos. I don’t want important items to be chopped off…and I don’t want to leave everything in the center of the page so it isn’t chopped off. I like the ease of having a .psd template to create my cover. And I like being able to choose to have endpapers or leave off the logo.
My original plan was to continue to do reviews comparing other book companies. However, it is unlikely I will do another review because it is unlikely I will print with any other company. Competitive pricing and OUTSTANDING quality means I will be printing EVERYTHING with Adoramapix from here on out.
AND, I have great news. Adoramapix agreed to allow me to share a coupon code with you: pxchelle88
25% off printing through June 30th 11:59 pm EST!
This is a GREAT opportunity for you to give them a try. Pick a handful of your favorite layouts and print up a book for Dad…or Grandpa. You will LOVE the results.


 Hi! I'm Chelle: a 40 something mom of 7. My husband & I live in a rural community in the rocky mountains with our 4 children still at home. In the winters we enjoy sledding & snuggling by the fire. I the cool fall evenings we love relaxing around the campfire & meeting friends at the county fair. Admiring the stars


