Hey friends, Friday got away from me, so we are having a 1-time only Saturday Freebie. Carol made this digital scrapbooking amazingly layered cluster for you to use.
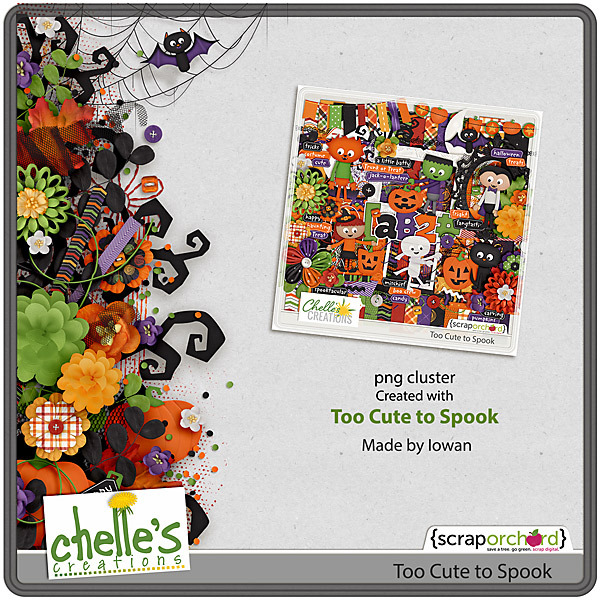
Here’s the Full Too Cute To Spook Bundle.
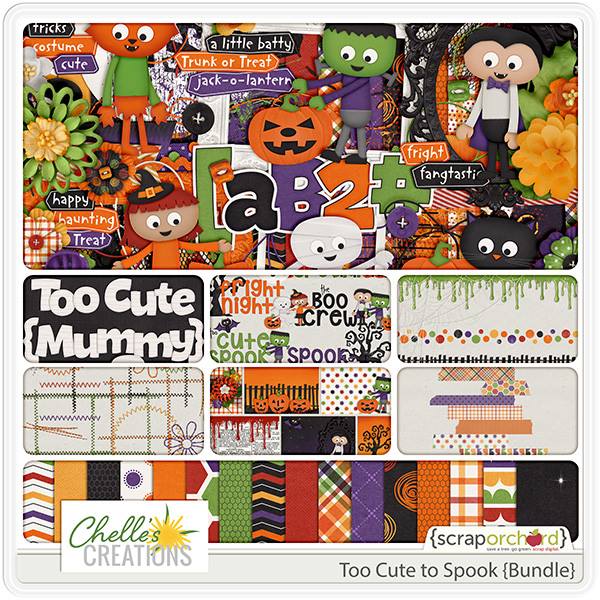
Enjoy!


Hey friends, Friday got away from me, so we are having a 1-time only Saturday Freebie. Carol made this digital scrapbooking amazingly layered cluster for you to use.
Here’s the Full Too Cute To Spook Bundle.
Enjoy!
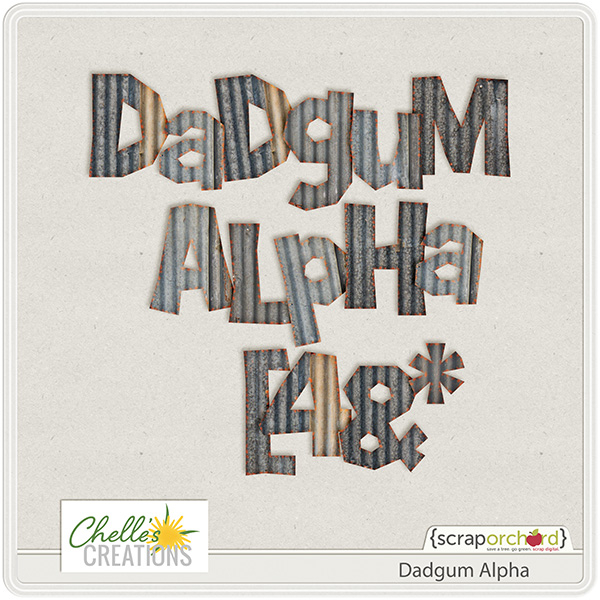
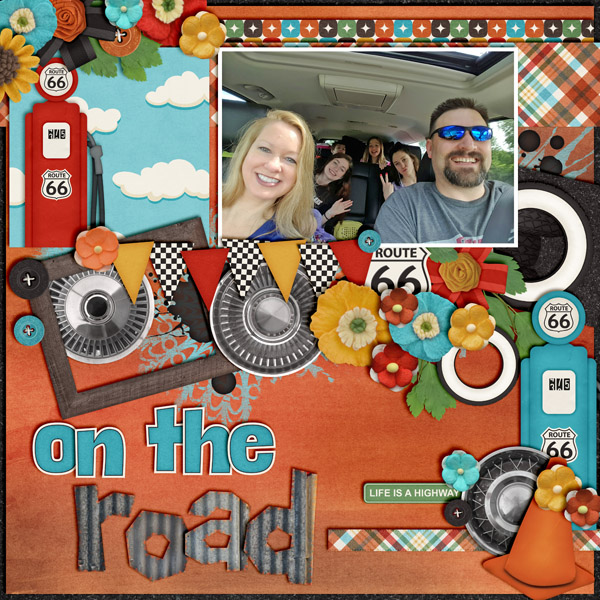
Hello Friends! This week Chelle released a new digital scrapbooking alpha, Dadgum, that coordinates with her Route 66 Collection. Traffic, racing, car repairs, road trips, or that movie-come-to-life amusement park, this alpha is perfect for your automotive pleasure.
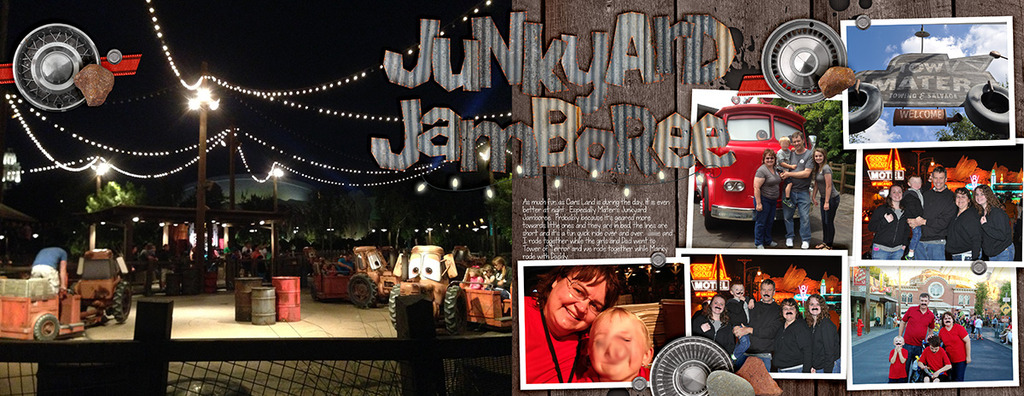
Check out this new layout Chelle made at our monthly Scrap Twister Chat.
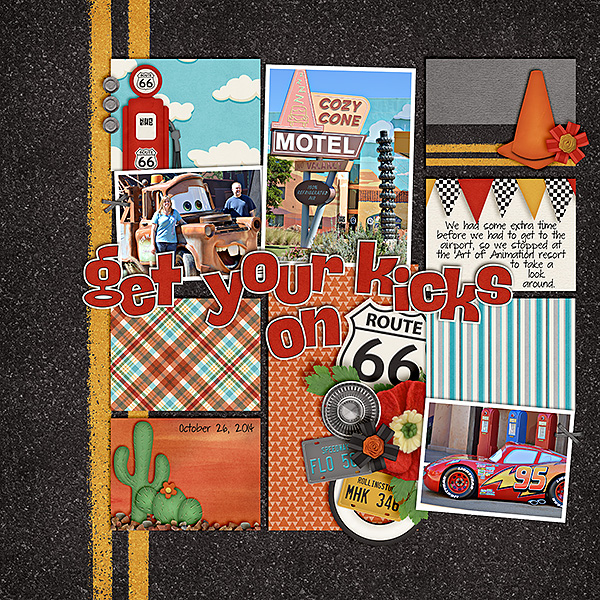
Here’s a couple of layouts using Route 66 that I didn’t include in last week’s Week In Review posts. The layouts are by Jenn & Karen
Have a great week!

Hello Friends! I was looking over some of Chelle’s Digital Scrapbooking Tutorials and came across this information about shooting photos in the RAW mode on your camera. I wanted to re-post it to all of our new newsletter subscribers.
Photo Fix Tip: SHOOT IN RAW!
The other day I was browsing my pictures from a past July…nighttime shot of playing with sparklers and saw this:

I was so bummed. You could hardly see anything…and it’s not the first time I’ve messed up the exposure on my dark photos. FORTUNATELY I’ve learned from my mistakes. So when I’m shooting in low light situations (or other problematic exposure situations) I change up the settings on my camera. I “shoot in RAW mode”. This means instead of saving the photo as a JPEG, it’s saves the photo data in a different way (different camera brands have their own extension…but we’ll call it RAW). My camera will save it both ways simultaneously, & I like that mode best.
So…I opened up the same RAW photo & tweaked the numbers…mostly the EXPOSURE and got this:

Woot! So then I created this:

SO…check out your camera manual…learn how to shoot RAW (if your camera can) so the next time you are in the dark & your exposure is off, you can save the photos!
ps. Why don’t I ALWAYS shoot in RAW? Well…
#1. My last camera could either shoot raw OR jpeg (not both), and I could only view the photos if I brought them into the Adobe converter…a LOT of work just to look at my photos. But now my operating system can preview both jpgs & raw files, so that’s not so much a reason anymore…
#2. RAW files are relatively HUGE compared to jpegs. In the picture above, the jpg is 3MB and the raw is 8MB, so when saving both, I was filling up my SD card VERY fast. Um…I upgraded my SD card (the old one was 5 years old…and it was big back then…) so now that’s not so much of a reason anymore either….
Guess I should switch back to RAW+JPEG again. 
Our CT Member Jenn J. Tried using the RAW mode with her camera. She used Fleur de Violette.
Now look at how the picture started out.
After the Fix.
Amazing! Try it out if you camera has a RAW mode. It might turn out to be your favorite new way to shoot photos.
Enjoy!


Hello Friends!
Recently I was browsing on Chelle’s Blog. I came across a tutorial I had never seen before. I’m always up for sharing ideas. So here is a re-post of “Inked Edges,” in this case tags. With Christmas around the corner, I know all of my digi friends could have a blast with digital scrapbooking tags for presents. Paint splats, glitter, things like that. Think of the mess you won’t have to clean up!
Perhaps the best thing about digitally “inking edges” is that my fingers are clean. Or maybe it’s that I don’t need several colors of ink pads. Either way, here are some step by step instructions for simulating inked edges.
Step 1: Begin with an element that you wish to “ink”. Create a blank layer above the element. This is the layer that will have the “ink” so it can be “clipped” to the shape.

Step 2: Use a texturizing brush. I chose number 23 and lowered the size to about 100.

Step 3: Make some adjustments to the brush–these adjustments work in the full version of photoshop. Some adjustments can be made in Elements. Lower the spacing adjustment to about 15%. Raise the angle jitter to aover 50%. The actually numbers are not critical–differences will result in unique “ink”.

Step 4: Brush along the edges of the element. I click on the corner, then move to the next corner, hold down shift and click again. You CAN create a path and stroke the path, but I believe the uniqueness that results from doing it “by hand” adds to the realism. Especially on circles. Inking with a square/flat inkpad on a circle does NOT turn out smooth or even.

Step 5: Go around the element twice to establish a “base”. Clip the ink layer to the element. It will be easier to see your results.

Step 6: This is where you get to be creative. Change the size of the brush. Brush it up here and there. In this screenshot I’m getting started on the left edge.

Step 7: Keep going until all edges are tweaked. Go a little thicker on the corners.

Step 8: Not really a step…change the color of the inked layer…adjust the blending mode…try a light color & screen to simulate sanding the edges.
Enjoy!

Today we’re taking a look at a classic Chelle’s Creation kit called Midnight Crow. It’s got the cutest fall color scheme and elements of any kit on the market. Those crows are adorable! Take a look at what Chelle’s creative team has come up with for us.
First, Jenny had the terrific idea of using a vertical layout for all her goodies on the page. I love the thought of “fall” falling down the page, and this kit is perfect for her pumpkin patch photo. 
Next, Kayla shared a page with us that is a large photo of her daughter in a pumpkin patch. Take a really close look at it – Chelle’s elements are so life-like I found it difficult to pick out what was in the photo and what was an element Kayla added to the page. 
Finally, Jenn gave us this bright and cheerful fall page. I love the yellow background that brings out the bright and sunny fall day featured in her photos. And look at that crow peaking out up top. Isn’t he the best? 
If this kit has escaped your attention until now, you can find it in the market by clicking the images below. 


Hello Friends! How do you include grandparents in your digital scrapbooking? I was watching a local tv show here in Utah, Studio 5. They talked about ways to include Grandma & Grandpa in digi. Here are some of their ideas. I know all your creative ladies can adapt these ideas into a digi layout ideas. These ideas came from Blogger Nina Lewis, a.k.a. Digigram.
When your grandchildren live fairly close to you, it’s easy to build a relationship with them. However, it’s much harder when they live over-the-river-and-through-the woods. (Read that to mean a long, long, long ways away.) Here are three ideas of things that you can do to connect with those grandkiddos that makes building a relationship a breeze – and loads of fun.
“Face-to-Face” Relationships * Taking pictures off Skype or Facetime and digi scrap them.
Video chats (such as Skype or Facetime) are a boon to grandparents. They allow us to actually see our grandchildren while we talk to them. But, don’t spend all of your time just talking. Use video chats to actually play with them.
Fun with Photos
Typically, when grandma gets a photo of a family member, she sticks it on the fridge. While that is fine and dandy, do something different. Have fun with them! Doing wild and wacky things with photos is a perfect way to entice your kids and grandkids to send you a plethora of photos!


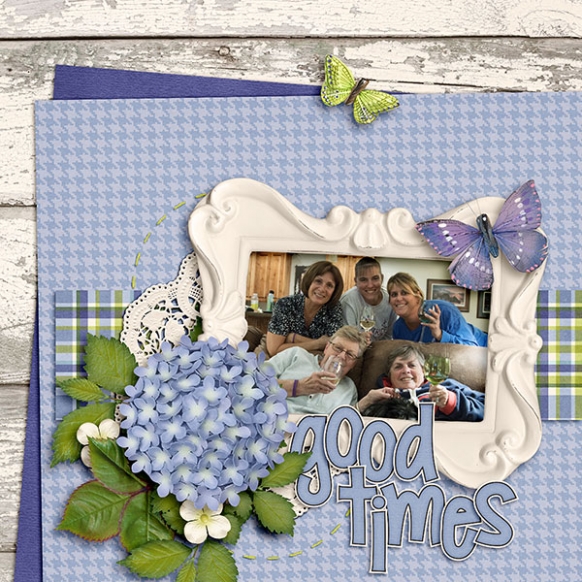
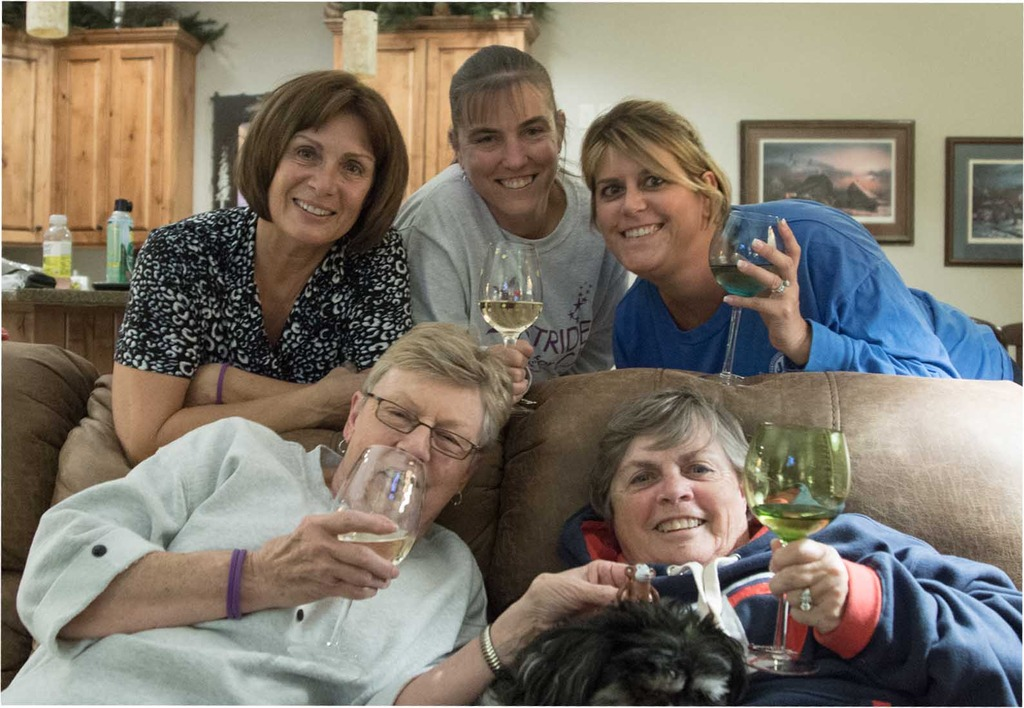
Here’s a layout idea from our CT, Lisa. She said, “One thing I love to do for our family members is scrap pages about our visits together. Sometimes family members shy away from the camera when it comes out but they ALWAYS love the gift of the pictures when they’ve been turned into something beautiful to always treasure. Photo books and calendars are favorites in my family!”
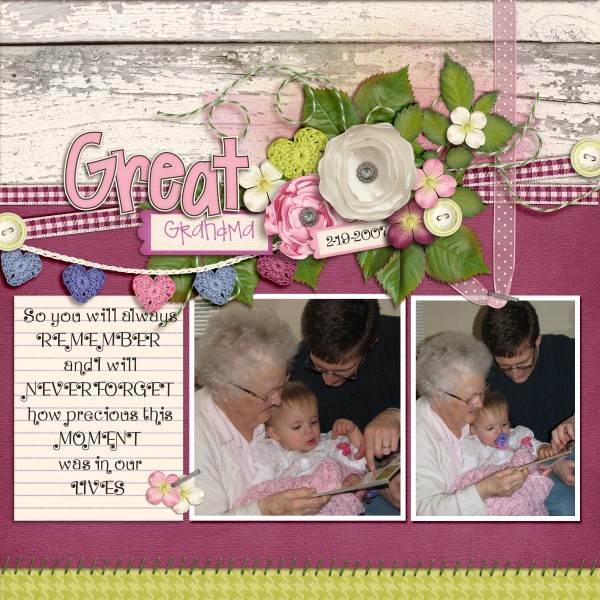
She used Fleur de Violette for her layout.
Enjoy!

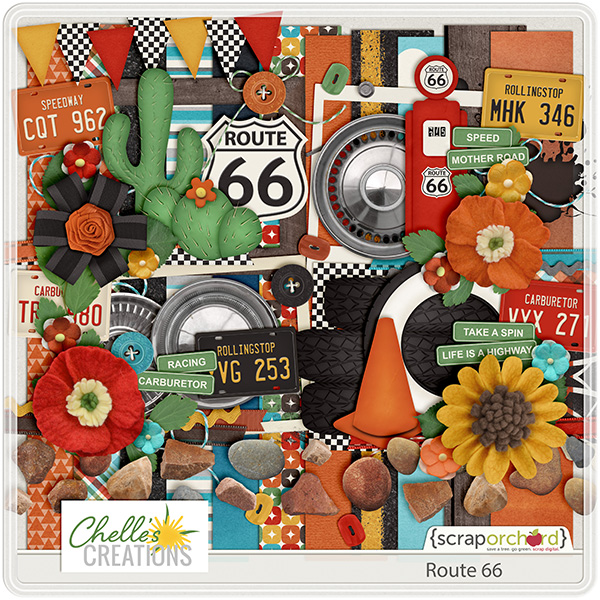
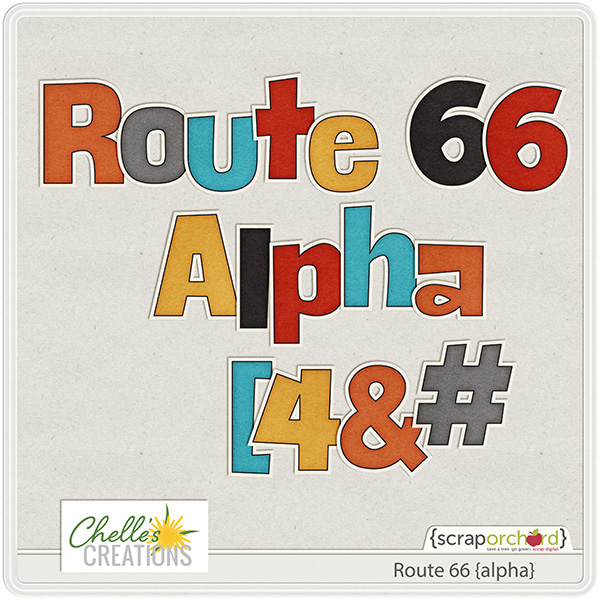
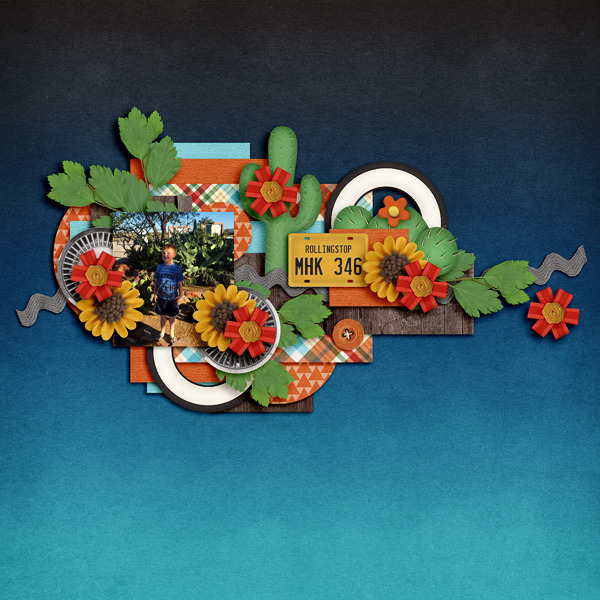
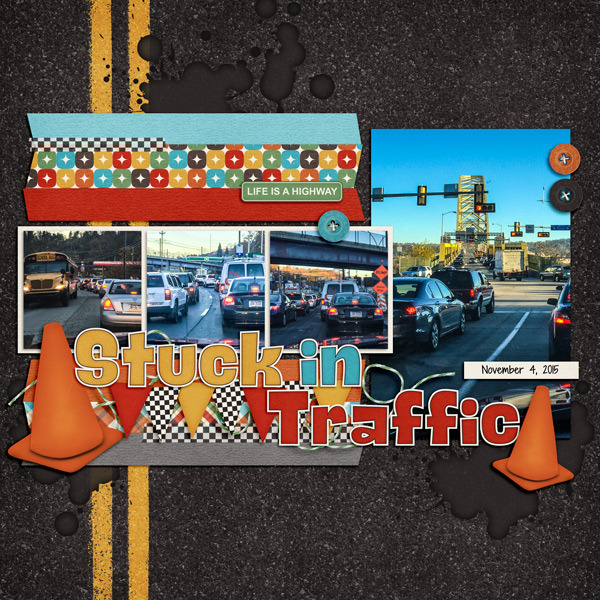
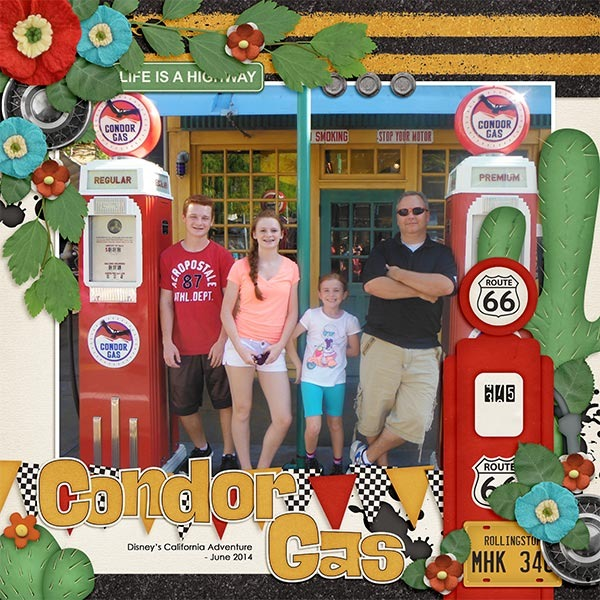
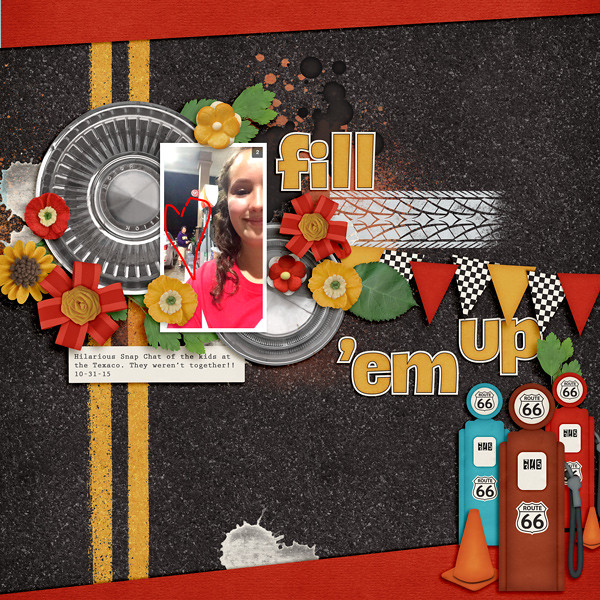
Hello Friends! I hope your having a great day in the Scrap Orchard Forum playing games and doing challenges as part of Digital Scrapbooking Day. Chelle released a new kit this week called Route 66. I’ve had the song running through my brain all week. “Get your kicks on Route 66.” Buy the kit and get the Route 66 Alphas for FREE. So rev your engine while I show you the goodies.
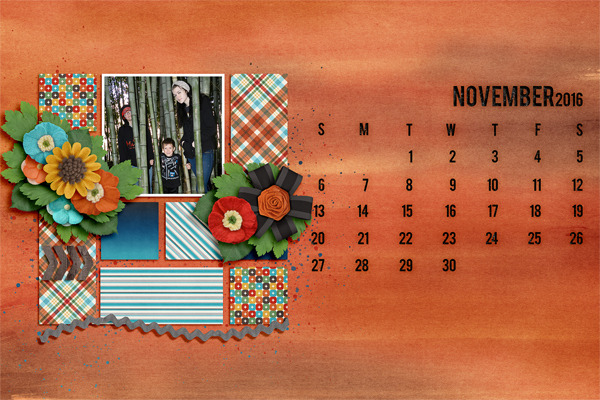
Here are some layouts from our team you can use for inspiration. Christine has been working on her 2016 calendar.
This layout is by Jenn J.
This is by Jenny.
Here’s Donna’s layout.
This is by Kayla.
Jan made this layout.
Love this layout by Carol.
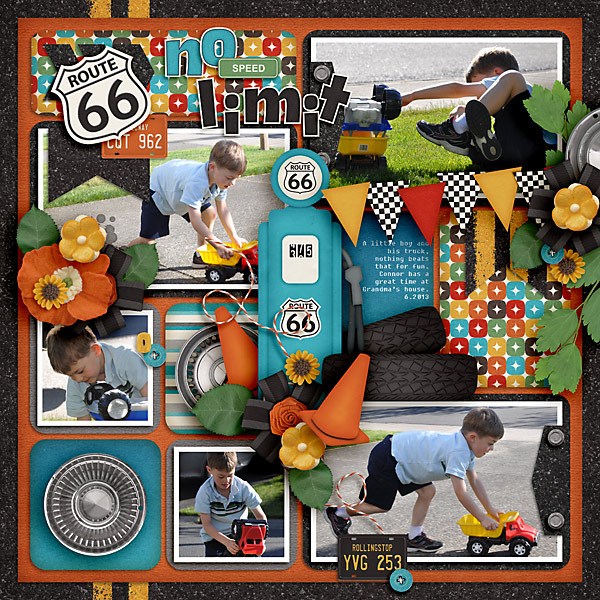
Karen
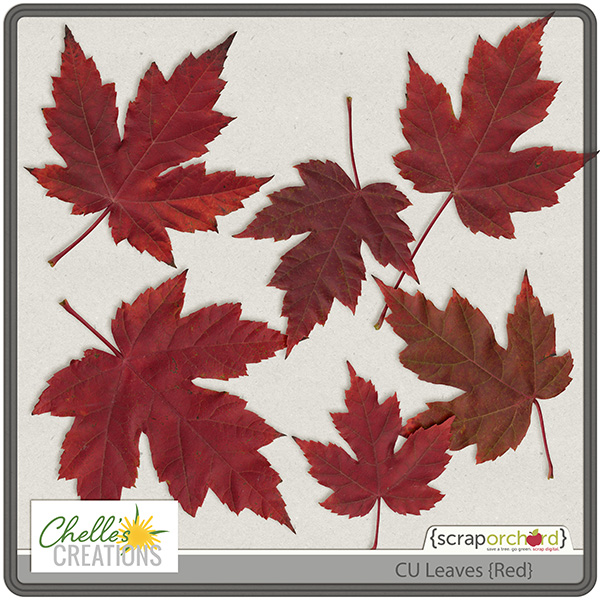
For our CU friends, Chelle released CU Leaves {Red} this week. I adore them. They make me think of poinsettia flowers or Christmas weddings.
Enjoy!

P.S. Remember Chelle has a 35% off sale over in her store. Sang those items on your wish list while they are discounted!

Hey Scrappers,
I’ve had several questions about Digital Scrapbook day, so I’ll share a bit of the history. Twenty years ago Creative Memories petitioned President Bill Clinton to declare the first Saturday in May as National Scrapbook Day, which he did. Since that time, the first Saturday in May has been known as National Scrapbook Day. And it’s official in the US. But we aren’t all from the US, so digi scrappers did two things about it. #1, the first Saturday in May is commonly known as interNational Scrapbook day (we kinda just declared it that…it’s not official, although I’m not sure what it takes to be official. LOL! and #2. We declared our own holiday, on the “opposite” day of the year, the first Saturday in November as Digital Scrapbook Day.
Buy hey. All that really matters is that we have a GREAT sale and tons of fun activities! First up, the sale:

What is that FREE KIT? Well, here’s a peek:

With all the goodies available for you to acquire, you can earn a FREE Mega and Add-on called, I like BIG books and I cannot lie.
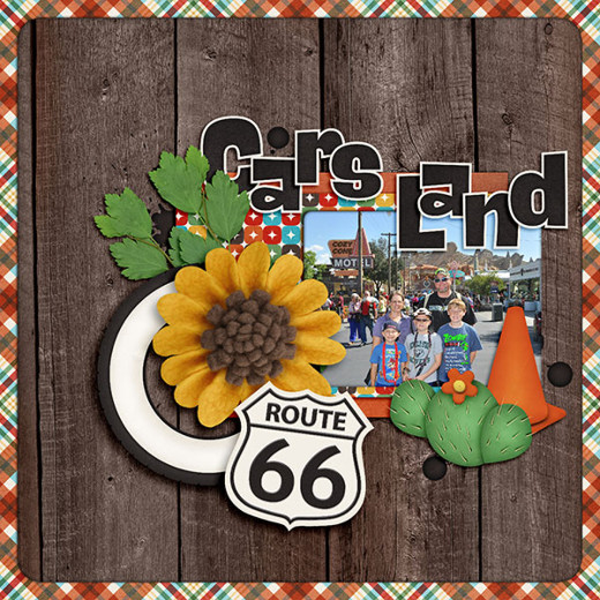
Can you believe it’s been 18 months since my daughter left on her mission? It has. And in less than 2 weeks she’ll be coming home. This is one of the photos she sent from her mission: (she’s actually spent a big chunk of her time along Route 66)

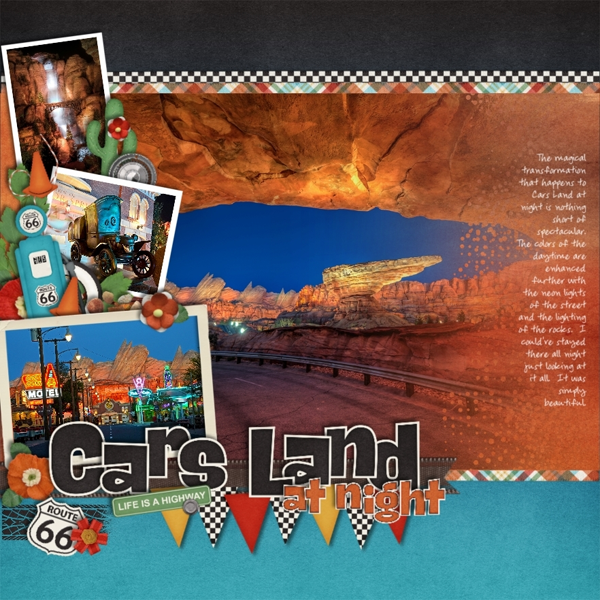
My favorite part of Disneyland isn’t Disneyland at all. It’s across the way at Cars Land. I LOVE spending time there. Especially in the evening at dusk when it’s time for the neon to turn on. Just like in the movie, they play “Life Would be a Dream…” and the neon turns on one building at a time. We love to grab some dinner and enjoy that special moment. (yes, we like to be silly)

Between those two memories, I needed a Route 66 kit. I’ve learned a TON about Route 66 while doing research for this collection. If I had a convertible, we’d be headed on a road trip very soon. In the meantime I’ll just have to settle for listening to my CARS soundtrack…”there’s a big blue sky waiting right behind the clouds…”4
I have a great NEW kit and alpha called Route 66.

This alpha is FREE when you purchase the kit.

Now for some layouts for inspiration.

The CT found plenty of car related things to scrap. Even car trouble.  Let’s hope I don’t need the kit for THAT!!!


And now for the freebies:
In the newsletter: (New subscribers will get the latest newsletter within 24 hours of subscribing…links expire 11.10.15)

Here on the blog. (click on image to download…links expire 11.10.15)

And this one is in the Facebook fan club. (links expire 11.10.15)


OK, maybe the 673 is exaggerating, but there are definitely hundreds of reasons why I prefer digital scrapbooking to traditional. One big reason is that it’s super easy to use photos to fill the letters of a title on a scrapbooking page. Sometimes that’s a difficult thing to do on a traditional page, but digitally it’s easy peasy. Two of our CT members have made pages to show you how they used this easy eye-catcher on their pages.
First, Donna used a template by WM[squared] Designs and Chelle’s Zoo Crew {jungle} to make this awesome page. Filling the large letters with photos allowed the page to have plenty of white space and made a very pleasing design. I love that border of leaves across the top. 
Carol also made a fantastic page with this technique. She started with a template from Fiddle-Dee-Dee Designs and Chelle’s Too Cute to Spook. I’m a huge fan of having dates on pages, and this large 2015 leaves no doubt which year the photo was taken. Carol, that’s the cutest little zombie hunter I’ve ever seen! 
Inspired? I hope so. Btw, this technique is great for making the title page to a book or a calendar topper, as well.

Hi!
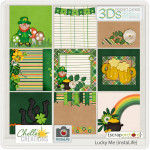
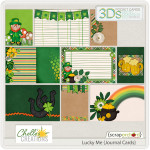
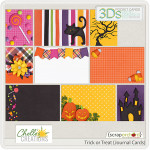
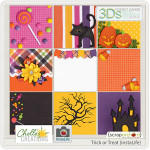
Have you ever randomly combined 2 of Chelle’s digital scrapbooking kits that aren’t matchy-matchy? You know what I mean? For example, 2 Halloween kits or Easter kits. This month I challenged our creative team to combine Lucky Me with any of the Halloween Kits. This is Carolina Scrapper’s digital scrapbooking layout.
Click on the images below for more details.
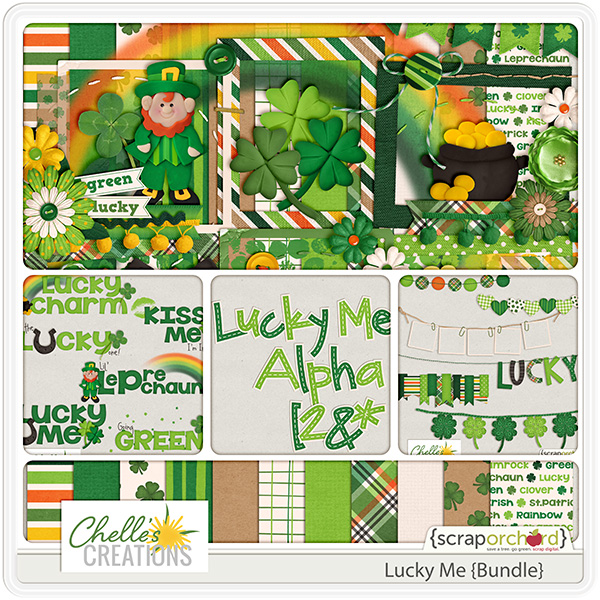
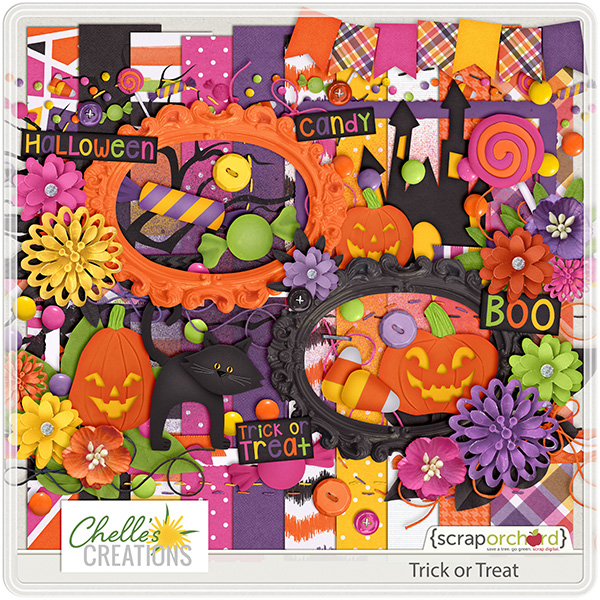
What would you create if you had this assignment? Go for it!


 You must be logged into the ScrapOrchard forum for the link to work. $14.99 per month OR $74.99 for six months = Six for the price of Five.
 Hi! I'm Chelle: a 40 something mom of 7. My husband & I live in a rural community in the rocky mountains with our 4 children still at home. In the winters we enjoy sledding & snuggling by the fire. I the cool fall evenings we love relaxing around the campfire & meeting friends at the county fair. Admiring the stars
  on a clear summer night and splashing in spring mud puddles. We love making memories together. Me? I love blueberries, fresh salmon, creating, memory keeping, & above all my family & my faith.


 Here are three ideas of things that you can do to connect with those grandkiddos that makes building a relationship a breeze - and loads of fun. "Face-to-Face" Relationships Video chats (such as Skype or Facetime) are a boon to grandparents. They allow us to actually see our grandchildren while we talk to them. But, don't spend all of your time just talking. Use video chats to actually play with them. For grandchildren that are seven years old or older, play Battleship with them. Each of you will need your own set - and then play like you would normally play. Grandsons especially enjoy playing this game. Charades is another fun game to play during a video chat. Have your grandchild act something out. You try and guess what your grandchild is doing. Once you guess correctly, then you take a turn to do something for your grandchild to guess. To make this a successful activity, make sure that you are several feet away from your web camera. If you are too close, your grandchildren won't be able to see your actions. Pictionary is another fun activity to play when you Skype with grandchildren. If your grandchildren are old enough for the commercial game, you can use the cards from that set. If your grandchildren are younger, have them simply think of something, draw it, and then hold the picture up to the web camera for you to see. As variation, use Play-Doh and make a three-dimensional object instead of drawing something with paper and pencil. You can also play other games such as Candyland, Chutes and Ladders, Twister, Boggle, Sorry, and Scattergories. Fun with Photos Typically, when grandma gets a photo of a family member, she sticks it on the fridge. While that is fine and dandy, do something different. Have fun with them! image: http://img.ksl.com/slc/2509/250945/25094587.jpg?filter=studio5/instory image: http://img.ksl.com/slc/2509/250945/25094588.jpg?filter=studio5/instory image: http://img.ksl.com/slc/2509/250945/25094589.jpg?filter=studio5/instory Big Huge Labs is a treasure trove of ways to create unique things from your photos. Here's just a smattering of fun things that you can create: · A motivational poster. · The cover of a magazine with a picture of your grandchild on it · Pop art · Photo booth pictures · Badges (ID badges) · Photos with comic-book style captions · Mosaic pictures · Personalized jigsaw puzzles · Trading cards · Movie posters · Framed pictures (frames that make your picture look like 35 mm film, a stamp, a to-do list, a Polaroid picture, or a bulletin board) · Bead art Doing wild and wacky things with photos is a perfect way to entice your kids and grandkids to send you a plethora of photos! Grandma Mail Everybody loves getting mail. When you send some to your grandchildren, jazz it up. Do something different. Be creative. Be unique! Here are a few ideas that will get your grandchildren dashing to the mailbox to check to see if there's something in there from grandma. · Write a letter and then cut it up into a puzzle. Your grandchild will have the adventure of putting a puzzle together before he gets to read you letter. · Here's a variation of the puzzle letter. Write a letter and cut it up into puzzle pieces. Divide the pieces into three groups and put in three different envelopes. Send the envelopes on three consecutive days. This builds the anticipation of getting all of the pieces and putting together the puzzle when they get all of the pieces. Be sure to let your grandchild know how many puzzle envelopes to expect. You can write on the envelope something like ‘first out of three envelopes.' · Always use a special color of envelopes for your letters (e.g. always use yellow envelopes). Also spritz your perfume on your stationary and envelope. This reinforces (through smell) which grandmother you are (the one who wears the lovely perfume). · Write a letter on several ping-pong balls. Box them up and send them off to your grandchild. · Buy clear vinyl from a fabric store. Stitch two pieces together creating several ‘pockets.' Fill the pockets with items such as stickers, pencils, notepads, glow-in-the-dark sticks, crayons, card games, coloring books, or books. · Make envelopes out of old calendar pictures, fun/pretty ads from a magazine, or scrapbook paper. · Use empty water bottles for your mailing containers. Put things in the bottle such as items to make jewelry, flavored lip balm, colored pencils or crayons, marbles, miniature toy figures (Army guys, cowboys or Indians), candy or gum, hair barrettes, puzzles (if the pieces are small enough), Legos, glow-in-the-dark sticks or bracelets. Nina Lewis (a.k.a. DigiGram) is the blogger behind Grandma Ideas. She has been blogging for 5 years and loves to use technology especially to connect with her grandchildren. She has four grandsons and three granddaughters - one granddaughter that was born exactly one week ago today. Read more at http://studio5.ksl.com/index.php?nid=54&sid=26040780#PSo6Hkr86d16PL66.99)