9.10.2015 Video Tutorial: Adding a Pattern to Accordion Flowers

If you are anything like me you love adding flowers to your scrapbooking pages. There are times though, when you are looking for a flower and can’t find one that fits what you imagined. These are the times I’m especially happy that I have added a few CU items to my stash. No I don’t design in any way, shape or form, but I love the ease of using the CU items to create the flower I had pictured when visualizing my page. With all the said, I’m here today to share with Chelle’s Creations video tutorial on how to add a pattern to accordion flowers using her CU Accordion Flowers + Action.

Now let’s take a look at the lovely flowers created by Chelle’s talented group.

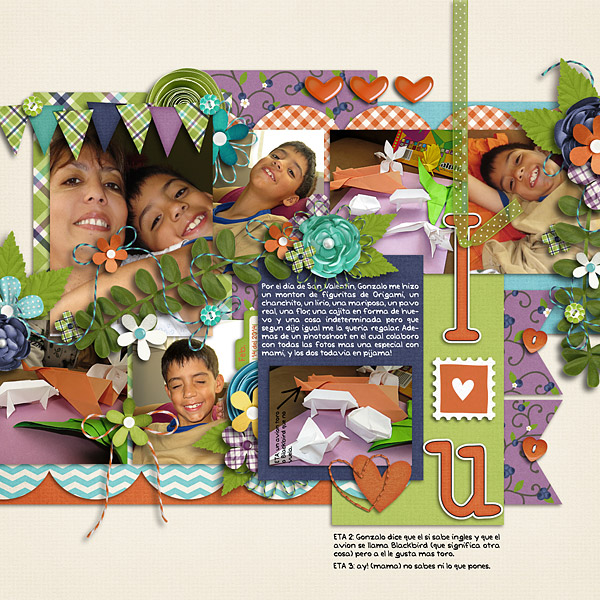
Check out how well this kit and picture go together. This page was created by Donna (djp332) using Chelle’s Creations Fabulous 50s {bundle} along with a template by Scrapping with Liz. I really like the subtle pattern Donna chose on the flower.

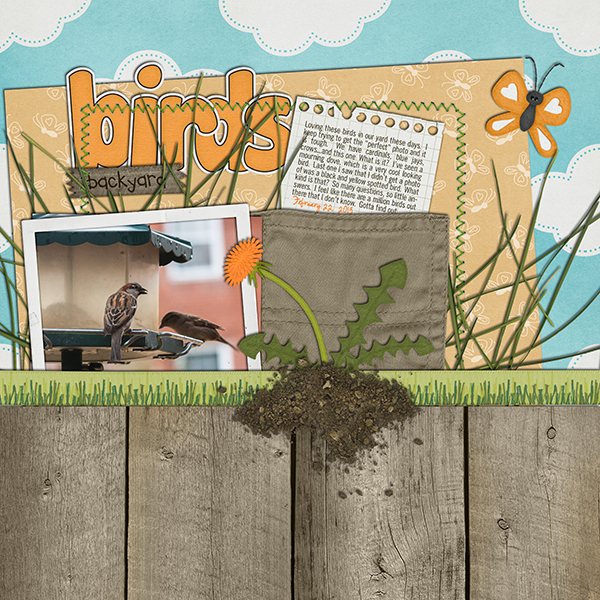
The flower Lisa (kelseyll) created adds a very nice touch to the outdoorsy feeling page. She used Chelle’s Creations The Great Outdoors kit for her page.

Do you want to be able to create your own accordion flowers? Head over the Chelle’s store and pick up her CU Accordion Flowers + Action today.

As always be sure to share with us the pages you create. Happy scrapping!

9.15 Video Tutorial: Painted & Drawn

I think everyone enjoys learning new ways to make layouts stand out. Chelle’s Creations video tutorial shows you a few ways to add an artsy flair to you pages. Her video instructs you on how to get a photo to appear as it has been hand-drawn on the page and then painted in on certain areas. Check out the video below so you can add this technique to your next page.

The page doesn’t need many embellishments to make it complete. You want the main focus to be the artsy picture. Let’s take a look at a couple of other great examples from Chelle’s creative team.

Donna (djp332) uses a photo much like Chelle’s skyline. I love how she has the burst bordering the page. Donna used Summer Lovin’ to create this terrific page.

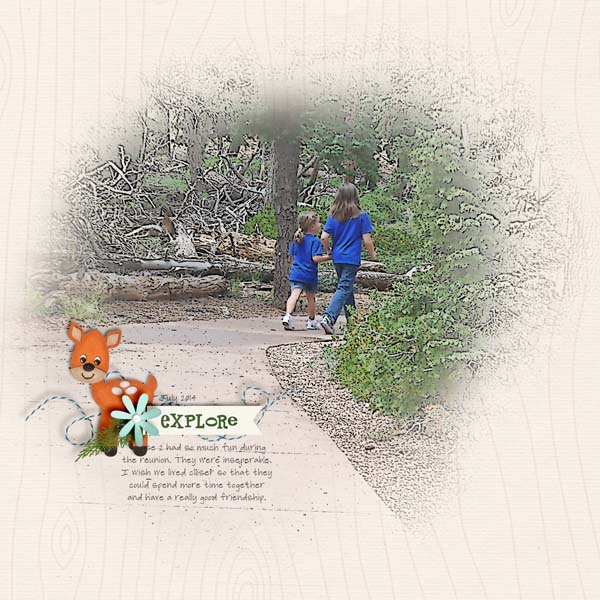
How cute is this page using In the Forest. I love how Heather (htew) combines the muted woodgrain paper with the adorable outdoors photo to create a perfect artsy feeling page. The little deer element just ties everything together.

Chelle’s video tutorial used the kit Oh Snap! kit. The Oh Snap! word bits have been retired. Visit her store to pick up the kit and see what other goodies you can find.

If you use this technique on a layout be sure to add it to the gallery at Scrap Orchard so we can all admire it. Happy artsy scrapping!

4.10 Tutorial: Adding Depth of Field

4.10 Tutorial: Adding Depth of Field

Hi Everyone! I’m Jenn, or jk703 in the forums. I’m a self taught Photoshop girl, and like to share what I’ve learned with easy tutorials! Hope you enjoy this one!

We are going to manually blur the background of an image to bring the focus onto one subject/object in your photo. Many times when we take pictures, we use the “Auto” settings, and nowadays, many of our photos are taken using cell phones. These pictures are great, and keep taking them! At times though, you might have a busy but crisp background, and that is because when taking the photo you opted or couldn’t change the aperture. To give a bit of depth, and to be able to choose your image’s focus, follow along with the Tutorial: Adding Depth of Field for the simple workaround!

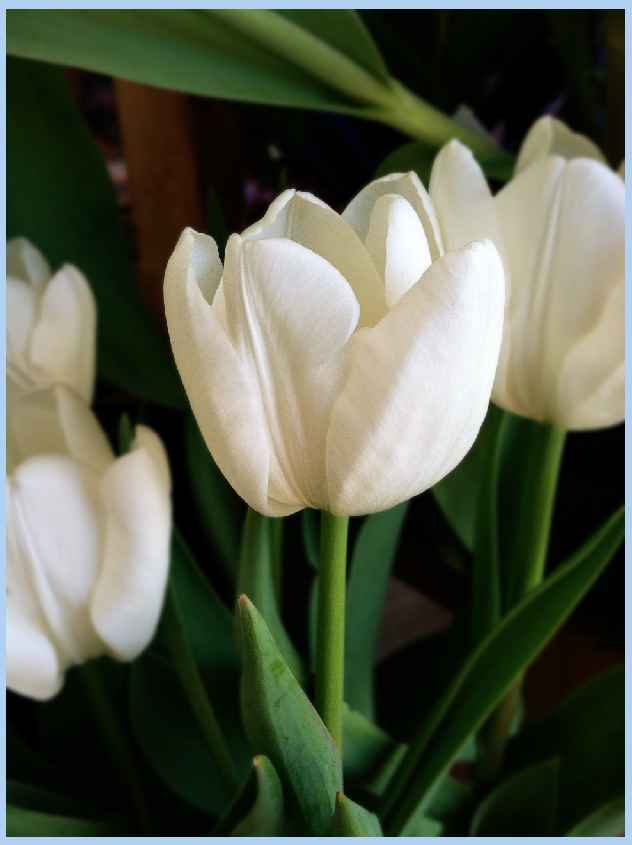
Here is my original image, using my cell phone.

Depth1

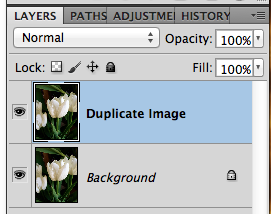
First, duplicate your image.

Depth2

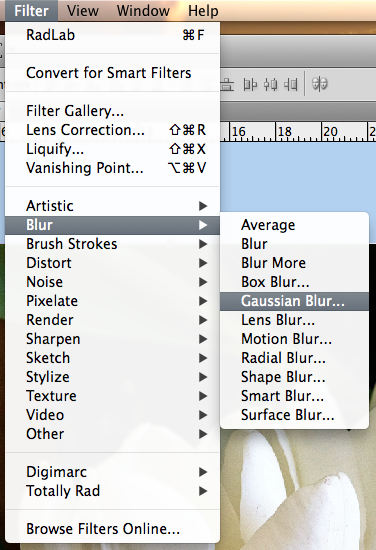
Next, with the duplicate layer selected in the Layers Palette, you will go to Filter > Blur > Gaussian.

Depth3

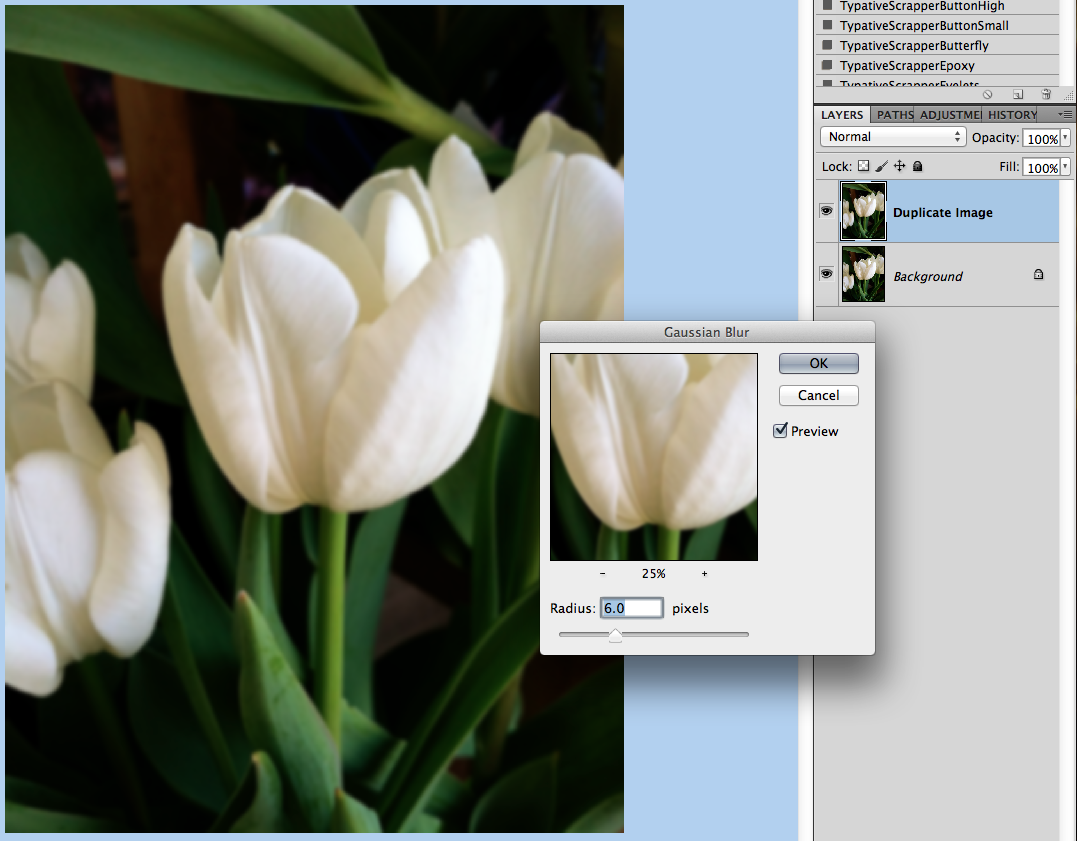
Look at the area that you want to blur, and move the slider until it is blurry enough that you like the look. Don’t worry about the part that you want to stay in focus at this point. Mine is at 6 pixels for now.

Depth4

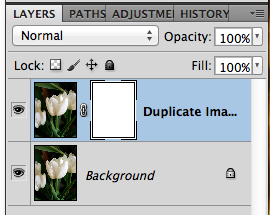
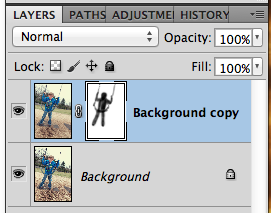
Next, still with the duplicate layer selected, you will click the square with a circle in it on the bottom of the Layers Palette. This is what I call the Mask Maker. :)

Depth5

Your layer will get a white box next to your image. Click on this white box so you see the corners with double lines. This means the mask is selected.

Depth6

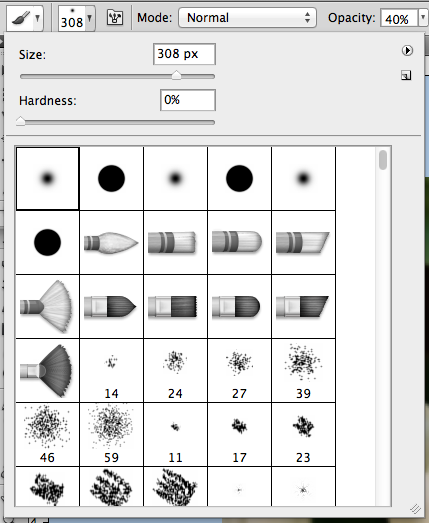
You want to have black in the Foreground Color for painting on the mask. Next, click on the Brush Tool. Use a soft black brush. Mine is set at around 300 pixels, soft, and 40% opacity.

Depth7

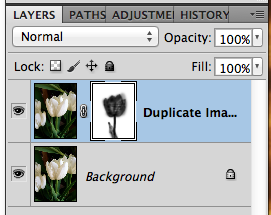
Using the brush, paint over the area that you want to bring into focus. You can see my mask here, painted black and almost in the shape of the single tulip.

Depth8

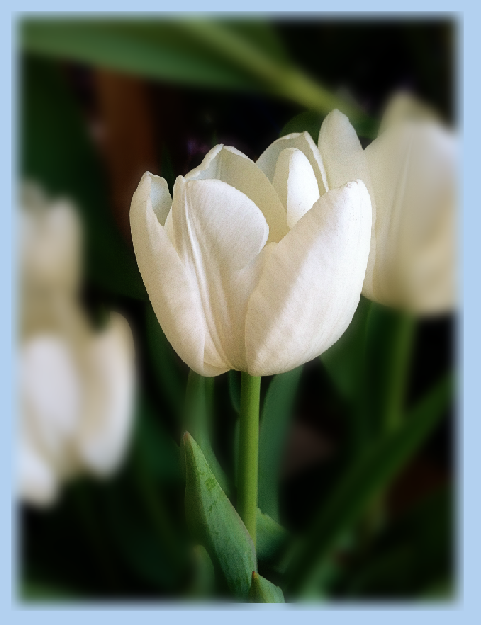
Here is the tulip image. This one is at a 6 pixel blur. Just a little blur for the background and other flower parts.

Depth9

Jumping to an 8.8 pixel blur and the same tulip in focus would make it look extra soft. Almost like the retro photos that had the softness on people’s faces.

Depth9aa

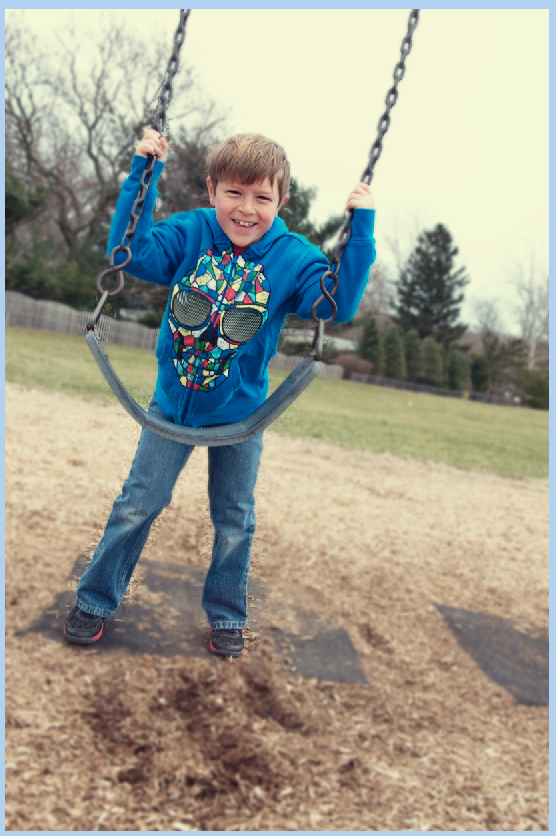
Here is another image of my son, at the park. I wanted to focus on just him, and a bit more blur on the trees and surroundings.

Depth9b

Depth9a

Here is what the CT came up with for this tutorial! :)

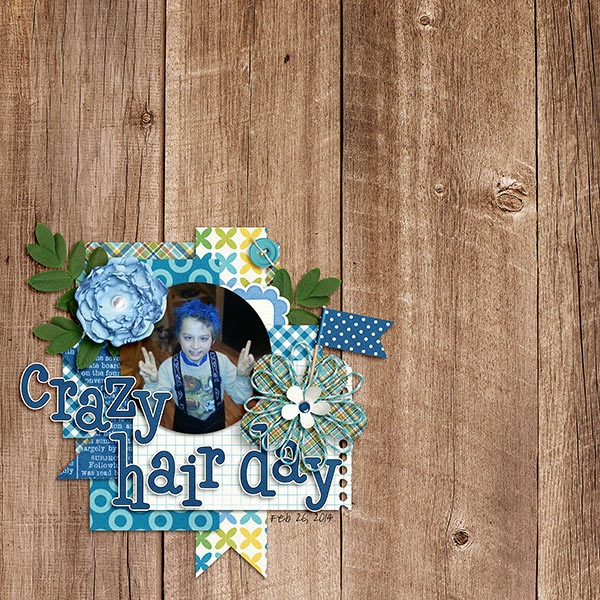
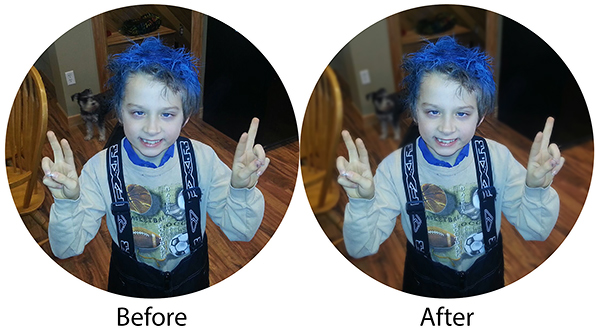
Jennifer (jmljensen) created this fun layout of her son – she used Chelle’s Bluebird on My Shoulder and About a Boy (template – Watering Hole freebie template by LGFD).  She already knew what I was going to post, so she was able to give me a before and after of the photo itself!

40769

web_beforeafter_zps8c533405

Jen (supergirljennie) created her layout using Fleur de Violette. She shoots in manual mode, and had the settings at f/2.5, 1/2500sec, 200 ISO. kelseyagain_zps581b5871

Super simple, and a fun technique. It will work great on photos that you have a lot going on in the background. You can easily provide focus on what you would like to stand out. Can’t wait to see what you create using this tutorial. Now, go add some depth of field, lol.

Thanks for visiting!

by_Jenn


3.27 Tutorial: Easy Pencil Sketched Photos

3.27 Tutorial: Easy Pencil Sketched Photos

Hello Hello! Welcome to today’s tutorial! This is Jenn, aka jk703, and I can’t wait to share a fun and really easy tutorial for you today. You are going to love the Tutorial: Easy Pencil Sketched Photos! It is fun, and has a cool effect, plus I think it can give you a way to change up your layouts. Add a bit of different – :)  I hope you like it!

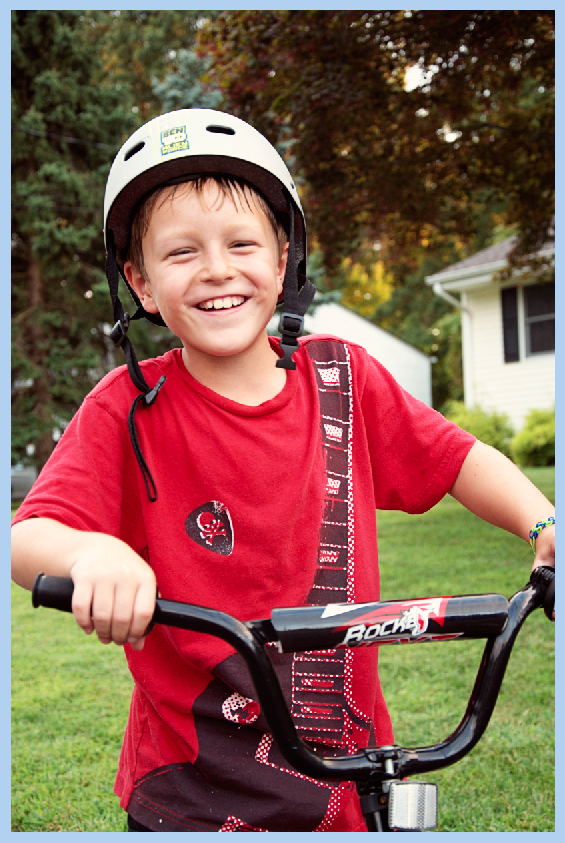
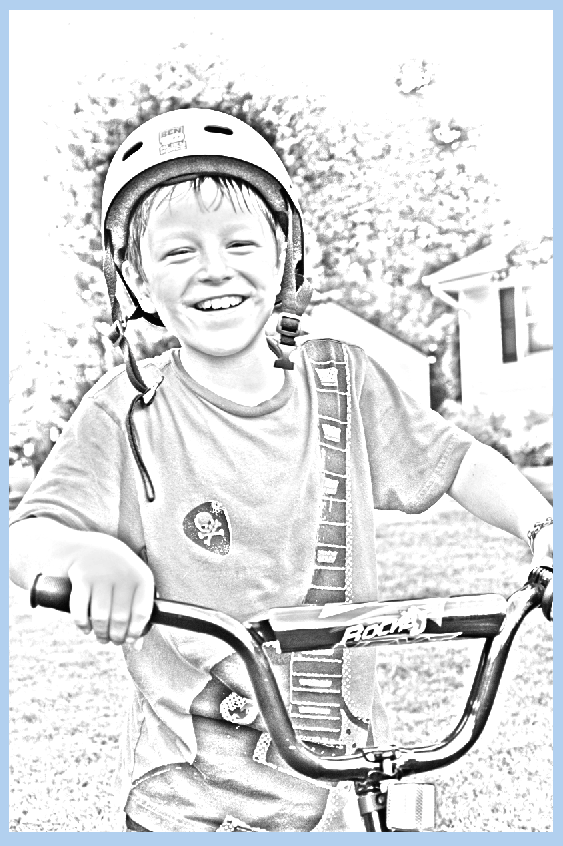
Here is my son, and right before he was done riding his bike, I was able to snap this picture. He is laughing at me for some reason, but I don’t know what it is, lol! I pry told him to get back on the bike and put his helmet back on for a picture. All I know is that he has an infectious smile, and the natural smiles are my favorite. This is the original picture that I will show the tutorial for Easy Pencil Sketched Photos. (This should work for both PS and PSE users – Krista provided instructions on how PSE differs. I will include that in parentheses).

PencilOriginal

First, make a duplicate of your photo, right click to duplicate or Command + J. This way the original is still available and not written over with layers and other changes.
Pencil1

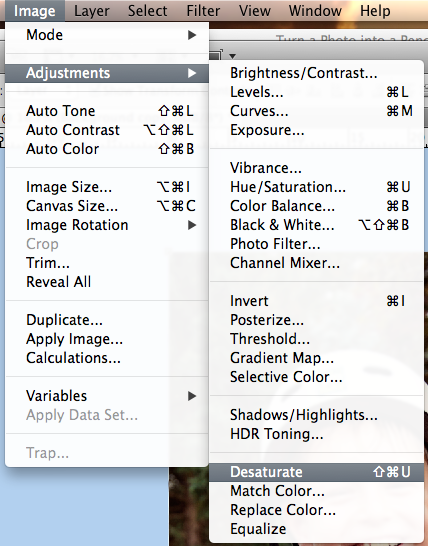
Next, choose your duplicate layer in the Layers Palette. Then click on Image > Adjustments > Desaturate. This will cause your image to turn to a black and white version. (For PSE Users – Krista said that she went to Enhance>Adjust Color>Adjust Hue & Saturation. She then brought the saturation slider all the way to the left.)
Pencil2

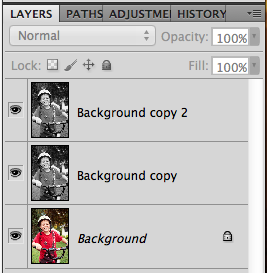
Duplicate the desaturated layer.
Pencil3

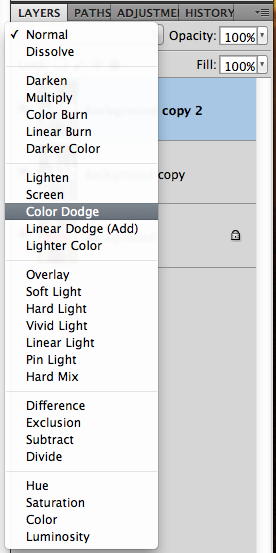
Choose the top layer in the Layers Palette. Next, change it’s Blend Mode to Color Dodge.
Pencil4

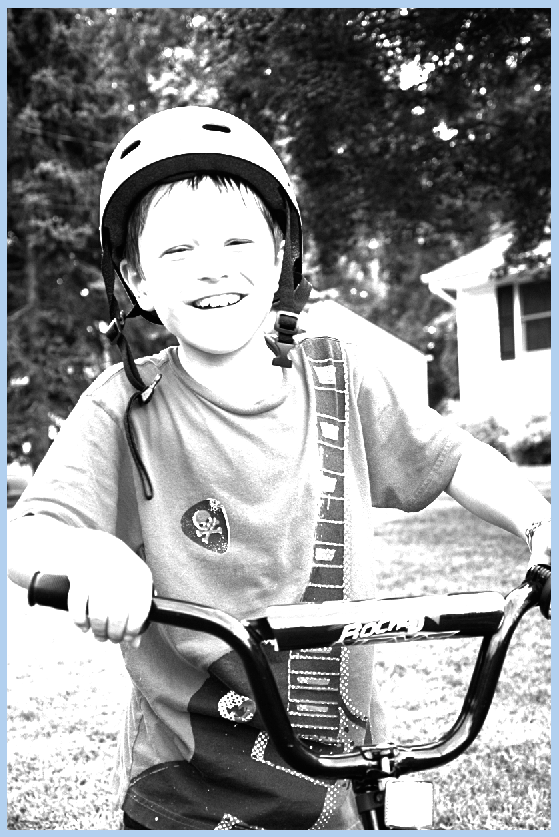
Your image will have an almost over white black and white image. Like this:
4a

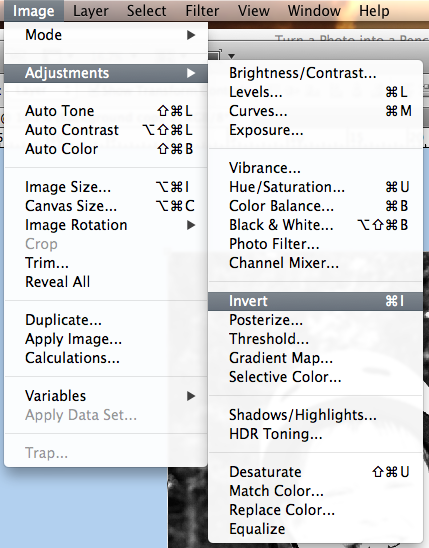
The top layer is still selected at this point. Next, click Image > Adjustments > Invert. (For PSE it’s Filter>Adjustment>Invert.)

Pencil5
Your image will turn ALL white right after inverting it. It’s normal. :)
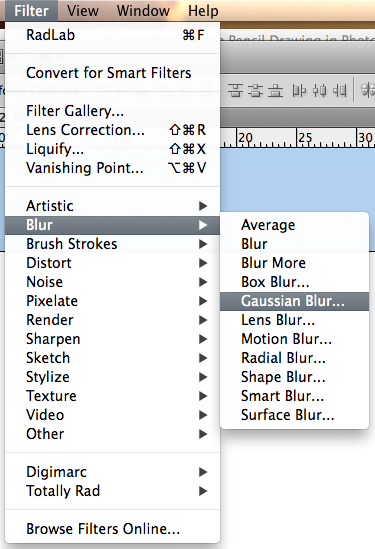
Ok. Next, click on Filter > Blur > Guassian Blur.
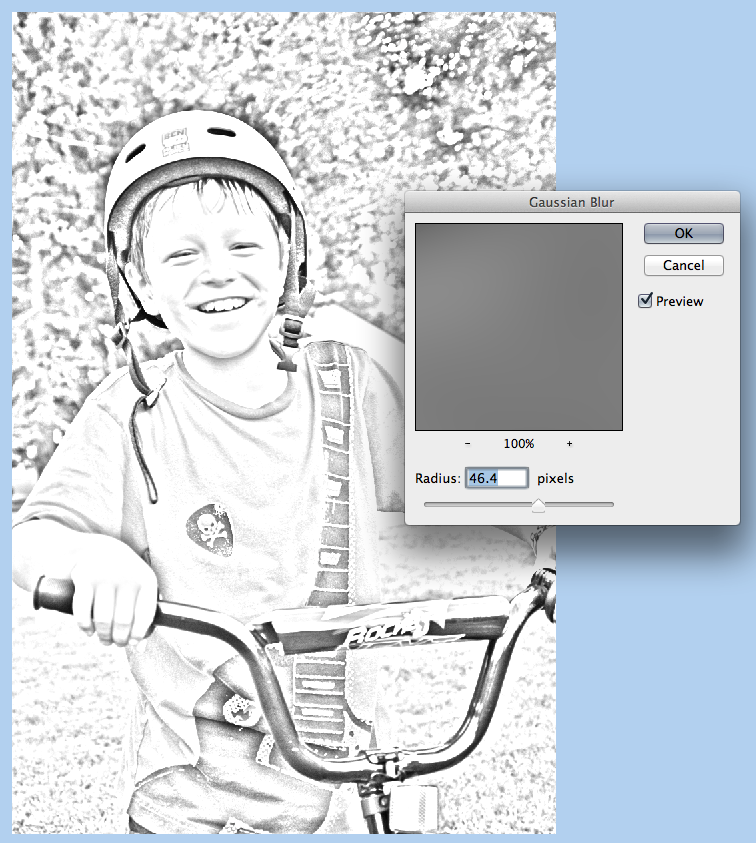
Pencil5a

You will move the slider to a lower number, probably between 20-60, depending on your photo. Mine is around 46.
Pencil6

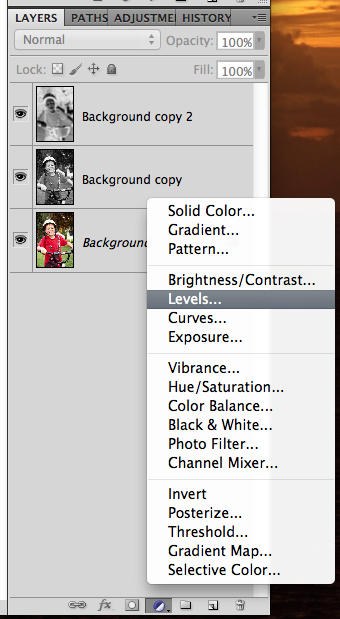
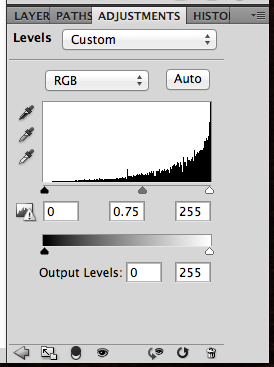
The image lost a lot of it’s detail when we added the blur. We will get some back. Create an Adjustment Layer for Levels. I used the half white/half black circle on the bottom of the Layers Palette to do this step.
Pencil6a

Now, choose the middle triangle under the chart. Slide it to the right. It will change the image, so watch and slide at the same time. It will bring some of the detail back
Pencil7

Here is what my image looks like at this point.

Pencil7a

I feel that the surrounding area takes away from him, so I’m going to bring a little more focus to the image. Select the layer just under the Levels Adjustment. Press D to change your foreground and background colors to the default setting.

Now, choose the Brush Tool, and use a Soft Round Brush, and you will paint with the foreground color, black. Mine is at a size of 715, and I originally had the opacity at 20%. As I worked with the brush, I lowered it to 5%. Play with this and your image. If you have erased too much, just switch up your brush color to white, and you can fix where you erased too much of the image. (For PSE Users, Krista said that for some reason she had to use the white to erase the background. When she used black it made the background black).
Pencil8

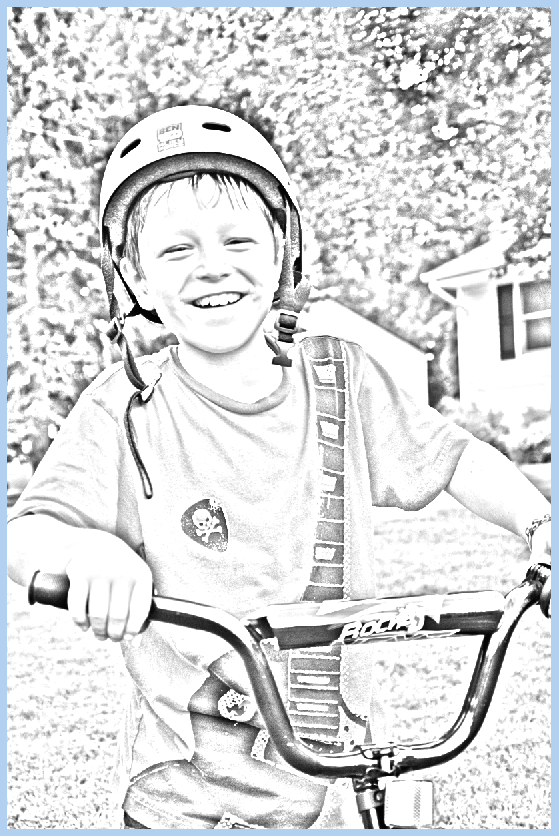
Here is what I ended up with. You can merge the layers and save them. Then you can use it for your layouts – framed images, polaroid versions, or blend it into the background. Have fun!
Pencil8a

Pretty straight forward! It turns out great for such a simple technique. Here is what the CT created.

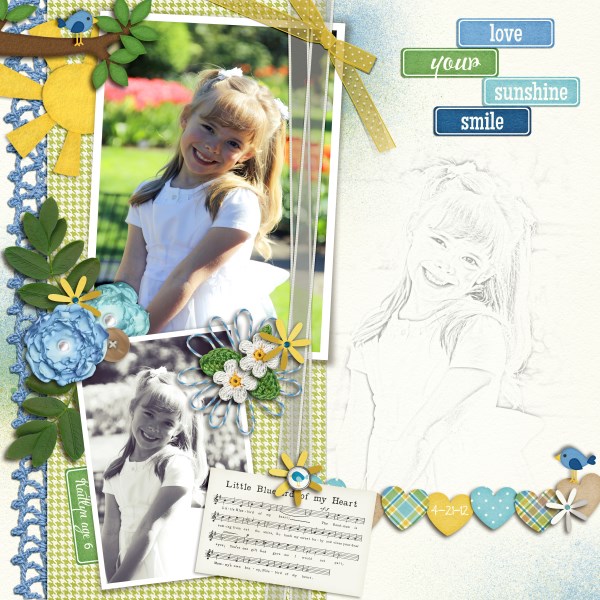
Lisa (kelseyll) created this soft and lovely layout. She used Bluebird On My Shoulder and the Curled Frames.

3-21BluebirdonmyShoulder600x600-1


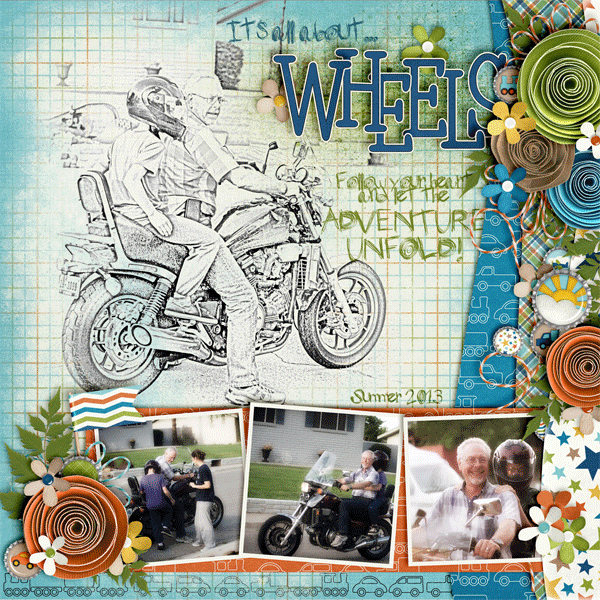
Leah (Cat Lady) made this awesome layout – I think the sketched image is so fun and works so perfectly with that alpha. She used About a Boy and a Fiddle Dee Dee Template.

40937


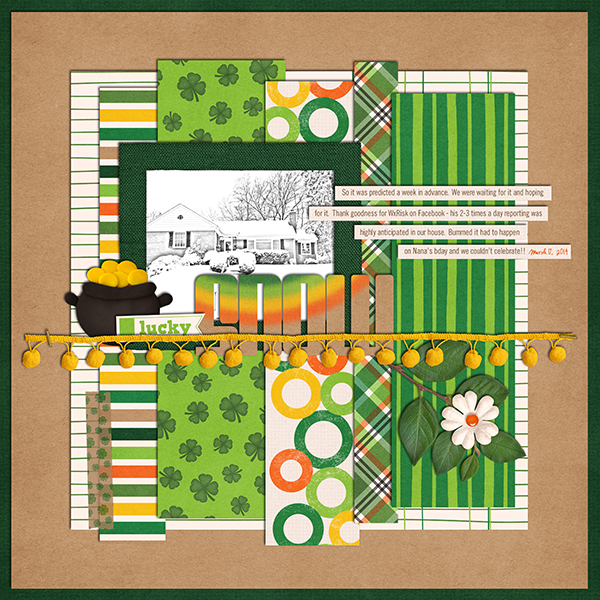
Jenn (jenny) made this fun layout and had the house sketched! She used Lucky Me.

34_2014_luckysnow_600_zpsd8c0cb18

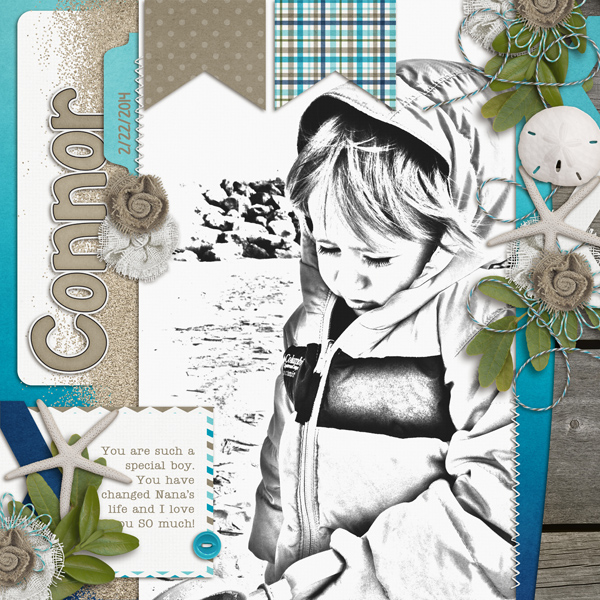
Krista (kc71595) made this layout and the sketched image fits perfectly! She used At The Beach and a Little Green Frog Template.

Connor_

Simply too easy for you not to try it out! Have fun and we’d love to see your pages using this Tutorial: Easy PencilSketched Photos in the ScrapPin Galley! Thanks for stopping by!

by_Jenn


3.6 Tutorial: Cross Photo Coloring

3.6 Tutorial: Cross Photo Coloring

Hello, Hello and happy Thursday! How are you all doing? Is this week flying by for you? It is for me, and I’m enjoying the almost 40 degree weather this week… definitely better than the teens, wind chill, and snow! This is Jenn, aka jk703, and I’m here to share a tutorial that you can use on photos and on your digital papers! It’s pretty versatile and fun… oh, and super easy too! Now, this isn’t available in PSE, but my fellow awesome team members figured out a work around that works similarly. We’re trying to cover the bases so everyone has a way to try it out! Yay!

Have you ever had pictures that you wanted to use with a certain kit… but the colors didn’t quite match well enough? I’ve got a solution for you, and it’s super easy! While I am a huge fan of actions and photo editing, (especially RadLab), this is an easy fix to use your photos with whatever kit you’d like – and have them look good together! It’s called Cross Photo Coloring – at least, that’s what I call it. :)
One of the best things about this nifty trick is the whole matchy matchy feel your photos have after doing this technique. Think about it. You’ve been to a party or at a BBQ, you take loads of pictures, and then when you look at them, the lighting isn’t always the same, or the tone doesn’t seem to match. By using the Match photos, and using a base photo or a base paper, you can tie them all together nicely.
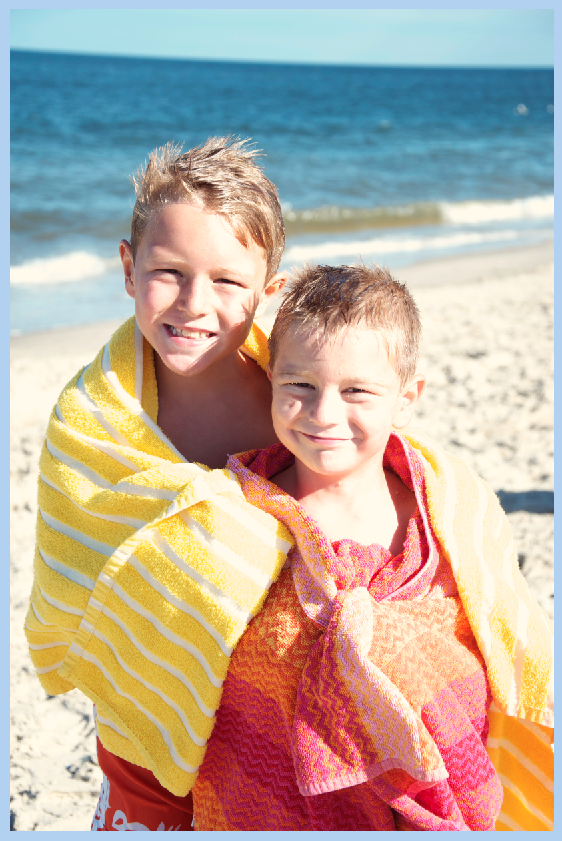
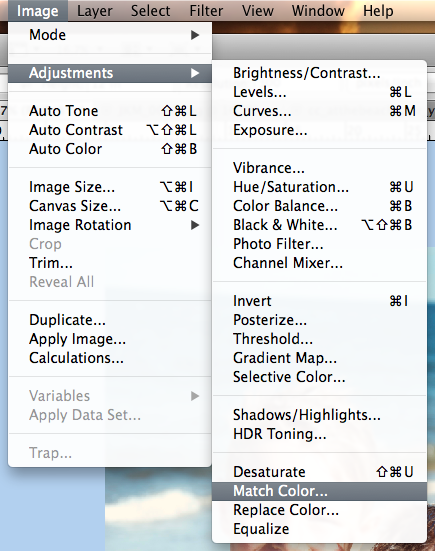
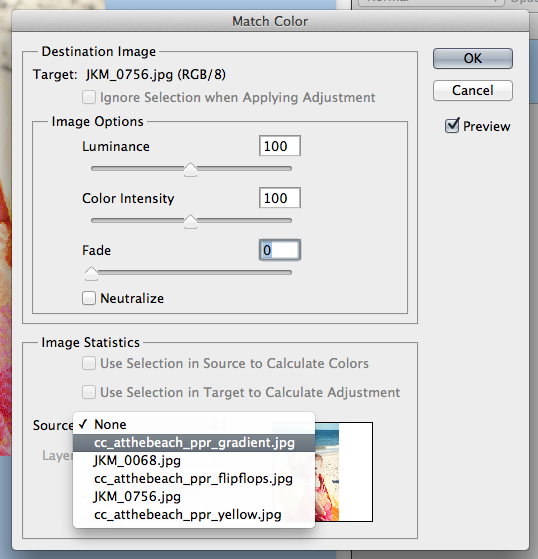
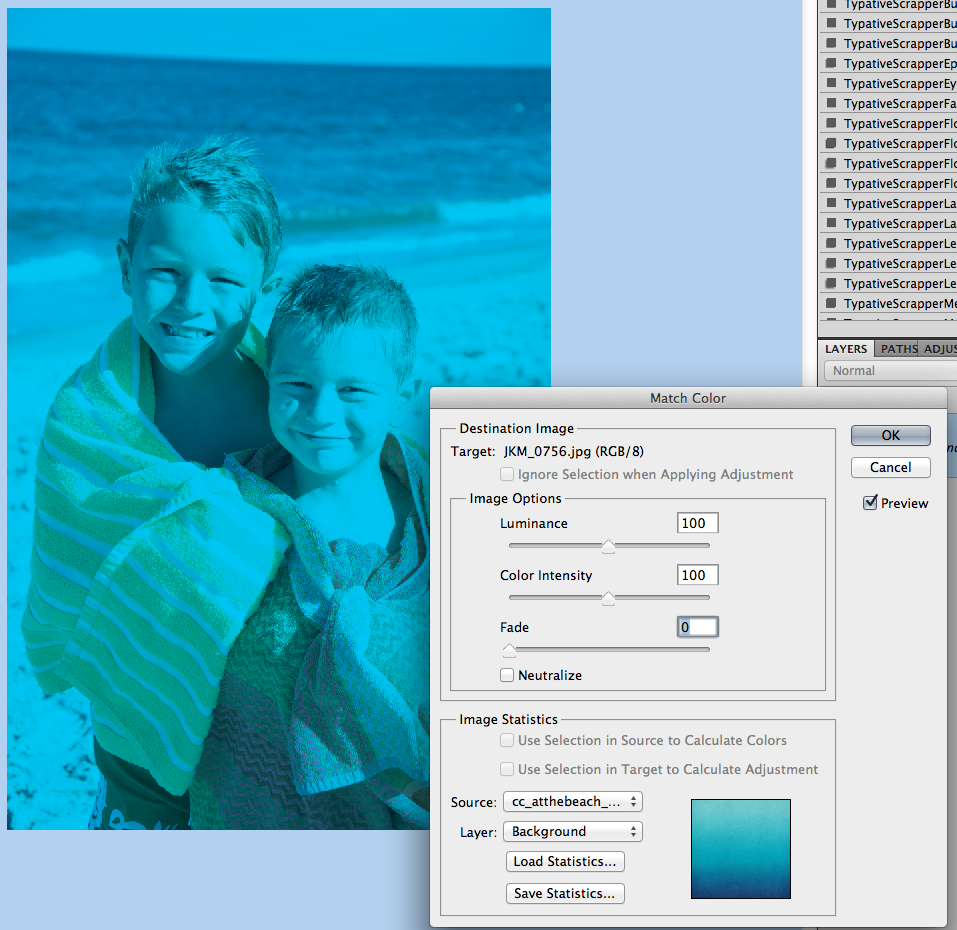
First, here is my image. It’s my boys at the beach and my camera settings were off, so the coloring wasn’t how I’d like. But, still a great picture. For my example, I’m using At The Beach kit. (lol!) Before you go further, open a couple pictures and a few sheets of paper in photoshop. To start, all in their own tab – I believe there is a way you can do these same steps using selections and working with the layers, but I have not tested it. Oh… and it’s ok to mix solids, or even patterns. Whatever you prefer. Remember, you could even do this to papers too – the possibilites are endless! Let’s Cross Photo Color IZE it! :)Cross Color 1But, what if I wanted a little cooler to teal tint to the picture. Easy! Ok. You should be “in” the image that you want to color change, and that should be the selected in the Layer’s Palette. Click on Image > Adjustments > Match Color.Cross Color 2A pop up menu will appear. Towards the bottom, there is a click down to choose the “Source.” The Source is where you will be getting the color from to add to the original picture.

Cross Color 3

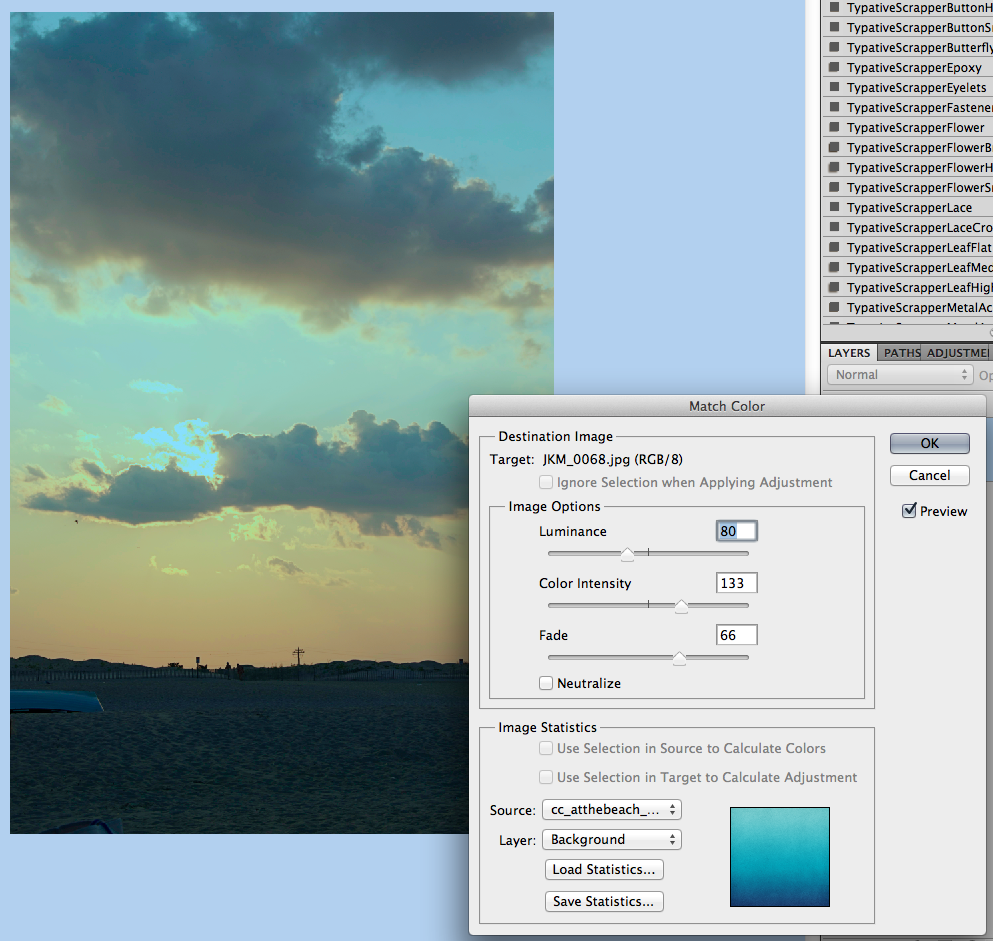
Right now, I chose a gradient paper from the At The Beach Kit. My image will instantly turn a tint of teal. Like this:

Cross Color 4

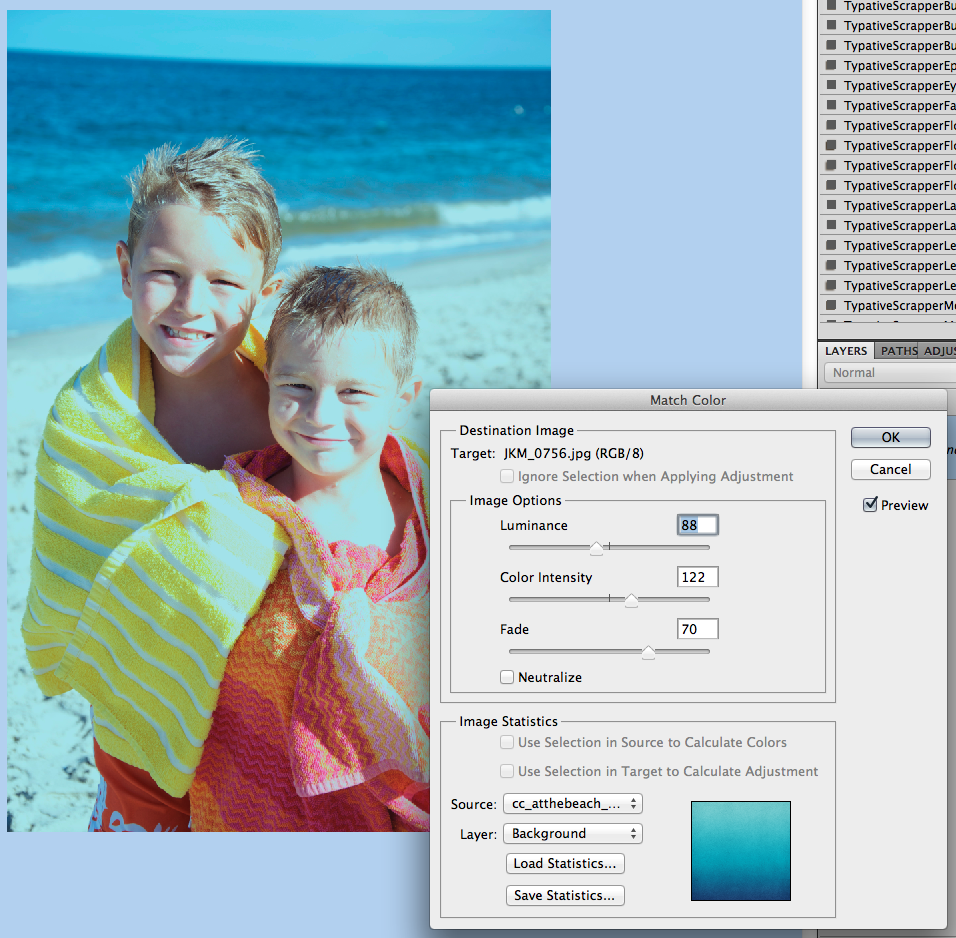
Now, I play with the sliders to change up the color. The sliders are Luminance, Color Intensity and Fade.
Luminance – adjusting to the left makes it darker, while sliding it to the right makes it lighter.
Color Intensity – adjusting to the left makes the color range smaller, while sliding to the right will add to the range and intensify the color.
Fade – sliding will determine how much of an adjustment you will have. To the left is a straight color adjustment, while to the right fades the color adjustment.

You can see my adjustments and sliders here. Gives it a cool look, and adds to the scenery.

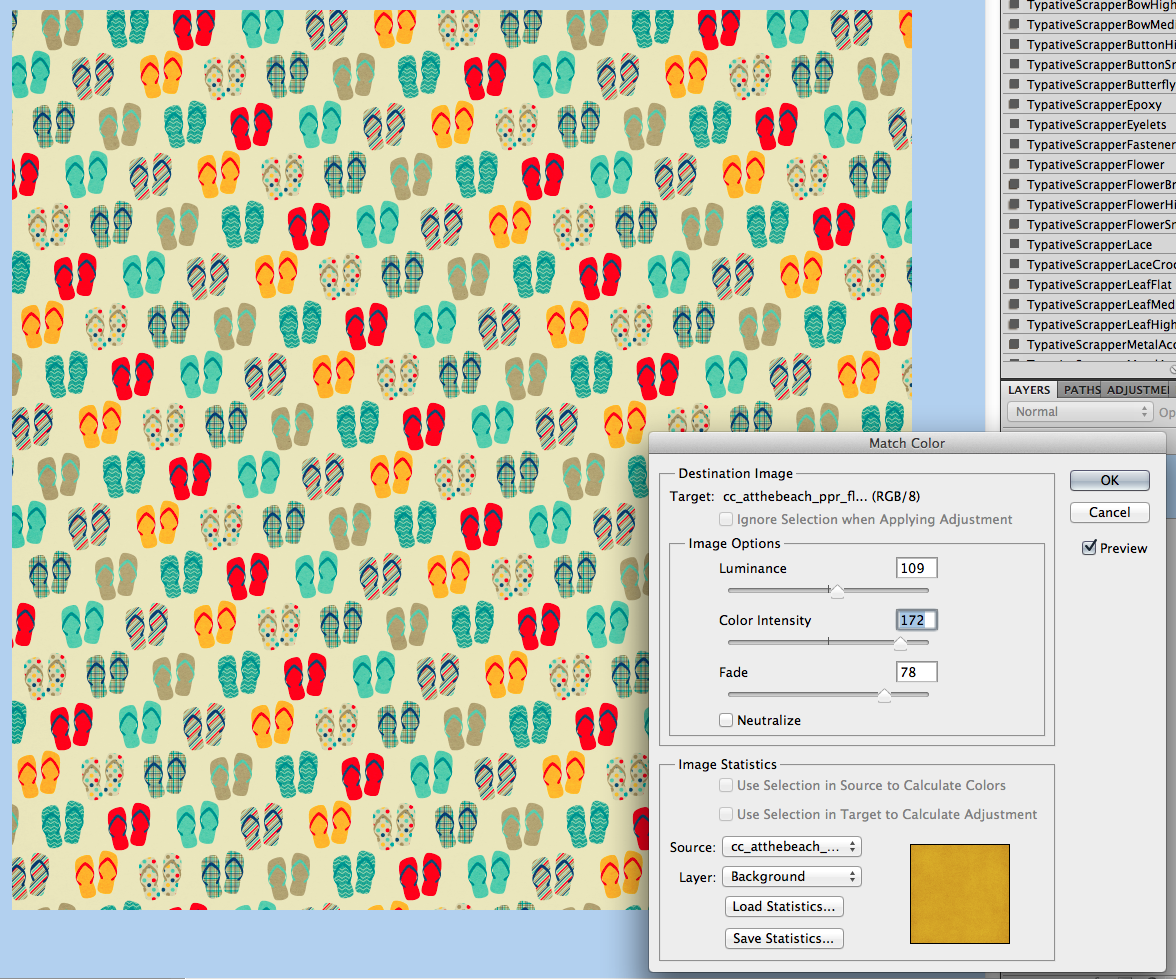
Cross Color 5

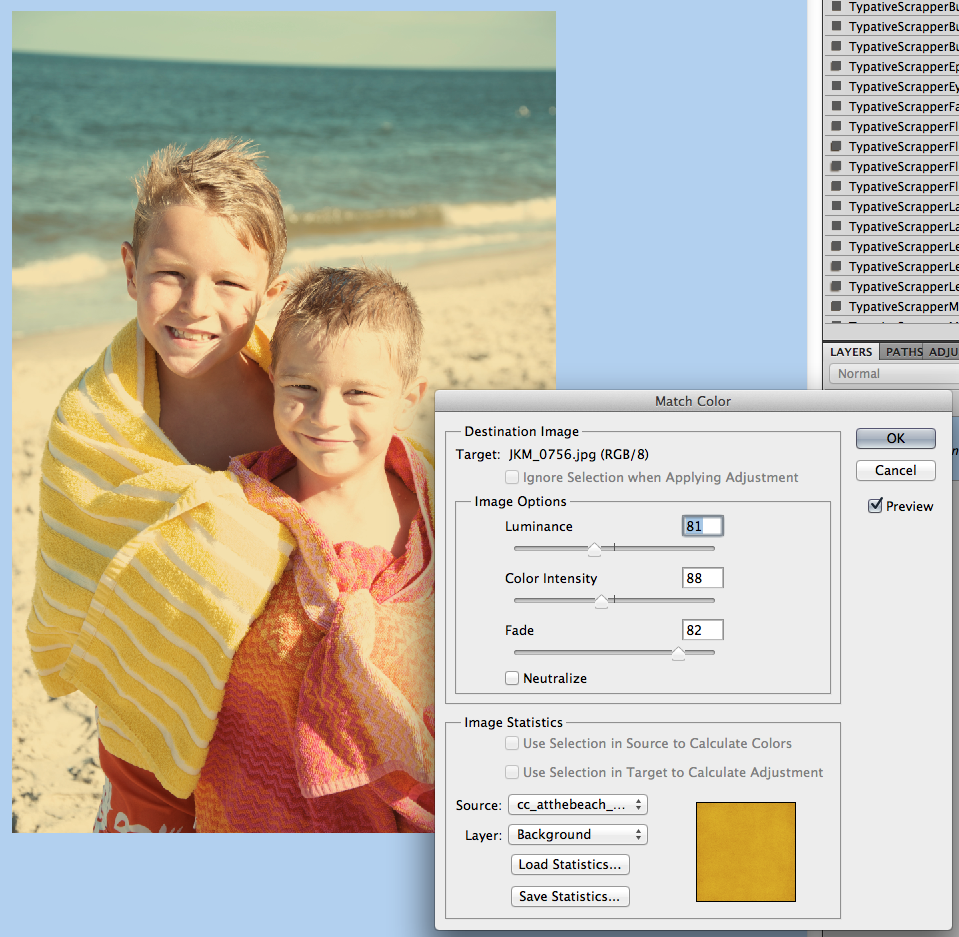
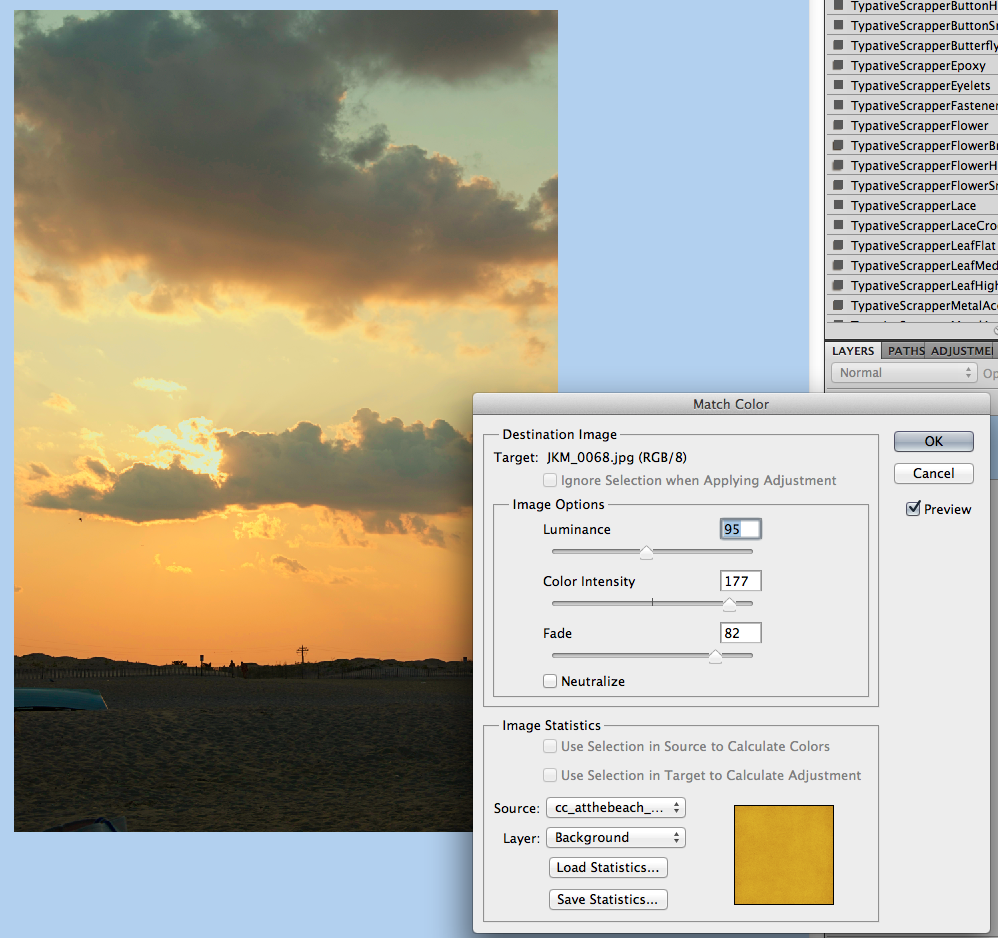
Here is the same image, but with the golden yellow paper, as well as the sliders and settings I settled at. Makes a warmer image and again, it’s still adding to the scenery. See how the same image can work and totally change the photo with each color match!

Cross Color 6

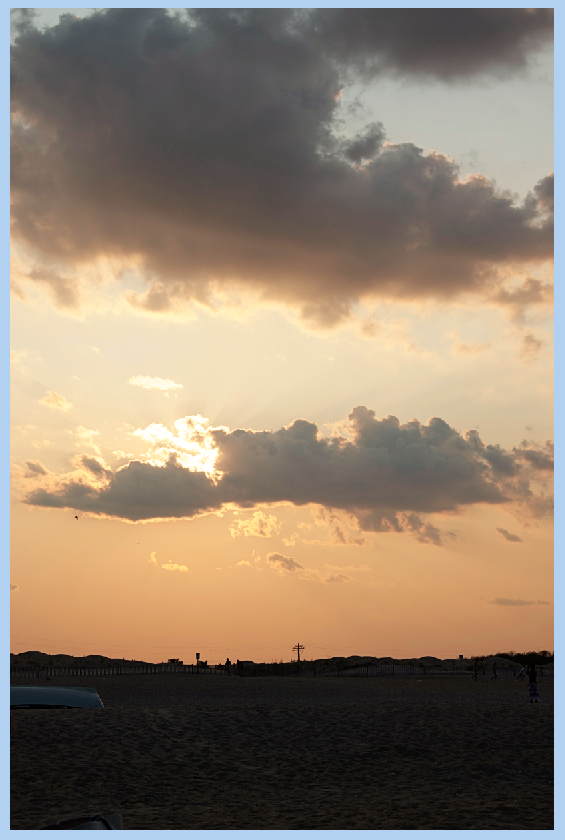
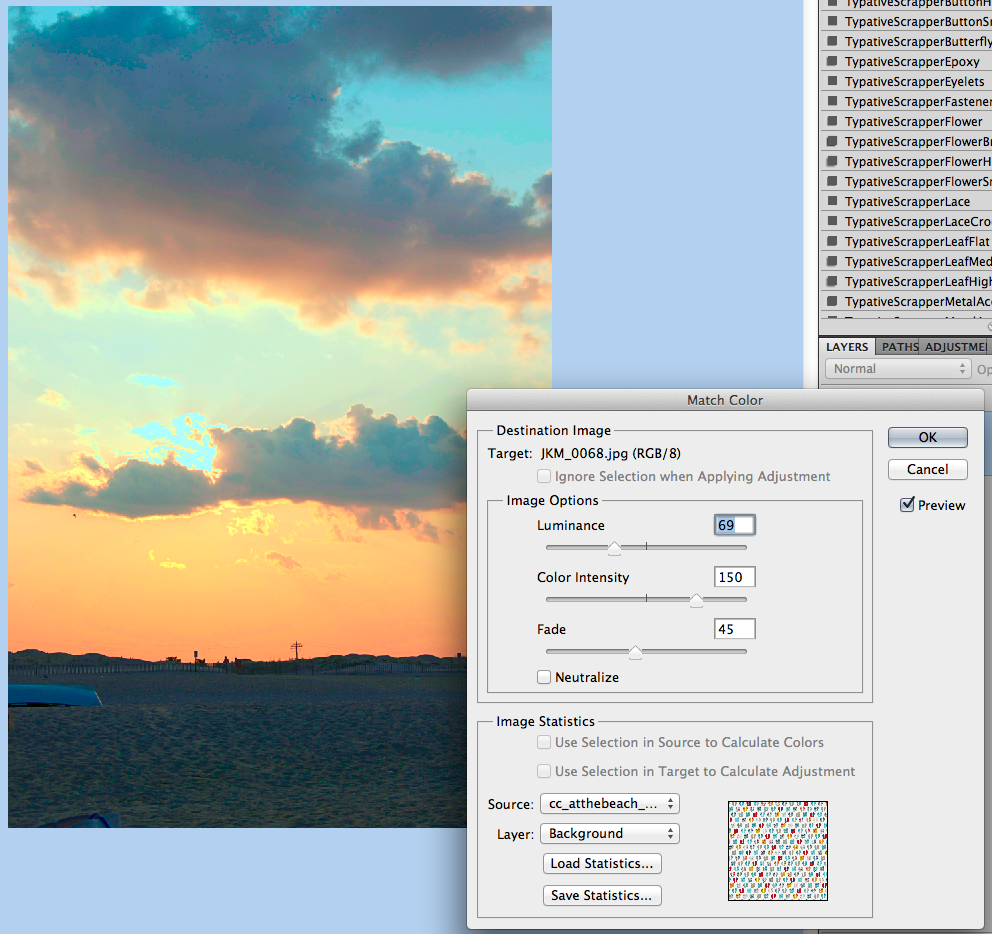
Another example, a sunset:

Cross Color 7

Image, sliders and outcome with the Teal Paper:

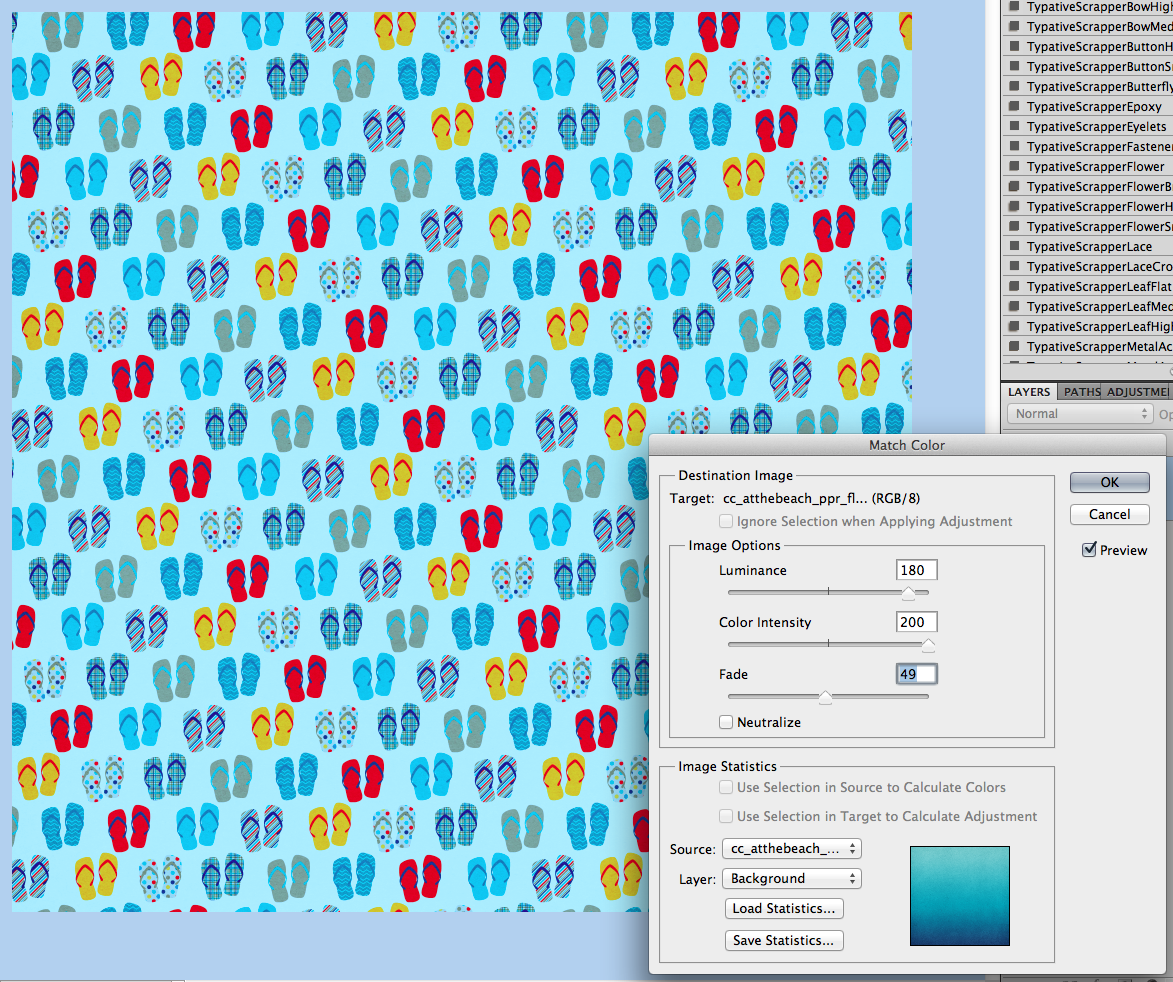
Cross Color 8

Image, sliders and outcome with the FLIP FLOP paper! Check it out! I really think this cross photo coloring is my favorite! Who would have thought flip flops would do this! :)

Cross Color 9

Image, sliders and outcome with the yellow paper:

Cross Color 10

Now… two other things you can do….

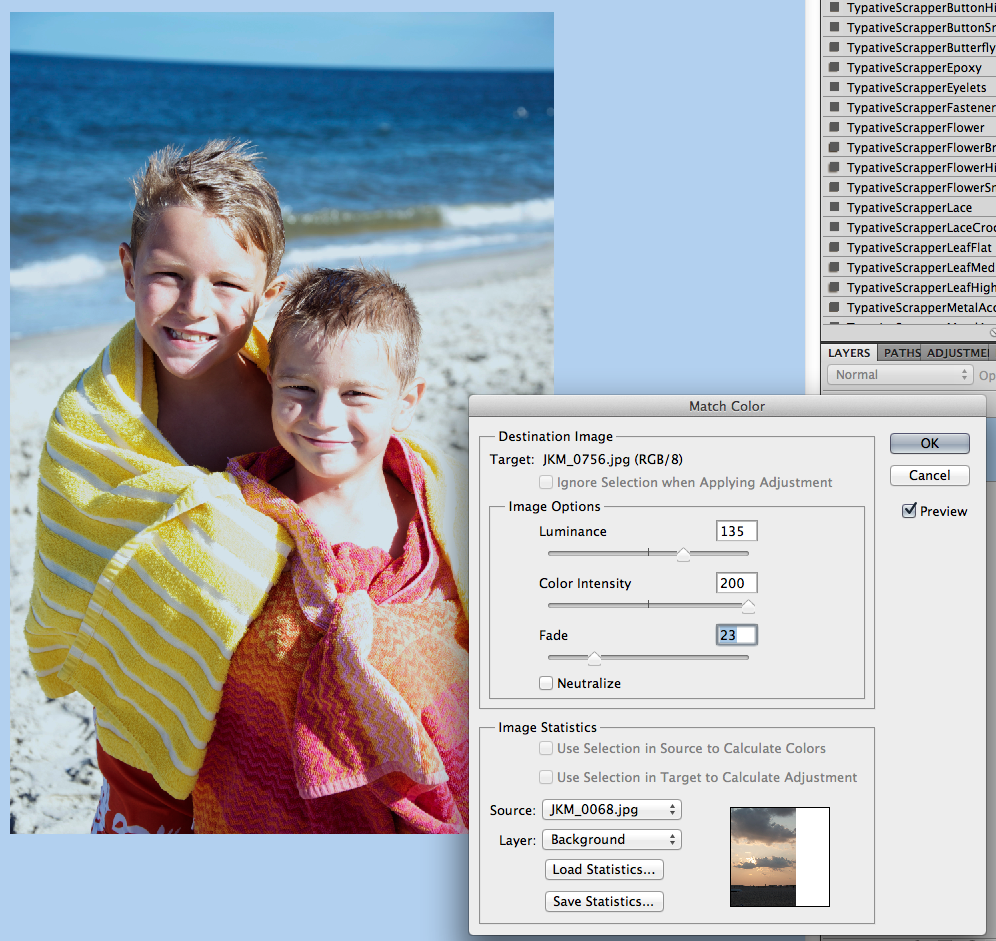
Combine images… here, I’ve combined the boys with the sunset, and moved the sliders some.

Cross Color 11

Combine papers… here, I’ve combined the flip flop paper with the teal and yellow papers, and how I changed each slider:
Cross Color 12

Cross Color 13

Now, here is what the CT came up with! They really helped me out to find an alternative to the Photoshop way! Thanks ladies!

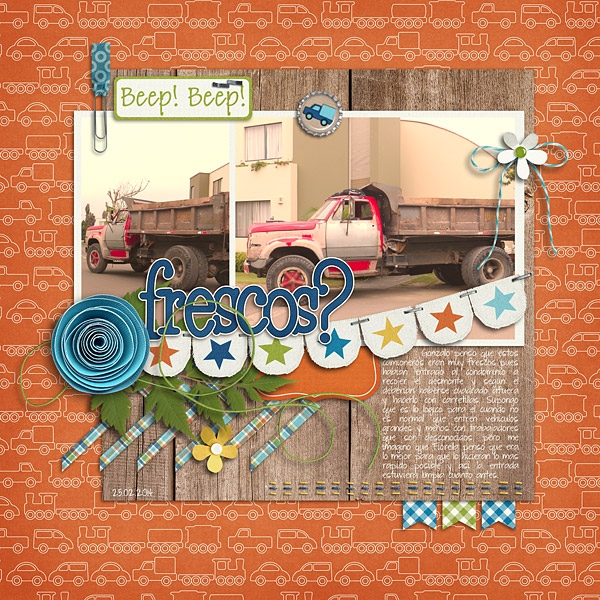
Roxana (roxanamdm) used 2 pictures and the wheels2_orange paper on the BG from About a Boy to match the color, then moved the sliders to 100-88-68.

tiport10

Karen (Zippyoh) said that she uses PSE 11, and for the photo she added the following: Filter > Adjustments > Photo Filter, and from the drop down menu chose the color yellow because of the yellows in my LO. Kit used is Bluebird on My Shoulders and a template from Little Green Frog.

bluebird600

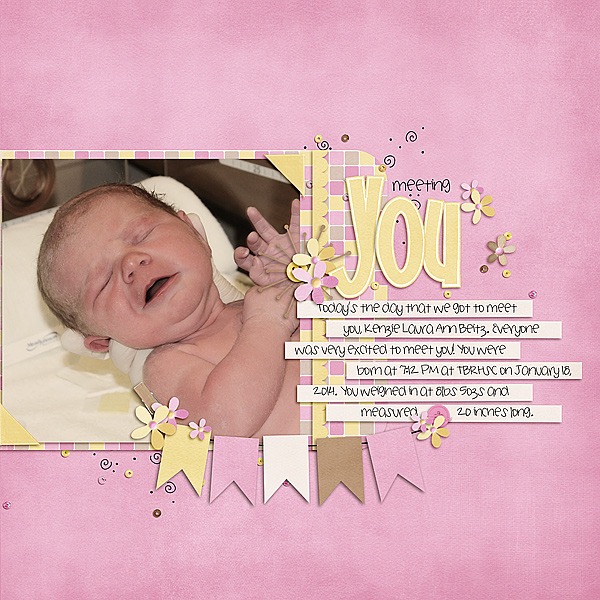
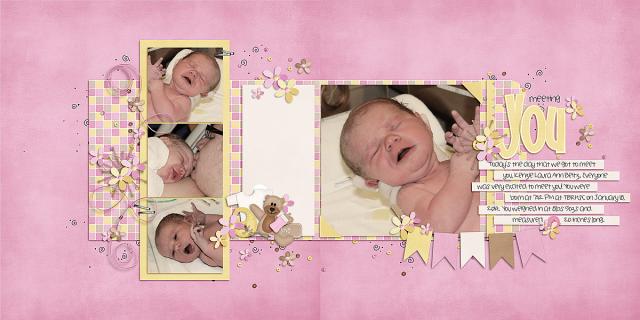
Now, I know we all have different ways of achieving the perfect look for our pages, so Melissa showed us an action that she uses for a similar effect. She used used a free PSE Action called, Coffeeshop Faded Daydreams. Which lightens the photo and adds a yellow and pink colour to the photo :) It can be located here: http://www.thecoffeeshopblog.com/200…se-action.html She said that the filter gave a softness to the photo and gave uniform-ness to the photos as well to make them match better. I believe she used Beary Cute Baby Girl.

Meeting-You-RS_zps06bb9e96

Meeting-You-Both_zps4266e2f3

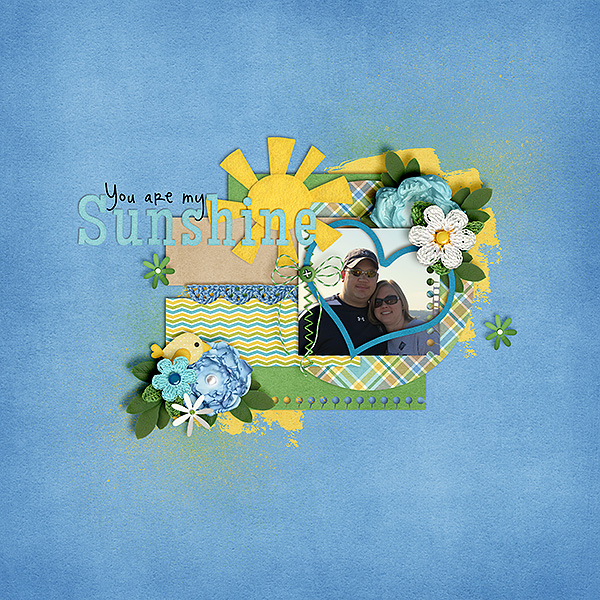
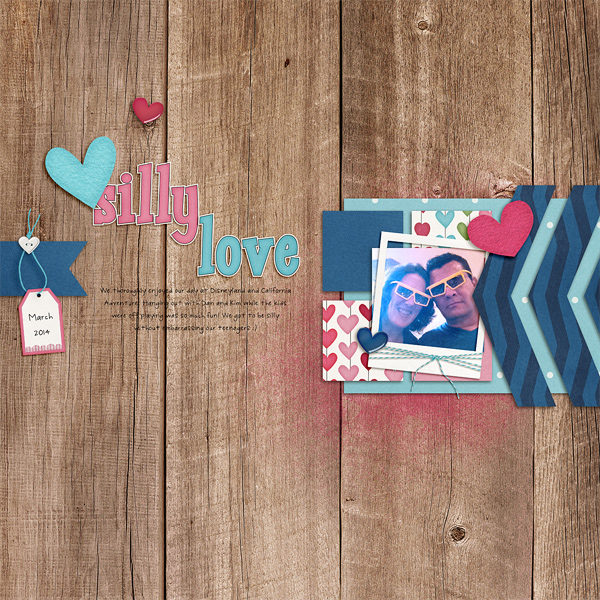
Tammy (craftytam) said that she followed the Filter > Adjustments > Photo Filter to adjusted the blues on her layout. She used Love Grows, CU Tag Ties, About a Boy & a template from Little Green Frog.

Silly-Love_zpsb2e970eb

That’s it! Lots of great info and such a great way to scrap with whatever kit you like! I’d love to see how you use this tutorial and add a Cross Photo Coloring to your photos – link us up! Hope this was something fun!

Thanks for visiting!

by_Jenn


2.27: Selective Recoloring Techniques

2.27: Selective Recoloring Techniques

Hi Everyone- it’s Jenn (jk703) here today! I’m back with another tutorial, and this one will be about recoloring. Have you every wanted to match a flower to a different color? An Alpha? Well, using the techniques that I show you today, you will be able to! Here we go – Selective Recoloring Techniques!

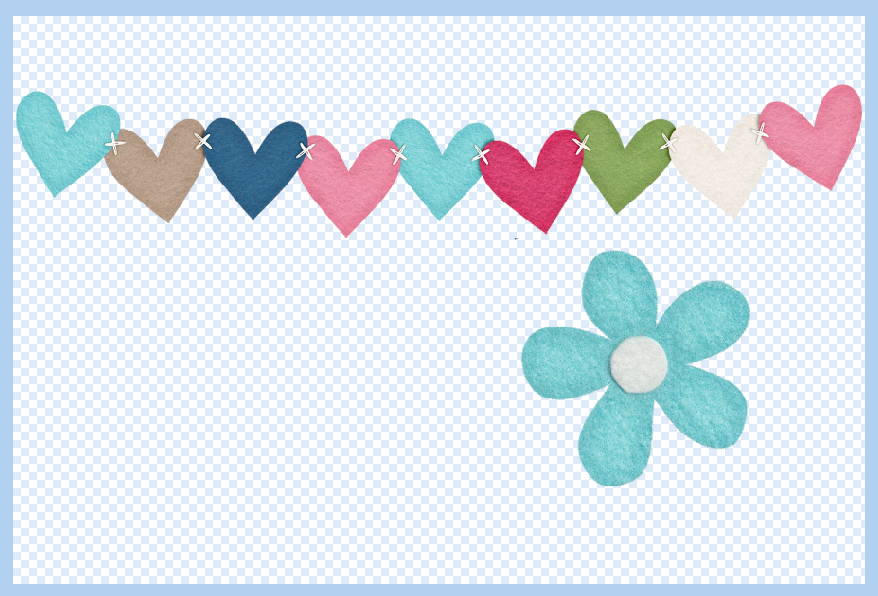
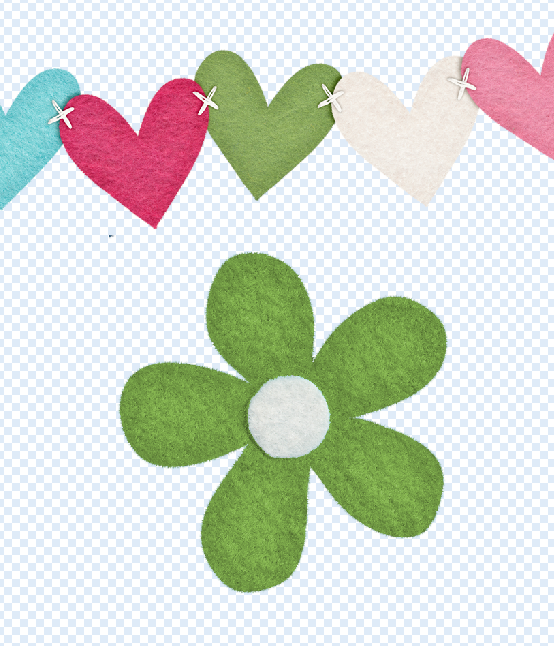
I’m working with the Love Grows Kit, and I’ve selected the Banner and a felt flower to work. with specifically.  I’m going to show two methods to recolor the elements to matching colors. There are always many ways to do something in Photoshop, so you may already know these ways, or another way. Any way you recolor and it works for your layout and memories will work! :)

Recolor1

Method 1

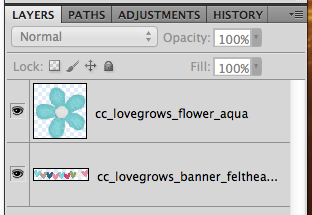
Here is what my Layers Palette looks like for reference. To start, I will recolor the flower.
Recolor2

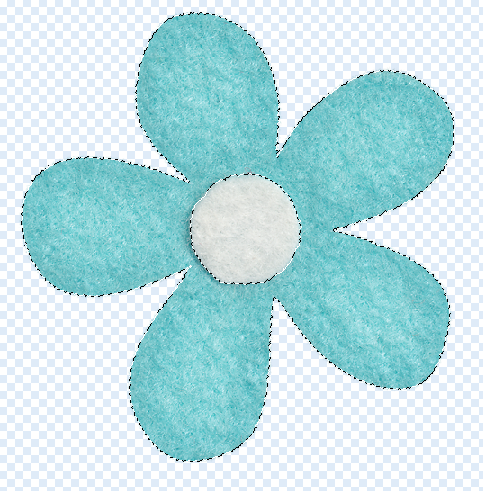
Double click on the flower thumbnail in the Layers Palette, and you should get marching ants around the edges.
Recolor3

Now, we will choose Magic Wand Tool, and choose the Subtract From Selection Preset. You will click on the white in the flower.
Recolor4

When you click on it, it subtracts this section from the selected outline.
Recolor5

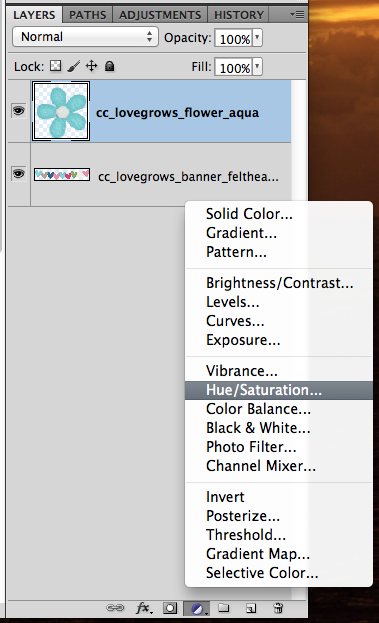
Next, on the bottom of the Layers Palette, click on the little black and white circle, choose Hue/Saturation:Recolor6

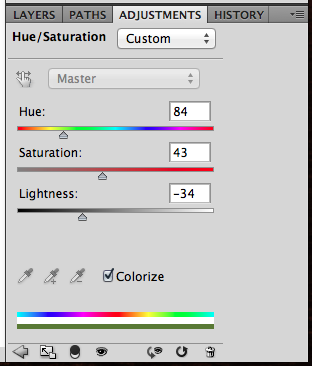
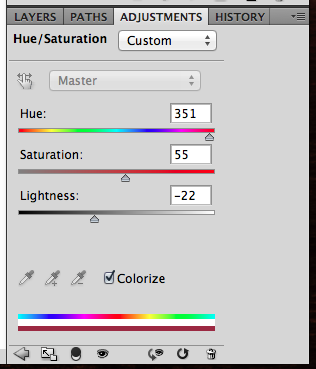
A screen will pop up, or it may show as a tab in near the Layers Palette. (Mine is a tab.) I’m going to click on the “Colorize” box, and I want to change my flower to green to get a closer match to the heart. Just play with the sliders. If you find other colors are changing also, use the eye dropper with the – sign and click on that area. It should take that specific color out of the equation. Here is what my setting are at after playing with them.

Recolor8

Here is what I ended up with for my flower. If you find that the color is close, but not as you wanted, try changing the Blend Mode on the Adjustment Layer. You might be pleasantly surprised.
Recolor9

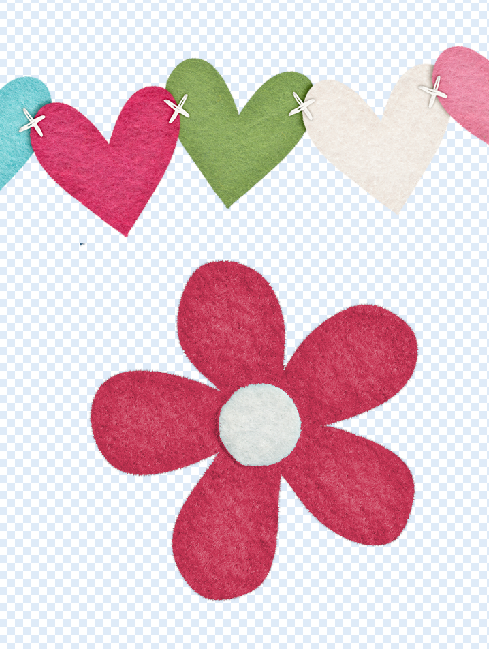
Now, I’ve gone and played with those sliders again…. this time I’ll try to match the magenta color.
Recolor10

Here is what I ended up with for my flower. Not too bad, and again, try out changing of the Blend Modes. I find that reds and pinks are harder to recolor than most other colors. Those are trickier to me. If the recolor is not working as well as you like, you could also try to combine methods.
Recolor11

Method 2

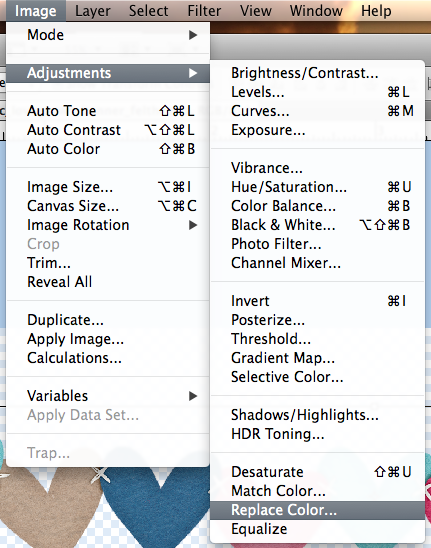
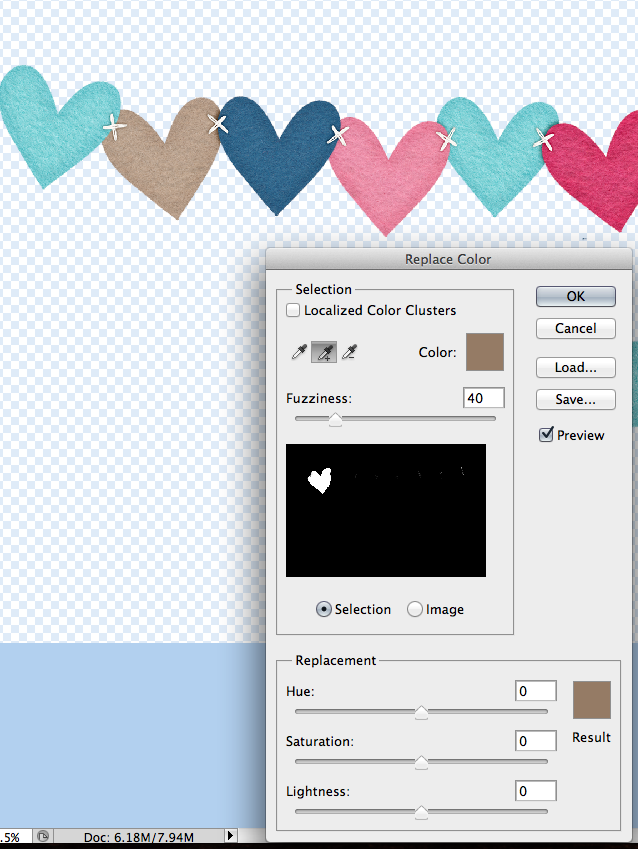
For this recolor method, I’m going to change the color of one of the hearts. Specifically, the tan one. In the Menu Bar, click on Image > Adjustments > Replace Color.
Recolor12

A pop up will appear, and you will use the eye dropper tools to select the color of what you wish to replace. If the image in the black box is not all white, just use the + eye dropper and click on other sections of the item that will be recolored. If other items are being included in the recolor, then use the – eye dropper tool to click and remove that color. You want a solid white image – this reflects what will actually be recolored.
Recolor13

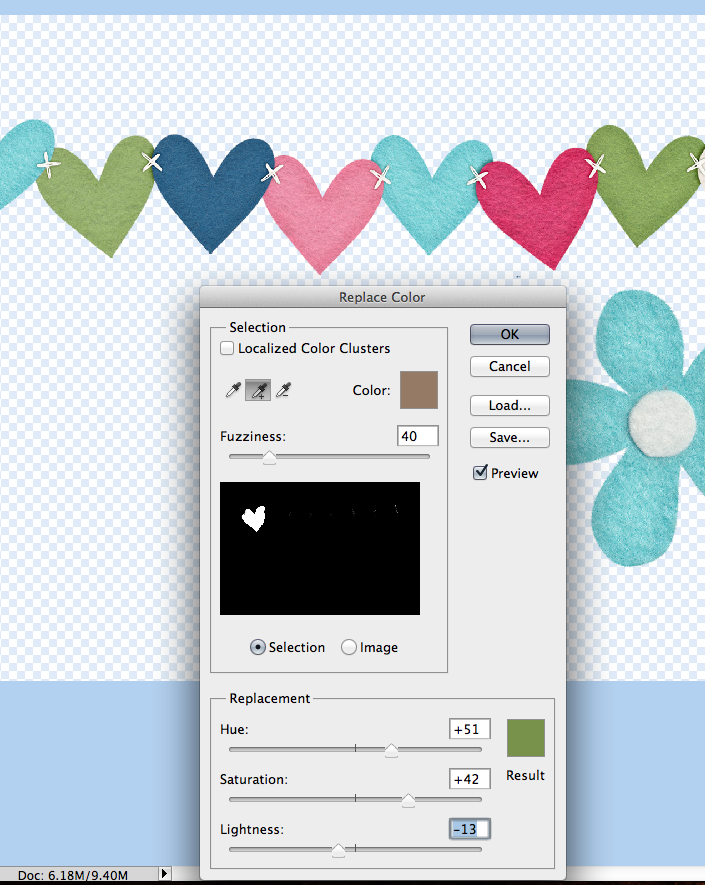
Now that you have the shape completed, we will start the color replacement. Use the sliders below, and move them to get to the color you want. Here is what my green heart looks like:
Recolor14

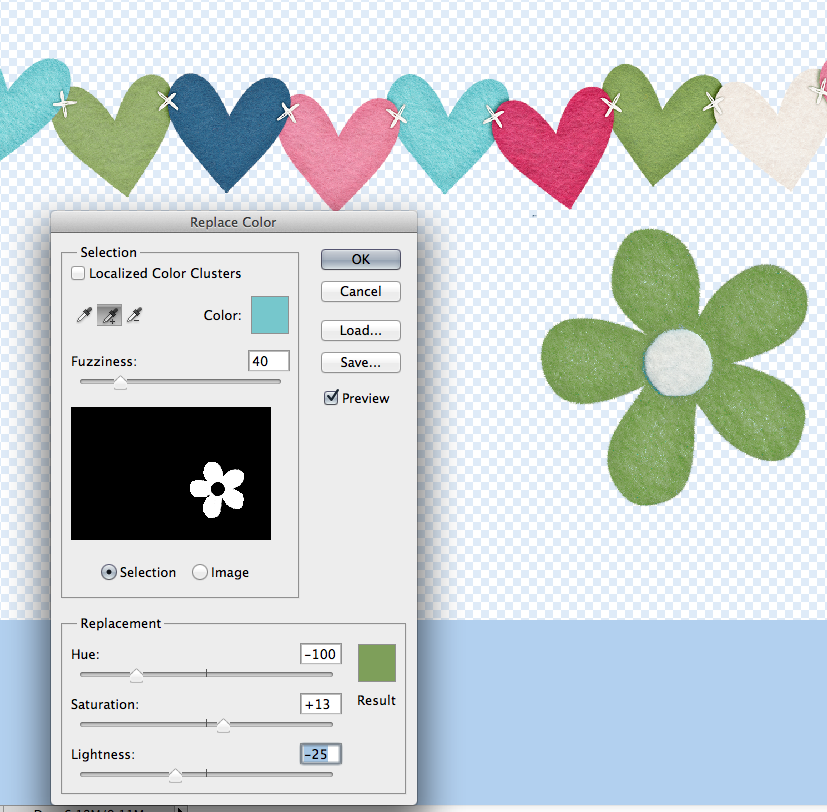
And here is a green flower:
Recolor15

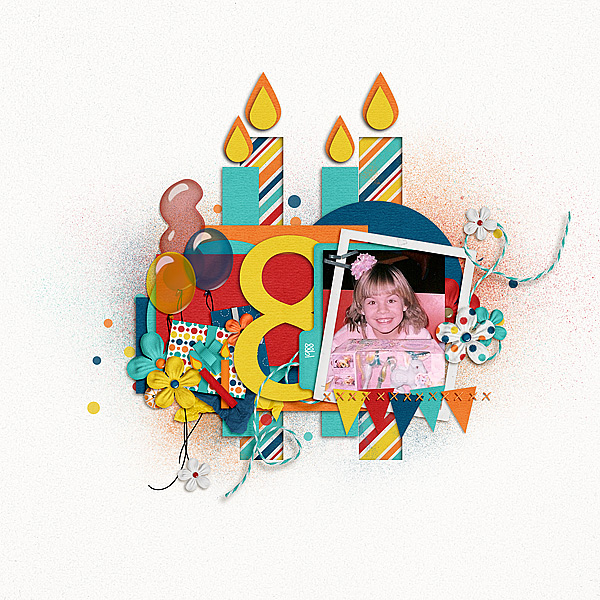
Two, pretty easy, methods for recoloring your stash! Stretch that stash and make it work for you! Here’s what the CT created. Melissa (pretty peaches) said she recolored the tissue paper to blue and the flower to orange. She changed the colour and also had to create another layer and use the filter multiply on it to give it the darker shade. She worked with One Year Older. 

LGFD-IOTCake-1_zpseae7e7be

Roxana (roxanamdm) said she used a red heart stamp, a gel heart and heart stitches from Technolove, which recolored easily with the Replace Color method. She then tried to recolor a pink heart button and felt but they proved to be a bit hard to recolor. She decided that Replace Color and Hue/Saturation technique weren’t working for her, so she clipped an orange paper. Then she changed the blending mode to color burn as well as an adjustment layer at this point.  With a Hue/Saturation layer, she moved the slider until I got the orange I wanted. The blue flower on top from About a boy was not from the tone I was using so recolored it with Replace Color as well. Roxana used Used Berryberry Blue, About A Boy, Techno Love and Mark My Words.

tiportutrecoloringfeb14-web

Jenn (jenny) said she used In the Backyard and recolored the butterfly, alpha, flower and background butterfly paper to orange!!

19_2014_backyardbirds_600_zps8524e38a

See, selective recoloring technique isn’t that difficult! Remember to play and try things out. There is always the Undo button! Hoping you learned a new technique, or another way of recoloring some of you (extensive) digi supplies! 😉 Have a great week everyone! Thanks for visiting! by_Jenn


1.2 Tutorial: Folded Corners

1.2 Tutorial: Folded Corners

Hi Everyone!  Welcome to 2014! I’m Jenn, aka j703, and I’m  excited to start the year fresh and enjoy it! Let’s get to today’s Tutorial: Folded Corners!

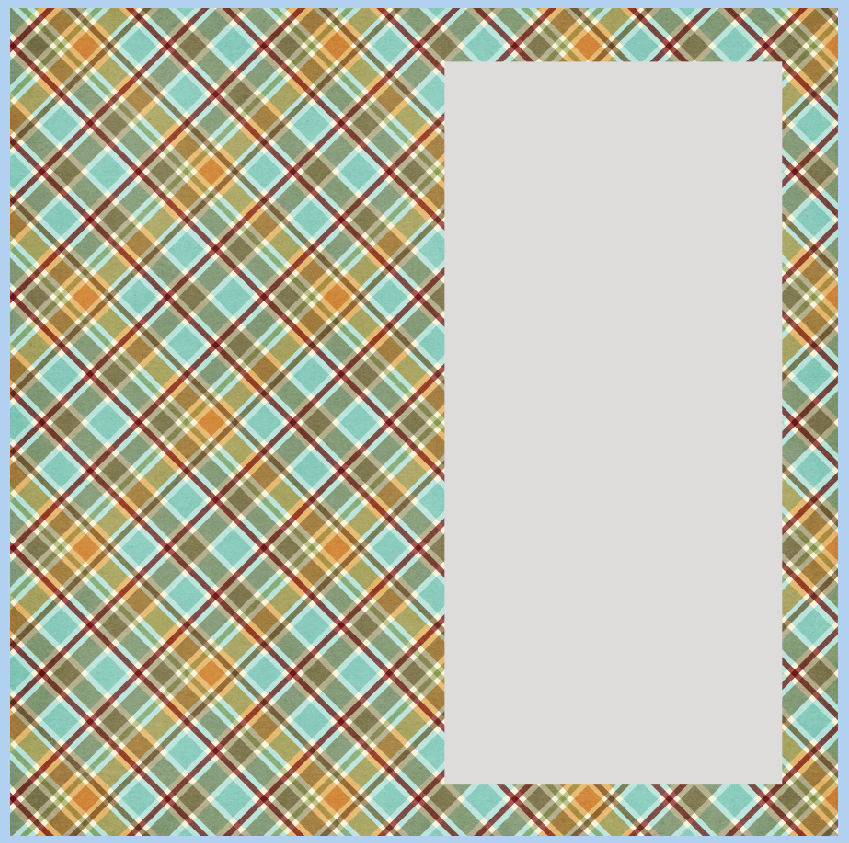
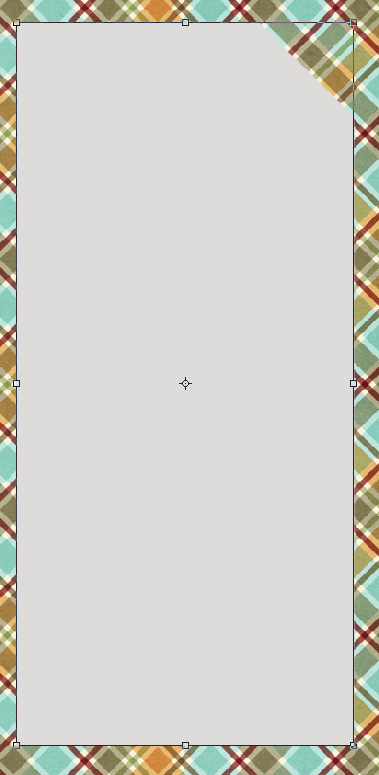
Begin your layout with a background paper, and a shape on top. For the tutorial, you will want a straight shape to easily try it out. I’ve chosen a rectangle – you can also try a circle or square. My examples uses Chelle’s Winter Woodlands kit.
FC1

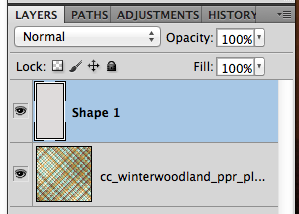
This is what my Layer’s Palette looks like:
FC2

Next, choose the Polygonal Lasso Tool. Click an hold the Lasso tool to get to the other tool options.
FC3

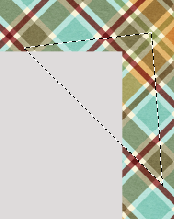
Once you have the Polygonal Lasso Tool selected, and the shape layer selected, click on the corner that you want to “flip.” I’ve created a triangular area that I will flip over, and once I connected all the points, the marching ants create the selection.
FC4

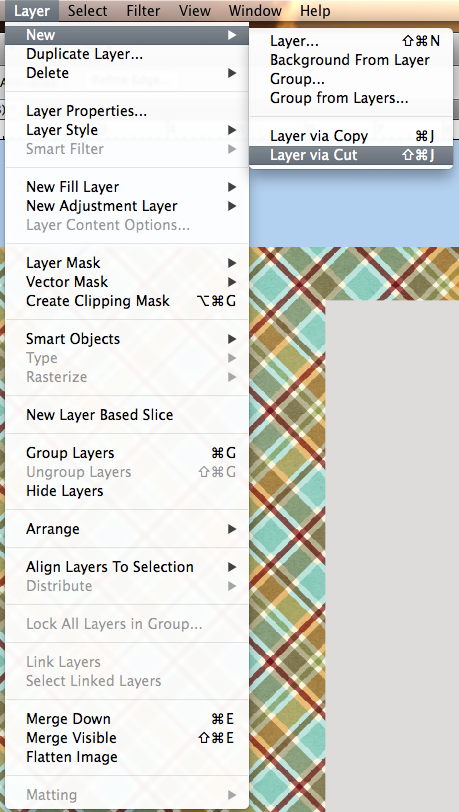
With the selection still marching, click on Layer > New > Layer Via Cut. This will cut the section out and put it on it’s own layer.
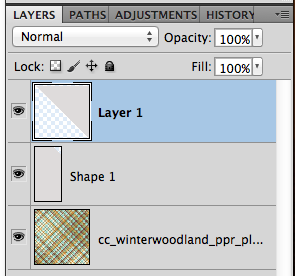
FC5

Here is what my Layers Palette looks like now. (If the ants are still marching, just press Command + D)
FC6

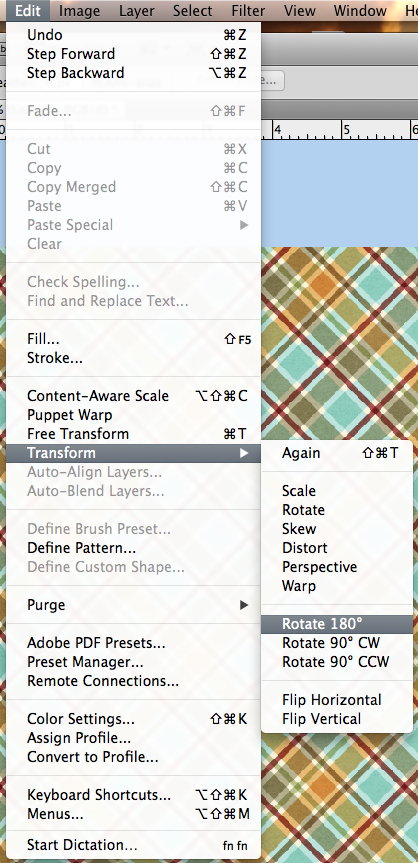
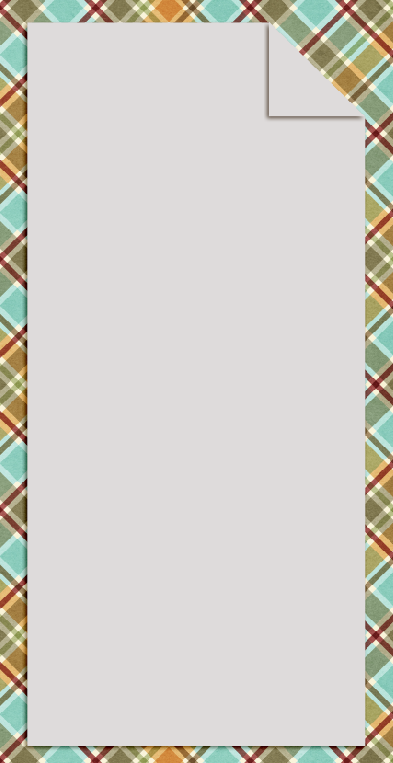
Now, with the new layer selected, choose Edit > Transform > Rotate 180*. Your shape should twist and not really be visible.
FC7

Here is what my shape looks like:
FC8

Add Shadows to all layers:
FC9

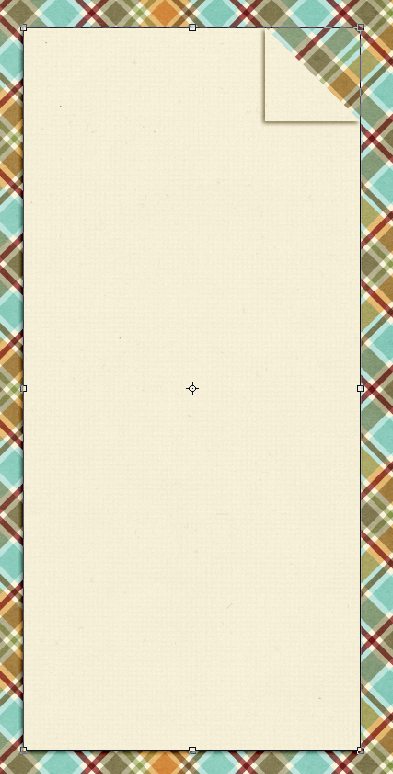
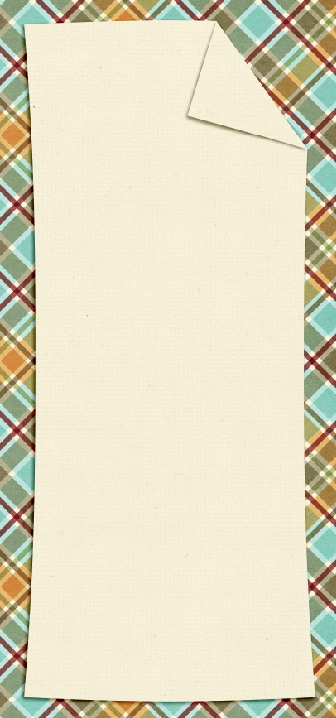
Add papers to all layers:
FC9a

Here is another example of a irregular shape. It’s a bit more tedious to get the edges/corners to line up. You may also want to warp the shadows a little using Edit > Transform > Warp. Irregular shapes are do-able, but take more time, and effort to get the same look.
FC9bHere is the layout that I made:

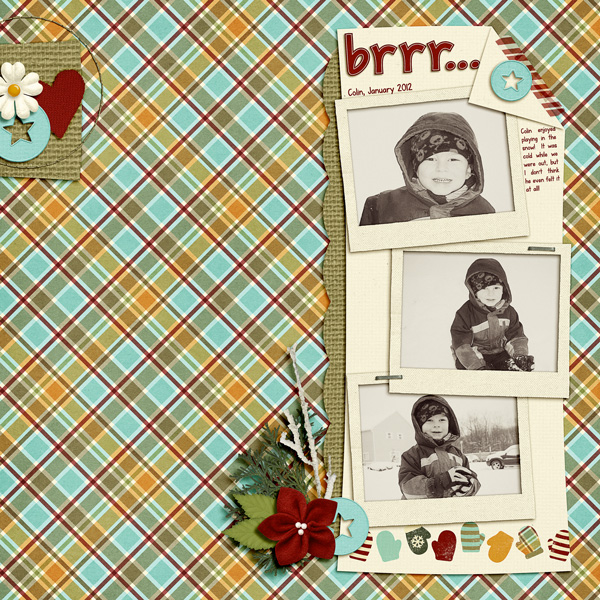
SO_CC_WntrWdlnd_KGFallForYou_ColinJan2012_WEB


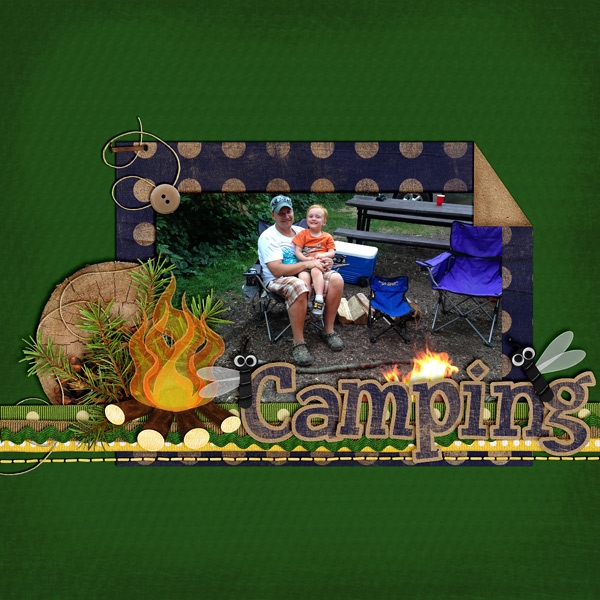
Here is a layout by Jenny (jenn18) that uses Let’s Camp S’more. I think the fire looks awesome!

35449


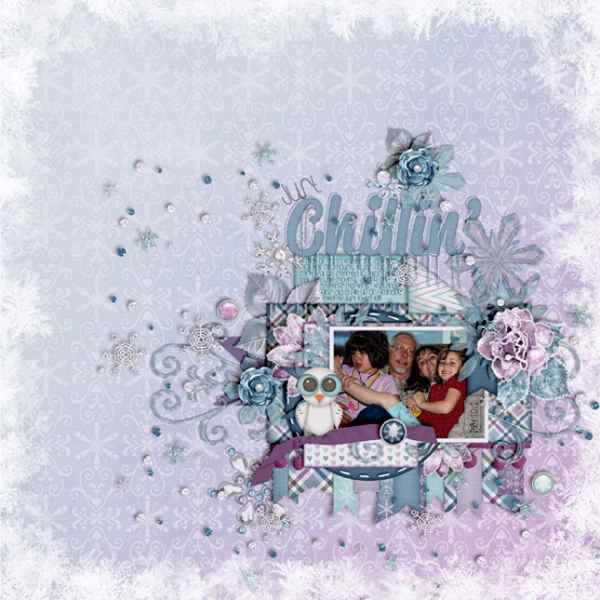
Leah (Cat Lady) used Snowlandia for her layout. So pretty!

35506

Not too hard – so give it a shot!  Add a little twist to your page using a folded corner! Have fun and thanks for visiting!

by_Jenn


12.26 Tutorial: Background Spotlights

Hi Everyone!  It’s Thursday, and we are ready to get back to normal in my house – especially after Christmas. This is Jenn, aka jk703, here to show you a fun way to change up your background papers. Background Spotlights are a way to give a spotlight or a luminosity effect on your background papers. You can highlight a pattern, or even just add a little accent to the background paper. I will show you guys two ways to do this, and there is always room for different steps or ways to get to the same ending. Play with all the blend modes, and even all the other styles – you might like what you accidentally learn! :) For my paper, I’ve used Chelle’s Capture Your December kit.

Here is the way using the Gaussian Blur:

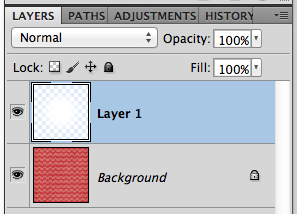
First thing you will want to do is to add a layer above your background layer. Use the box on the bottom of the Layers Palette and it will add a layer below the background paper. You can just move it up.

Next, choose your brush tool. For my example, I have it set to 2000px, soft, white brush.  SL1
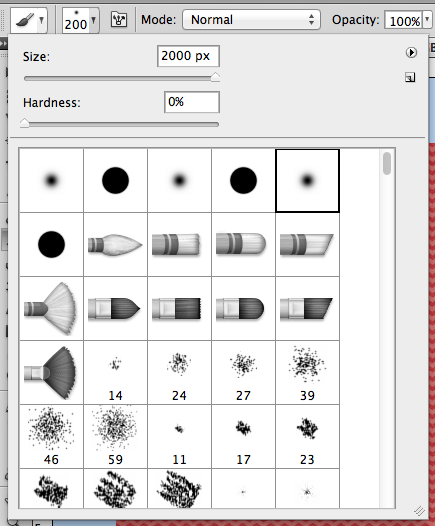
Make sure that your new layer is selected, and then click once or twice in the center. You will get a bright white spot, that feathers out to the outer edges. Below, is what my layers look like at this point.
SL2

SL3

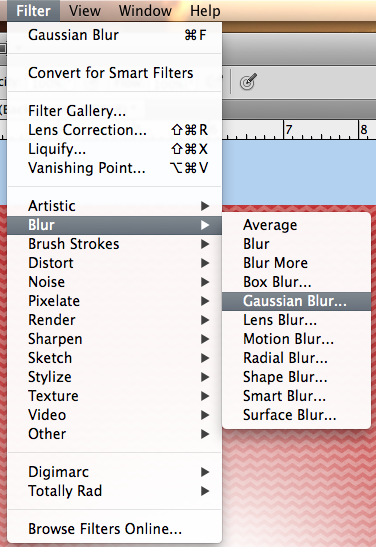
 Now, in the Menu Bar, choose Filter > Blur > Gaussian Blur.SL4
 

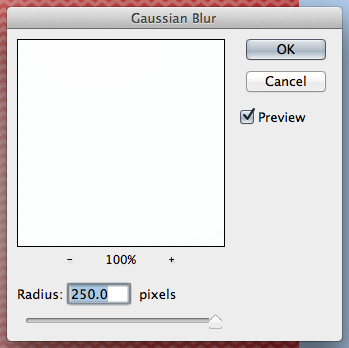
A menu will pop up – and I’ve moved the slider up to 250 – as high as it will go. :)  Click ok, and this will blur the brush circle out just a little more and lighten it at the same time.SL5
SL6

Now, on the Layers Palette, choose the bruch circle layer, and change the blend mode to Overlay.
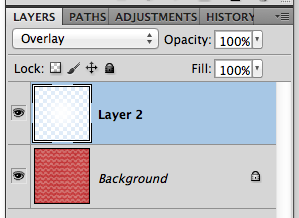
SL7

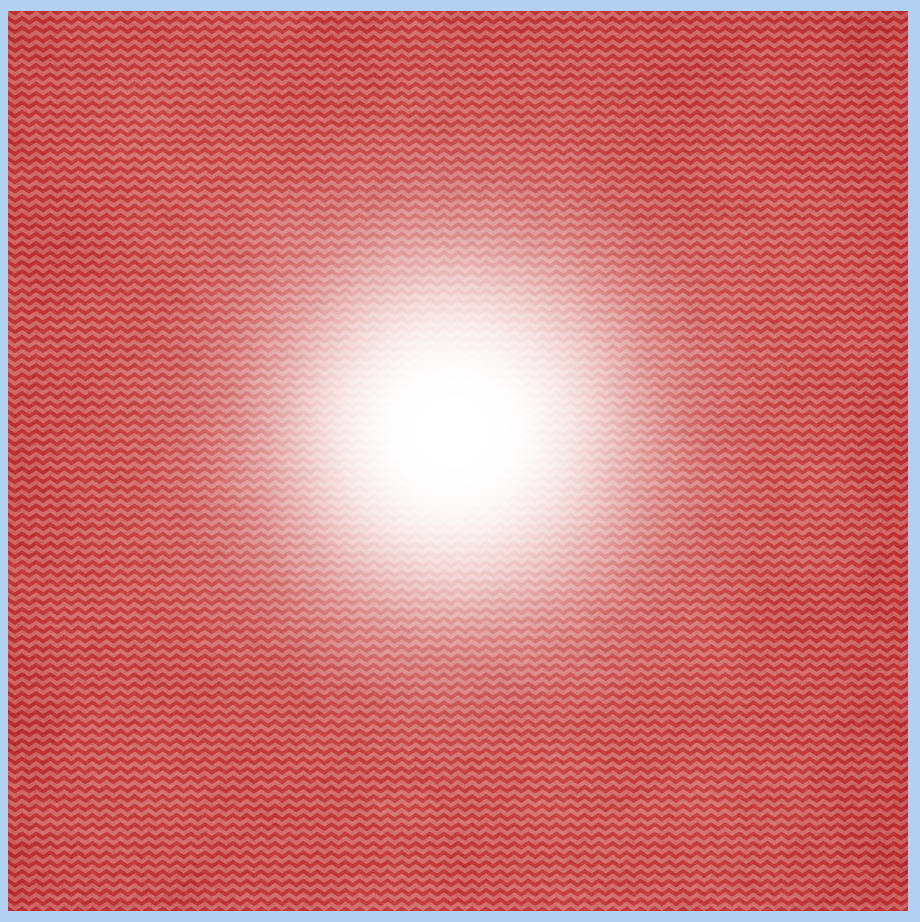
This is what you will end up with. A little light flare or spotlight. Again, try different blend modes, colors, and even different brushes and shapes!
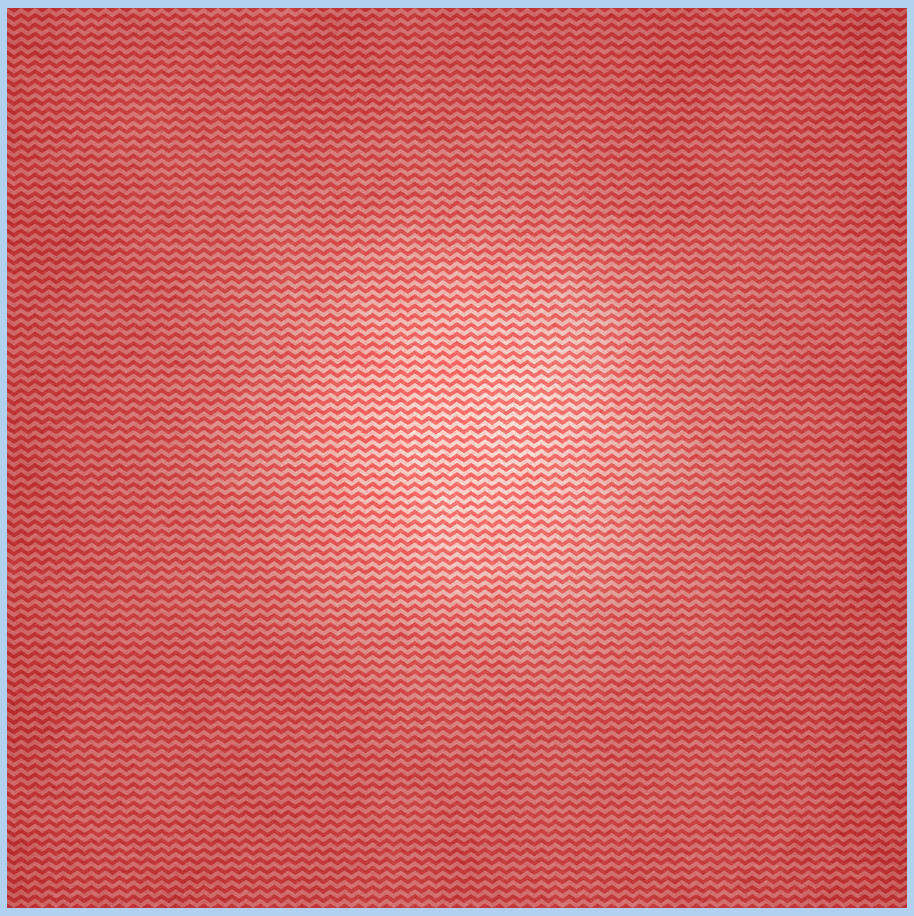
SL8

Now, I know there are oodles of ways to do things to get to the same effect in photoshop, so I’ve got another way to do this. This one is a little more difficult. For this version, starting from scratch, you will use the Layer Styles.

There are two steps that you need to do before starting this one. With your background paper open, and just in case it is your only layer, you need to remove the lock from the layer. Just double click on the layer. A menu will appear to name it – name it if you wish, and click ok.

Also, for this one, I’ve changed my foreground and background colors to match my paper. Like this:

GSP1

OK. Now, we will double click on the background layer and the Layers Styles menu will come up. Click on the Gradient Overlay. Here are the settings that I believe are default.
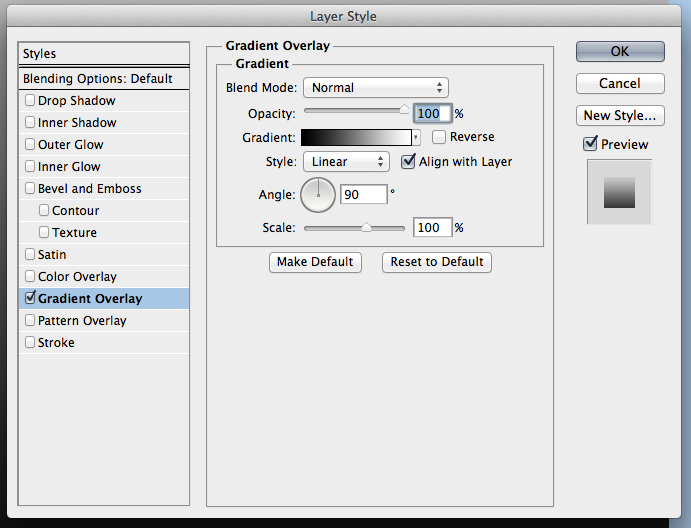
GSP2

Click on the Gradient that you see, A menu will pop up. By Gradient I mean the White to Black bar. We want to change the color of the Gradient to the color in the Foreground Box that we changed first. This is tricky – click on the bottom left corner slider box, and then click on the Foreground Color. The slider will change.
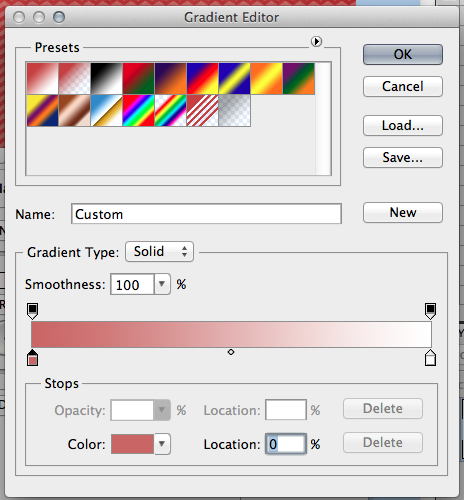
GSP3

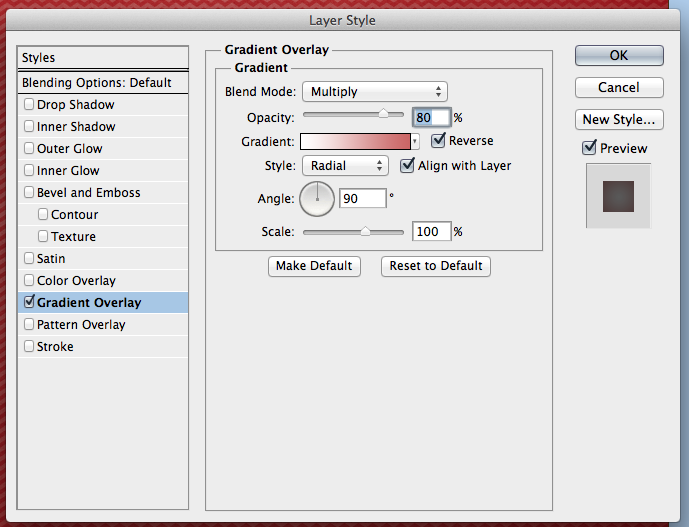
Next, (just in case you close it – double click on the background paper again to get to the styles), you will also change the Blend Mode to Multiply, Opacity to 80%, check off the Reverse box, and change the to “Radial.” Like this:
GSP4

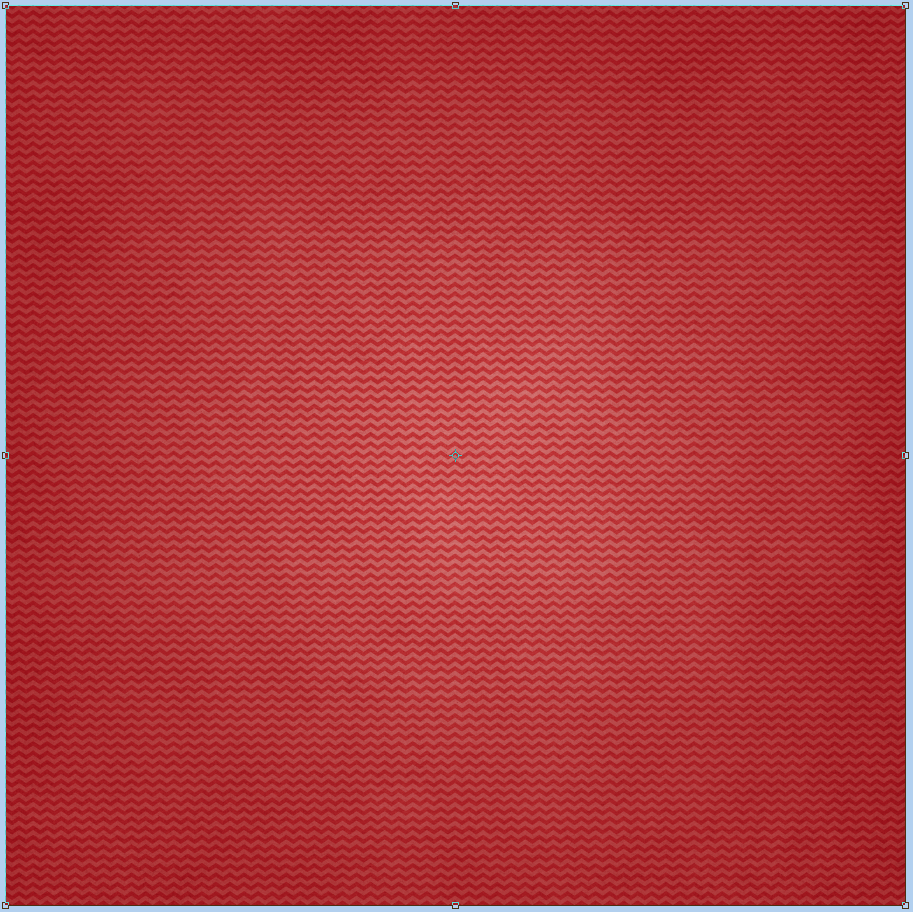
Once you click ok, your paper should look like this – a darker edged spotlight – way more subtle to the previous one. Remember, play with the Opacity, Blend Mode or even the Scale.
GSP5

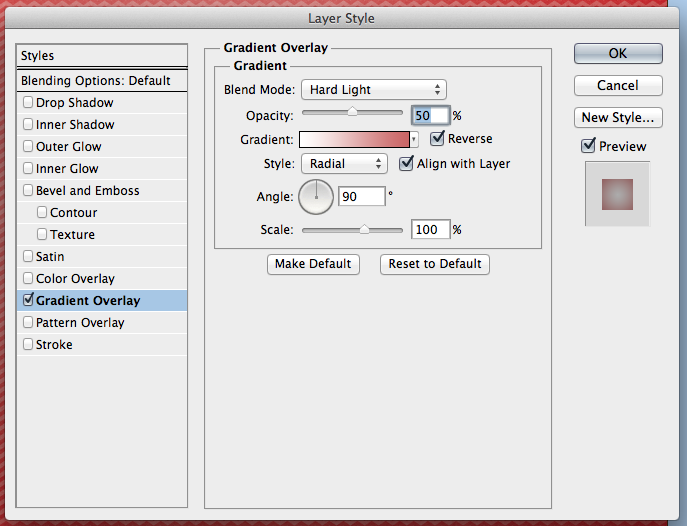
To make it a little more like the spotlight above, and to show how Blend Modes can make a change, here is the setting changed to Hard Light:
GSP6

And the new paper:

GSp7

Pretty easy, and fun to try!  Here is what the CT came up with:

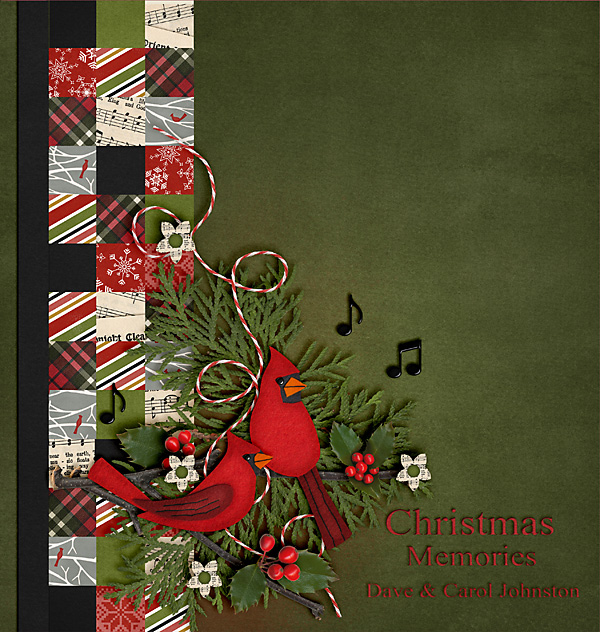
Carol (Iowan) created this wonderful page – I just adore the quilted look!  She used We Wish You A Merry Christmas by Chelle’s Creations. 
cover-with-highlight-copy_zps5bb7a584

Karen (zippyoh) said that she used the effect behind the title and the journaling paper for her layout. After she applied the gaussian blur, she then changed the blending mode to vivid light behind the title and pin light behind the journaling paper. Her layout uses Penalty Box and the journaling paper is from Toil & Trouble, with a template from Scrapping with Liz. Lastly, she also changed the color of the background paper by layering the red above the black, and lowering the opacity.
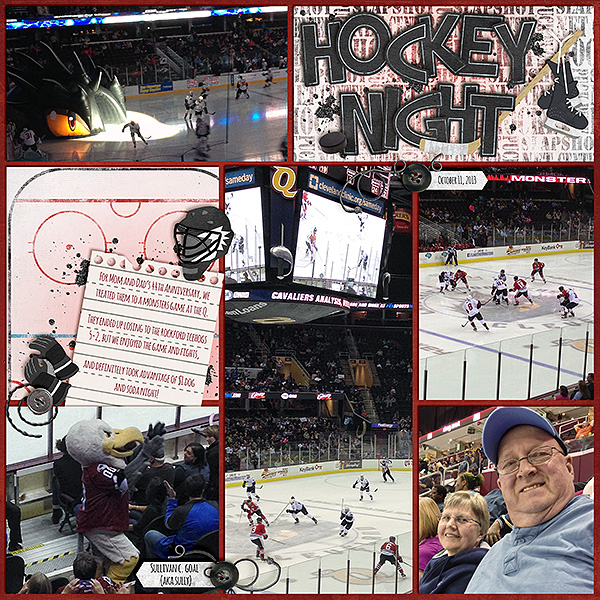
hockeynight2013_zps3fc07b6a.jpg~original

Jenn (jenny) used the effect on the overall wood paper so she could see the pain spritz a bit better….gave a lighter looking wood. She used Norlandia for her page.
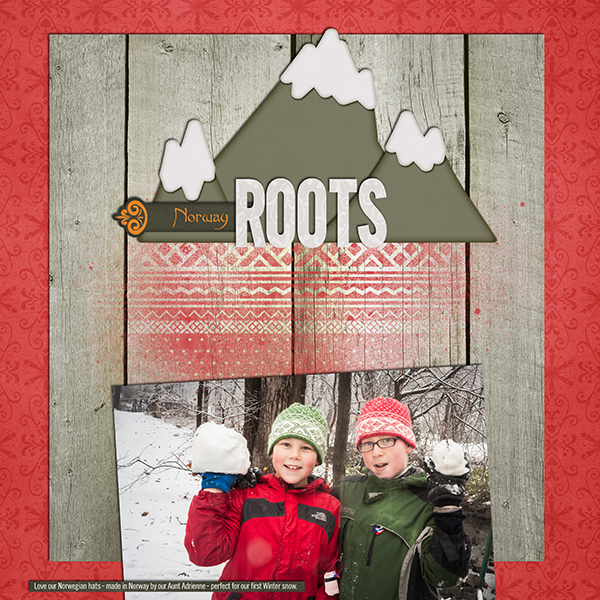
65_2013_Norwayroots_600_zps6ef7c43e

There you have it! A great way to change up the background papers! Hope you enjoyed this tutorial today. Have a great week everyone!

by_Jenn

10.10 Tutorial: Changing Paint Colors

10.10 Tutorial: Changing Paint Colors

Hello everyone! I’m Jenn, aka jk703 here to bring you a tutorial today! We are going to look at paint and splatters, and how to change their colors!  I’ll give you three ways to do it, though there are so many more ways, these are simple and really quick!  Perfect way to match the paint you want to use to the colors of the kits!
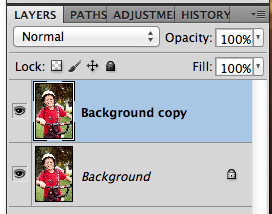
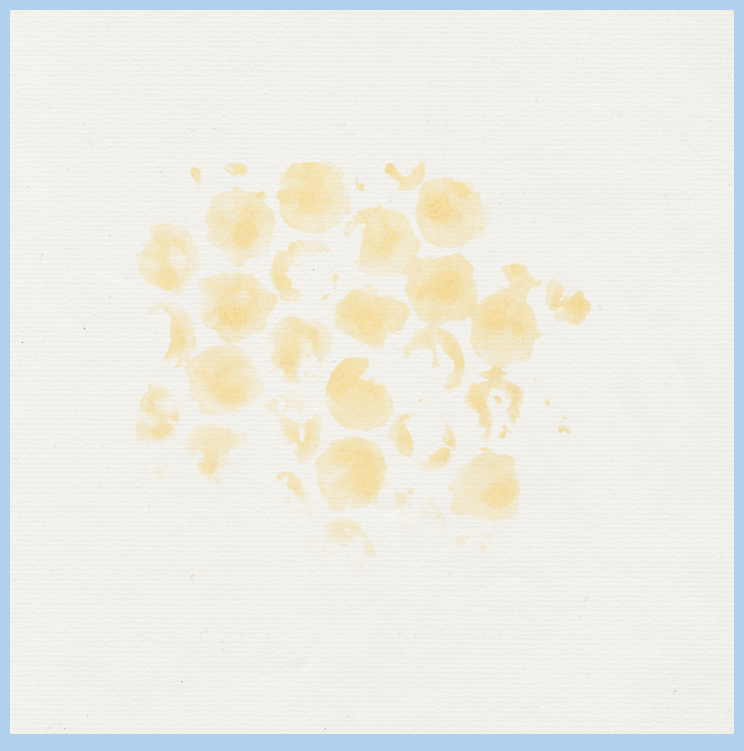
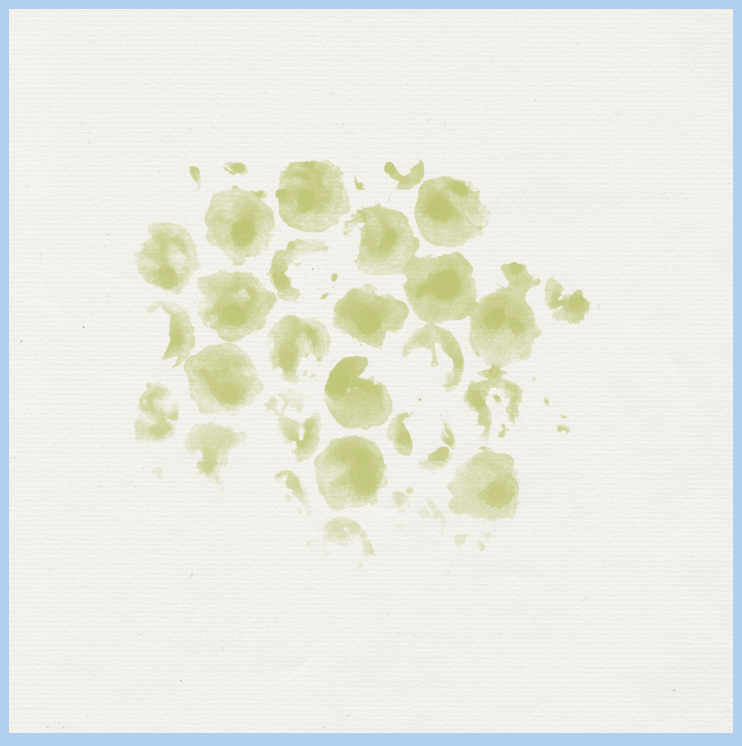
For my examples, I’m using the bubble wrap paint from Chelle’s Spic and Span kit – one of my personal favorites for the colors! :) You can use this for splatters, smears, paint, and many other items. Here is the pale teal bubble wrap, I’m going to change that paint color:PntChg1


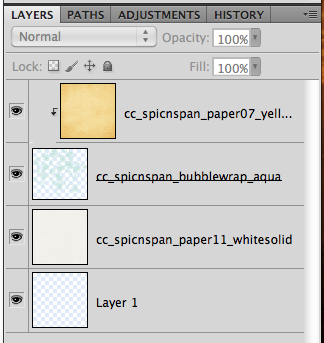
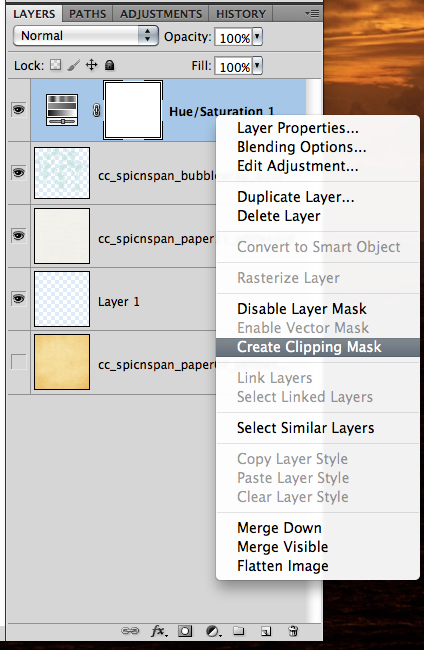
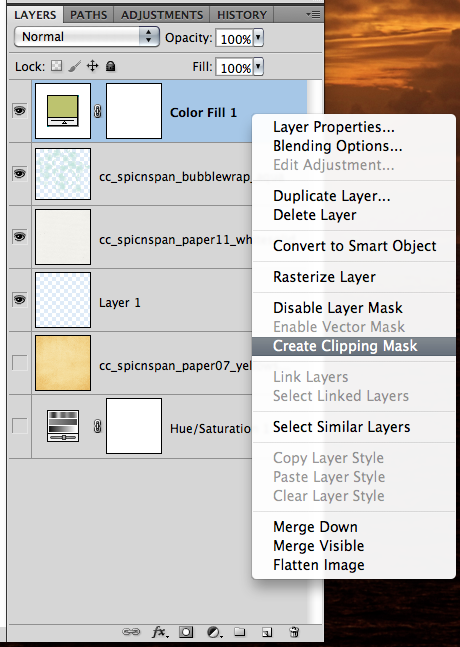
Now, the easiest way to change the color is to place a paper above the bubble wrap layer. Right click on the bubble wrap layer, and choose Create Clipping Mask. Then your bubble wrap will take on the color of the paper you clipped to it. Super, super easy.

PntChg2

PntChg3

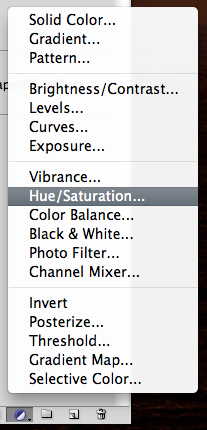
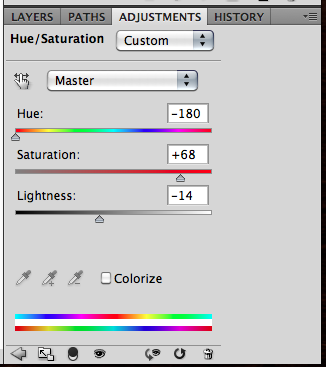
Next, you can use an Adjustment Layer – specifically the Hue/Saturation. With your bubble wrap layer chosen in the Layers Palette, click on the little circle half white and half black (or I call the Black and White Cookie) and choose Hue/Saturation. A menu will appear and you can move the sliders and play with the coloring. Don’t worry if it appears as if the whole layer is changing color.

PntChg4

PntChg5

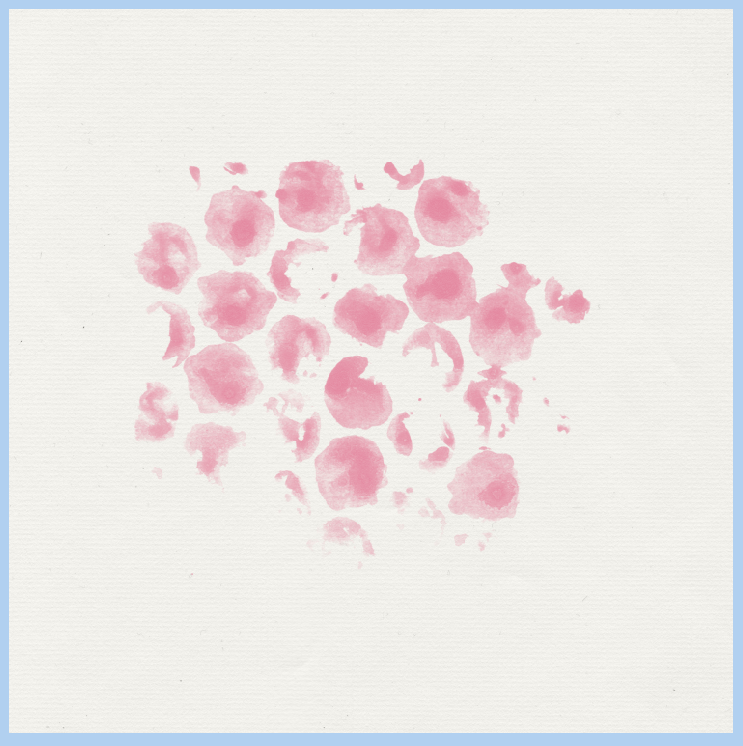
Once you find the color you want – I chose pink – click back to your Layers Palette. Right click on the Adjustment Layer, and choose Create Clipping Mask. The adjustment will then only be on the bubble wrap. Super easy, right?!

Screen shot 2013-10-09 at 9.18.53 PM

Here is how my pink turned out:

PntChg6

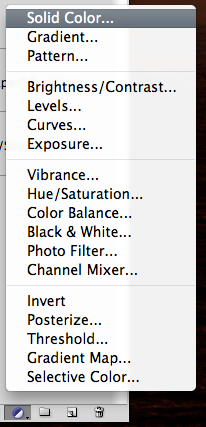
Here is one more way to change the color. With the bubble wrap chosen in the Layers Palette, choose the cookie (black and white circle on the bottom) and choose Solid Color.

PntChg7

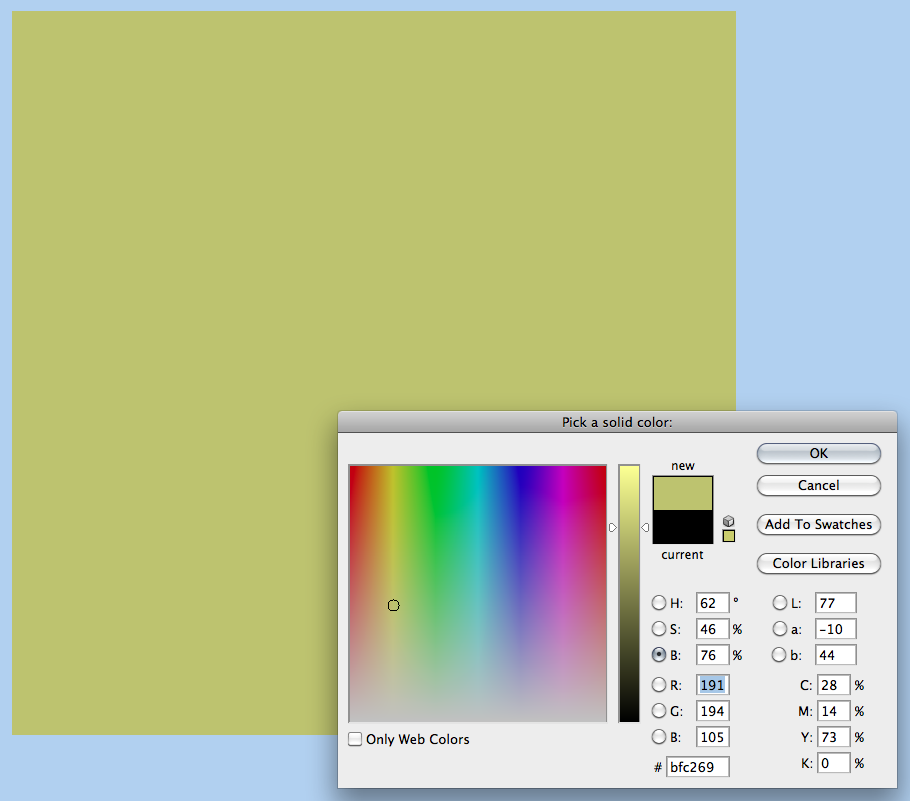
Your bubble wrap will go black – it’s ok! :) Next, choose the color, with the color picker that you want your bubble wrap to be. The whole area will then turn to that color. Click ok.

PntChg8

Click back to your Layer’s Palette. With the solid color adjustment layer chosen, right click and choose Create Clipping Mask. Your bubble wrap will now be that chosen color.

PntChg9

PntChg10

Pretty simple and very fast!  Makes for a great paint, splatter or bubble wrap that will match any kit or paper. Here is what the CT made – some super super awesome pages!

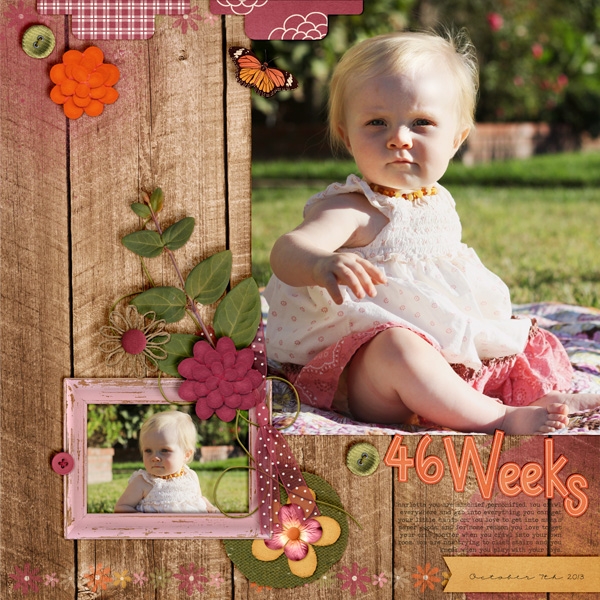
Jen made this gorgeous page of her daughter – so cute!  She used  Indian Summer, Indian Summer Plaids, and Apple of My Eye {painted}  for her layout. She started with clipping papers and then added a blend more for a little extra paint look.
30338

Next, Leah used Chelle’s Tea for Two for her layout – look at all those photos! :) She used the Hue Slider for re-coloring.
30344

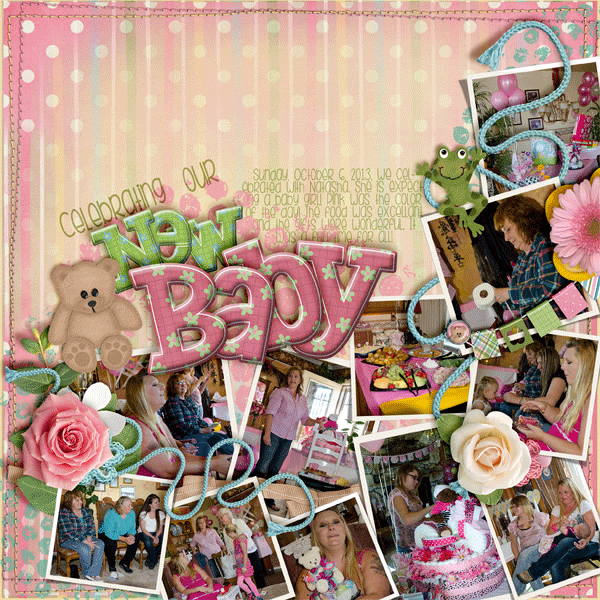
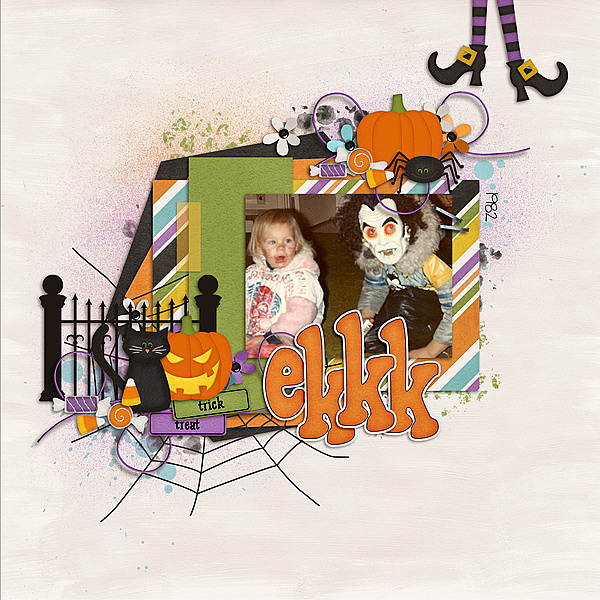
Melissa used re-colored bubble wrap from Spic n Span, re-colored the splats from Apple of my Eye, re-coloured the spritz paint from About a Boy, and the kit Eeeeek! Melissa clipped papers to the paints for re-coloring.

LGFD-AllHallows-4jj_zps830374bb

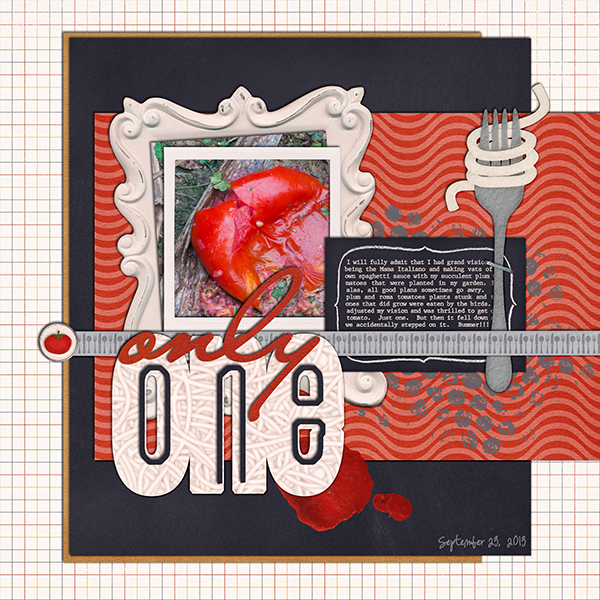
Lastly, Jenn used Pasta La Festa and Pizza Amore and the Hue Slider to change the Bubble Wrap. (I’m hungry now!)

32_2013_onlyone_600_zpsb950067f

There you go!  Changing paint colors is super easy and fast!  Hope you learned something new!  Have a great week!

by Jenn

9.12.13 Using Inner Shadows

9.12.13 Using Inner Shadows

Hi, Leslie here (lab130 in the Scrap Orchard forum).  I want to tell you how I make the Swiss-cheese effect in PSE.  The way I do it is to make it non-destructive because I always want to change my mind!   Too many times I’ve cut a hole in my paper and then decided later that the hole isn’t where I want it to be and have to bring the paper in anew.  Don’t know what I mean by Swiss-cheese effect?  Read on and I’ll tell you!

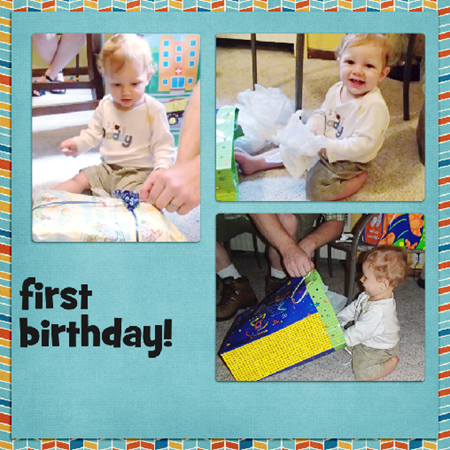
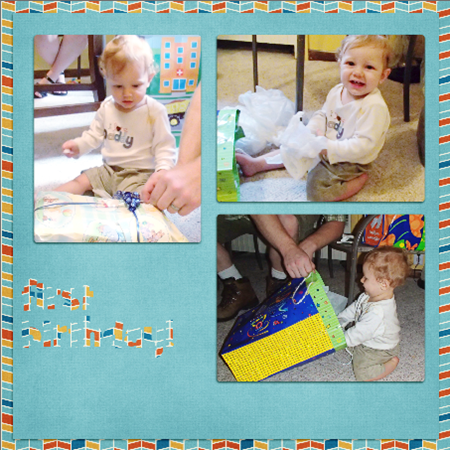
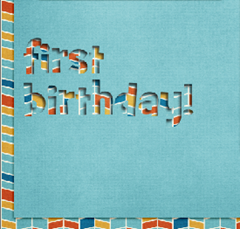
So, for this page that I’ve started of my nephew’s first birthday, I want the title to be “cut out” of the blue paper and reveal the patterned paper beneath. Here, I’ve used the font “GrilledCheese BTN”. And the kit I’m using is About a Boy by Chelle’s Creations.

image

So, then I’m going to clip a paper to the font layer by selecting the font layer and then dragging in the background paper above it.  Then using Control+G on a PC or Command+G on a Mac, I’ll clip the paper to the font.  It will now look like this:

image
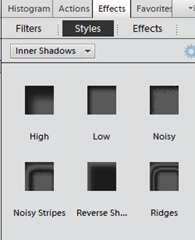
But I want the font to look like it’s cut from the paper, so we’ll need some shadows. I’m going to use the default Inner Shadows style from PSE.

image

These aren’t fabulous selections, and full Photoshop CS users have more choices and editing options, but we can made due in PSE using a little trick.  I’m going to apply the low shadow and make sure my shadow angle agrees with the angle of the blue paper and the rest of the shadows on the page.

Now we’re getting there!  But, notice that the shadows on the letters appear deeper and have a larger distance than does the blue paper at the corner.  It wouldn’t really be that way in real life, right? They should agree, mostly.
image

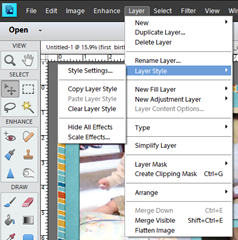
So we’re going to manipulate the shadow a little.  Anna Forrest has a nice action that helps to edit the interior shadows and gives you some of the full Photoshop capabilities.  But for purposes of this tutorial, I’ll show you the way to manipulate the shadow for FREE!  Go to Layer—>Layer Style—>Scale Effects.  I chose to scale down the shadow 50%, and I think that looks pretty close.  At this point, I have more flexibility to edit the shadow of the corner of the blue paper than the interior shadow, so I’ll play with that until it matches.  That doesn’t look bad, right?
image     image
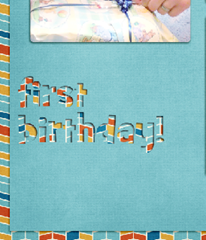
Except that now, I notice that the text doesn’t line up with the left of the photo above, and I want it to.  But now it’s not a problem!  I simply select the text layer, using Control T or Command T (Mac) to transform it and align it with the photo above.  Because I’ve used shadows and not actually cut the paper, making changes to the design is SO easy!  I can make the text bigger, too.  I just love having that flexibility!

image
Here is my finished page.  I added a little stroke that matched the kit’s off-white color just to define the alpha a little.  I’m pretending I did that with some chalk! haha!
——————————————————————————-
In Story Book Creator or Artisan, you can get a similar effect by putting shapes on top of your paper layer and finally when you’ve got them sized and placed JUST where you want them, after you have the rest of your page laid out, flatten the shapes to the paper and then use the Wand from the Cut and Fill ribbon to cut out the shapes you just flattened to the paper.  This will expose the paper you have beneath.

In Photoshop, you’d use the concept of inner shadows, but you can manipulate the size, distance, opacity and color without having to use the “scale effects” tool that PSE users would be compelled to use.
——————————————————————————–
Here is a page Donna (djp332) did using Prehistoric and a Santa hat from Ho! Ho! Ho! by Chelle’s Creations. She used the shadow technique to cut out the Mickey shape and also to inset her photos into the paper.  Man, the skeleton with a hat on it cracks me up!

image

Jan used Chelle’s newest kit, Aviator and a Fiddle Dee Dee template to make this cute page.  She used the interior shadows co cut out the clouds, exposing the cute plaid paper behind it.  Great idea!

jan-aviatortut

Here’s a final example from Jen (grahamlikethecracker). She used used Love Grows Bundle by Chelle’s Creations and Keepin’ It Real Double Templates by Scrapping with Liz.  She used the technique to make it look like she punched out the letters in her journaling square.  And what a cute baby!!

28966

————————————————————————————-
Well, that’s it for this week!  I hope you learned something new and we’ll be seeing you use this technique in your pages posted to the Gallery!

leslie