*Note I am using a simple re-color technique on this ribbon — for a more complete explanation of recoloring, see the recoloring tutorial.
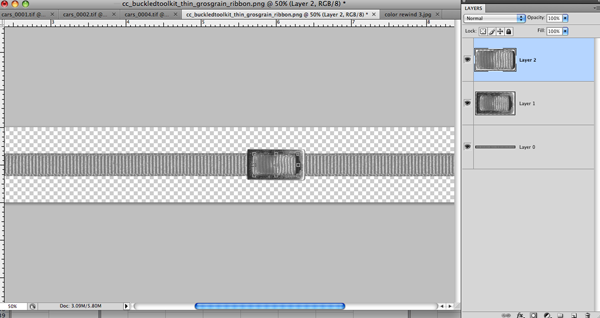
Let’s begin with one of the ribbon & buckle combinations. I am using the grosgrain thin ribbon with the square buckle. I have loaded the ribbon, the buckle, & the ribbon-inside-the-buckle into one file:
Now let’s make a striped ribbon. First we want a fill layer of a solid color. Now select the ribbon by ctrl-clicking on the image in the layers palette. Make a new layer above the solid color layer. Under selection choose contract selection by (I did some trial and error to get this one right–I wanted it to be divided in thirds) contract by 27. Then fill the selection with another color.
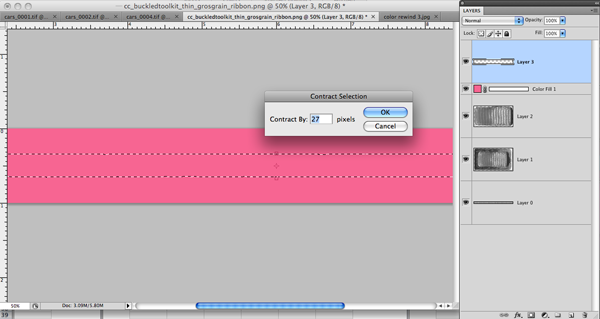
Merge those color layers together.
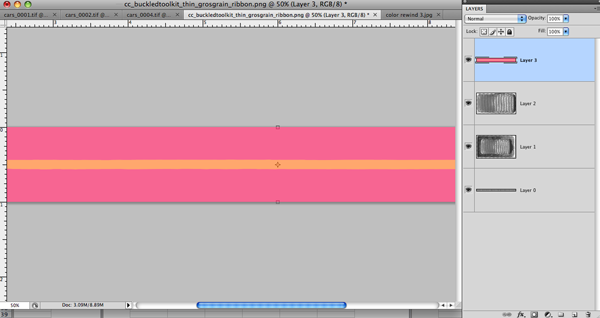
Move the “color layer” to just above the ribbon layer. Duplicate the ribbon layer. Move it above the color layer. Change the blending mode to linear light.
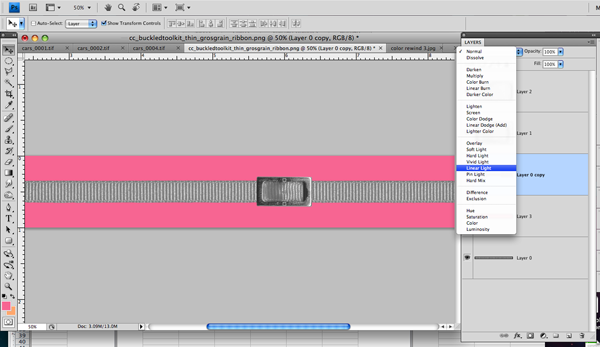
Adjust the levels of the linear light layer (with that layer selected, ctrl-L) Adjust it so that the ribbon looks less ‘contrast-y’. Make a note of what number you choose because you’ll need it again. I went with .86
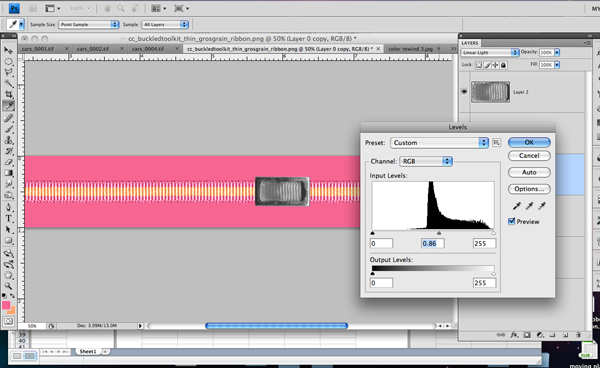
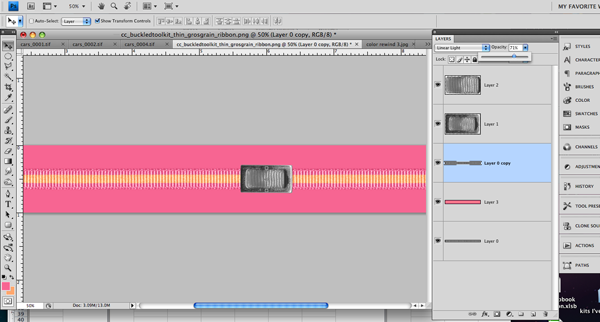
Lower the opacity of the linear light layer. I think I chose about 71%.
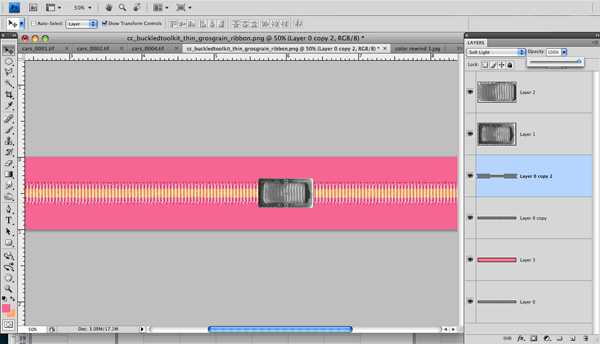
Those last 2 steps kind of muddied the ribbon. Duplicate the ribbon layer again moving it above the linear light layer. Change the blending mode to soft light. It just crisps up the image a bit (you made need a few of these layers, depending on the colors you use)
Now repeat the same process with the “ribbon-inside-buckle” layer (duplicate the color layer. duplicate the ribbon layer. move it above the color layer. change the blending mode to linear light. adjust the levels. adjust the opacity. duplicate the ribbon layer. move it above the linear light layer & change the blending mode to soft light)
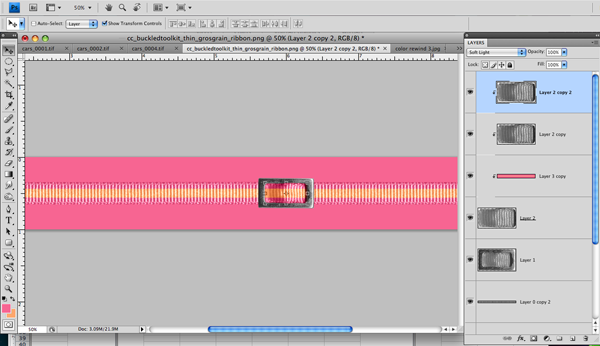
(This is where you would recolor the ribbon if you wish)
For the last step let’s add a “tail” to our ribbon. Clip the color layer to the ribbon layer below it. (I wait to do this step so I can make sure my ribbon stays true to the colors I originally chose as I add layers and change blending modes) Merge the flat ribbon layers.
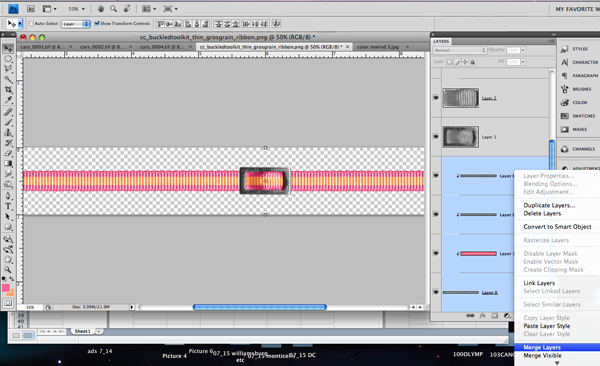
Duplicate a piece of the flat ribbon layer (select a portion of the ribbon & hit ctrl-J)
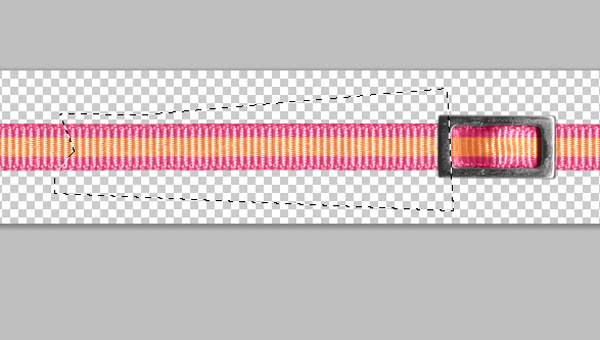
Move the edge of that piece under the edge of the buckle if necessary. Adding a shadow helps to define the edge. Rotating the ribbon piece just a bit also helps define it.
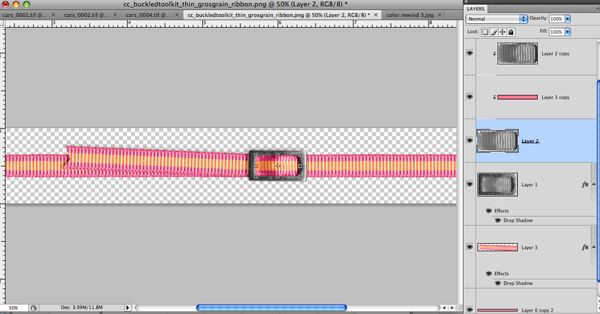
Note: Your finished product should have a shadow on the buckle & on the extra ribbon piece but NOT on the ribbon inside the buckle. Also be sure to remove the “outside” shadows before you save your final product.
If you have any questions or need clarification of part of this tutorial, send me an email (chelles.creations1@gmail.com) or post a comment here.


 Hi! I'm Chelle: a 40 something mom of 7. My husband & I live in a rural community in the rocky mountains with our 4 children still at home. In the winters we enjoy sledding & snuggling by the fire. I the cool fall evenings we love relaxing around the campfire & meeting friends at the county fair. Admiring the stars


