These directions are for Photoshop, but they should work in PSE as well. Open a .PSD file for one of the CU Layered Folded Ribbons. If you are using a patterned paper, you may wish to resize it to fit the ribbon.
Step 1: In this example, we will begin with a solid pink ribbon. I chose to add a fill layer of pink, and change the blending mode to color.
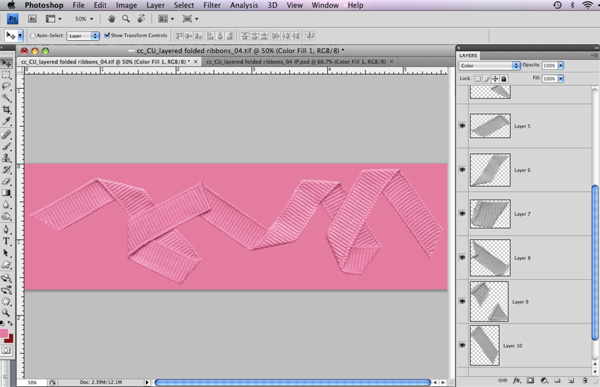
Clip the pink to layer 1, then duplicate the pink layer and move it just above each layer and clip to each one.
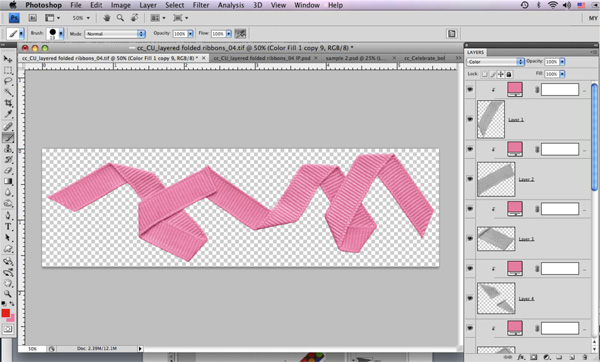
If you are using a patterned paper, this step would be the same, but then you would need to rotate each paper to the same angle as the piece of ribbon, for example…
This is the before:
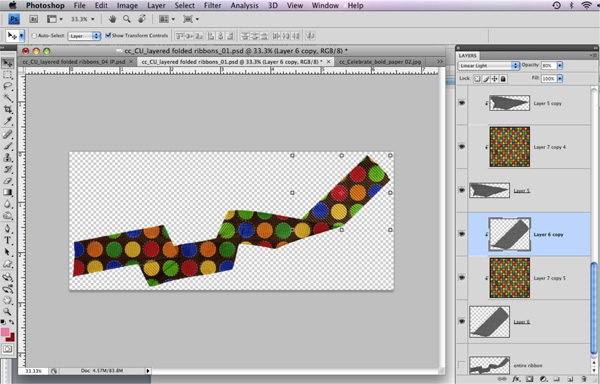
And here is the after…note each patterned paper layer is rotated, paying special attention to the folds where the pattern on the next piece should be to match.
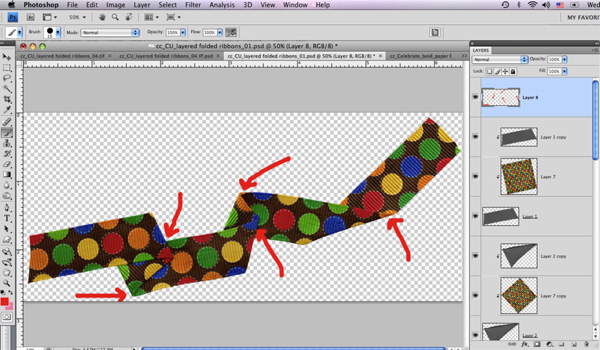
***Special note…I did not use the color blending mode for the patterned paper example, I used the duplicate the layer, move it on top, and change it to linear light, then lower the opacity (in this case to 80%) method to recolor each section.****
Step 2: Now we need to add the pattern. For this example, I wanted it to look like the flower pattern had been painted on. First, add your pattern. Duplicate for each layer, and rotate to fit each piece.

Continue ‘til each layer has a pattern fit to it. In some cases you will need to be careful with your pattern placement…if the pattern were folded on a flower and I would be able to see the other “half” of the flower on the other side of the fold, I would place the pattern accordingly – my flowers are too small to be visible under the folds.
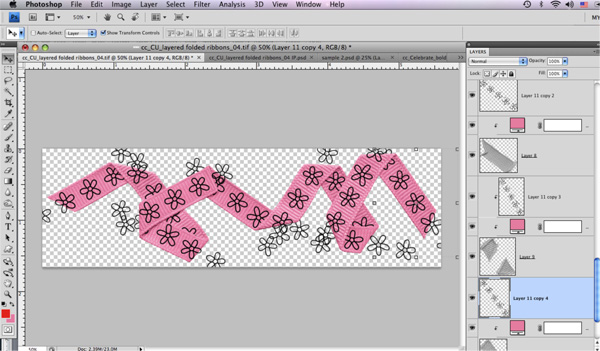
Step 3: Adding white “paint”. You will need to do this for each layer. First, we only need enough pattern for each piece. Ctrl-click on the “piece” layer, then select the corresponding pattern layer and hit ctrl-J. This will duplicate JUST THE PART OF THE PATTERN WE NEED. Then delete the layer with the excess pattern.

Repeate the process for each layer.
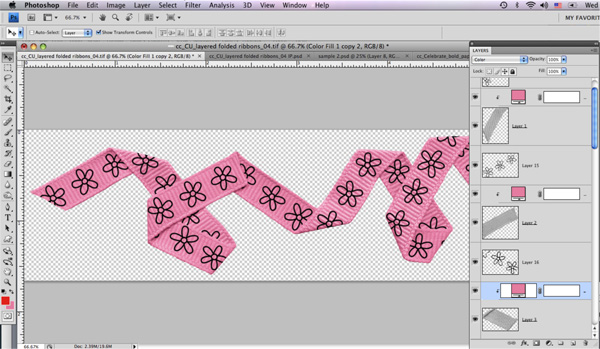
Add a white fill layer above each pattern piece. Clip it to the pattern piece.
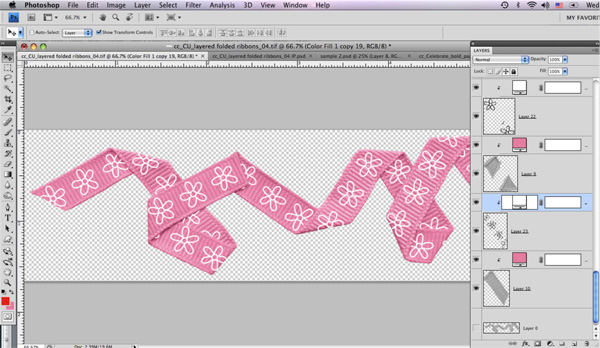
But white “paint” on ribbon tends to take on a bit of the ribbon texture. Repeat the following steps for each layer. Duplicate the ribbon layer, move it above the white layer and clip it to it, lower the opacity to 30%.
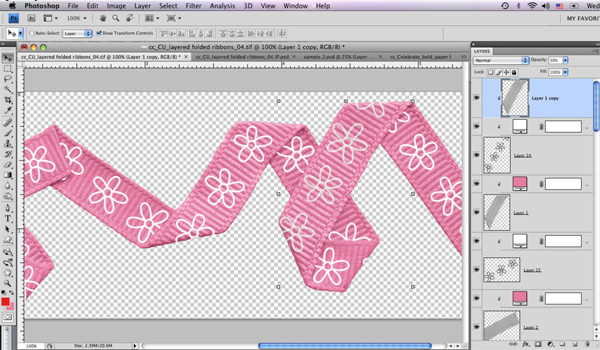
Repeat for each layer.
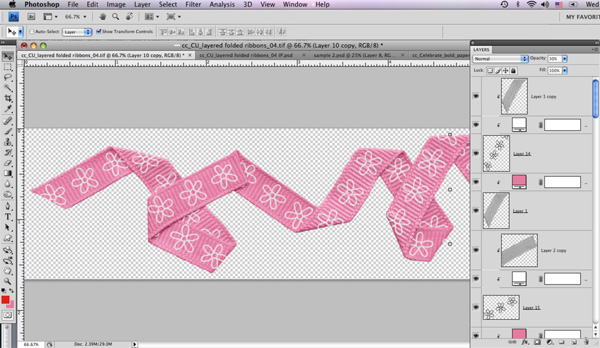
Step 4: Now to color the centers. I started by painting the color all on the same layer a new layer at the top of the layer stack. I didn’t worry about edges since I would be clipping the result to each layer.
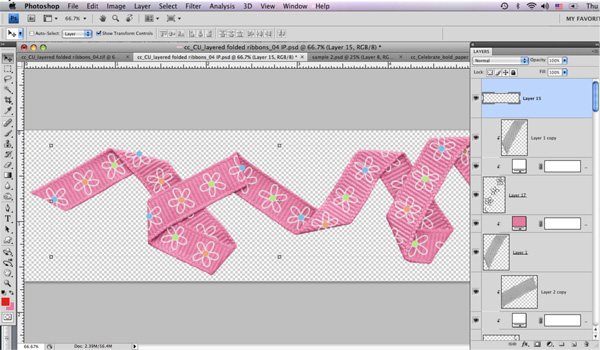
Change the blending mode to color and move this layer to just above the pink fill layer and clip it to the pink/ribbon piece stack. Duplicate the layer and move it above the pink fill layer for each piece of ribbon, clipping to the pink/ribbon stack in each case.
Beware of instances where you have color in the wrong place (along the folds) You could take time to add just the color for each layer to that layer and avoid these problems, but that would take much longer.
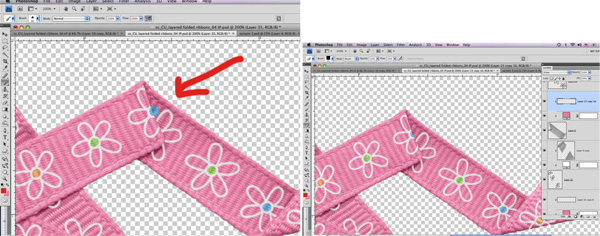
Step 5: Additional shading. Using the burn tool and a soft round brush, on each ribbon piece (the ones under the pink, not the ones above the white) darken the edges under folds to add depth.

Step 6: Tweak the color. Remember nothing is a boring as a color fill layer, even if you add a pattern. Merge visible layers, then on a new layer above the ribbon, with a color that is more yellow than the ribbon and a soft brush, paint in places that would have highlights.
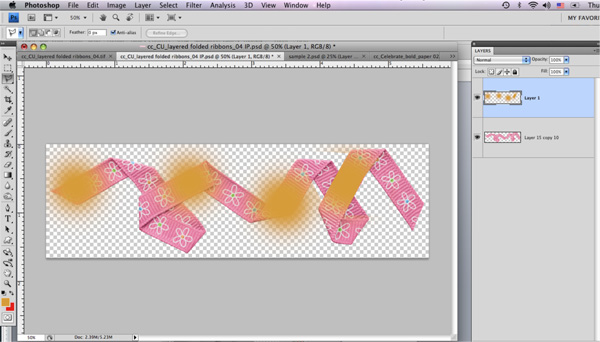
Repeat the process using a color more blue than the pink and paint the shadows.
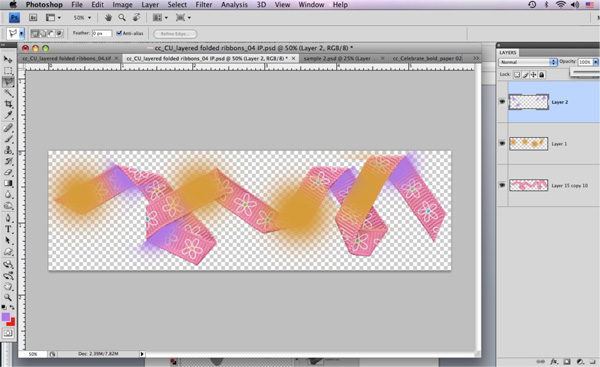
Note: I deliberately did this after merging to make the shadows and highlights more continuous. But as you can see I ended up needing to clean them up. (Note the places I cropped the painted color)
Change the blending mode to color, lower the opacity to just barely noticable, and clip the color layers to the ribbon.
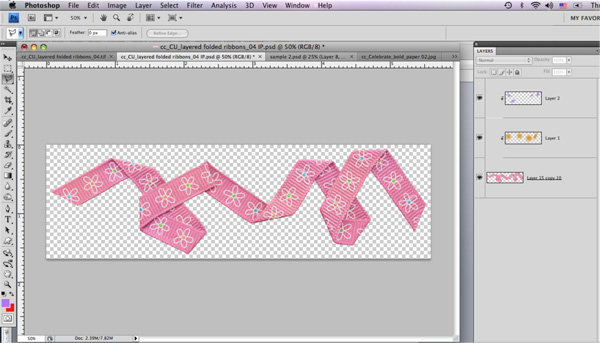
I ended up with opacities of 10% for the purple, and 7% for the orange.

If you have any questions, be sure to email me at chelles.creations1@gmail.com
Have fun!


 Hi! I'm Chelle: a 40 something mom of 7. My husband & I live in a rural community in the rocky mountains with our 4 children still at home. In the winters we enjoy sledding & snuggling by the fire. I the cool fall evenings we love relaxing around the campfire & meeting friends at the county fair. Admiring the stars


Pingback: 10 Great Ribbon Tutorials In Photoshop
Oh my goodness, I will never look at ribbon the same way again. Amazing!
Oh Caroline!You are so wonderful in so many ways. I miss your way with my kidods when you took their photos. No one captures them as you did.I appreciate you sharing this. My beloved friend Jamie (since Jr. High) is battling triple marker. It seems at every turn it’s bad news good news and back round again but man that girl is LIVING life!You have lit a fire under me and reminded me to appreciate everything I have and to live it up in all ways possible.May I share this link on my page so others might be inspired?Fondly,Robyn Sanchez
I really like and appreciate your forum.Really thank you! Really Great. Inocente