Here is a basic tutorial on how I create “solid” papers. There are 4 main parts to a solid paper: base color, variation, texture, & color variation.
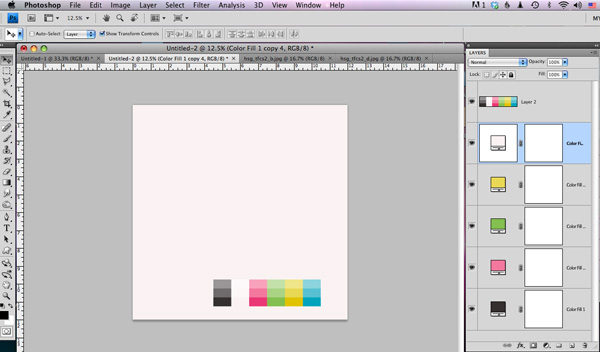
Step 1: The first part of a solid paper is the base color. Create a new 12×12 file. Drag your color scheme into this file. Now create a new fill layer with each of the solid paper colors you plan to make. (Making all of your papers from the same file will help them coordinate–yet be different)
The second thing a paper needs is variation. When you look at a piece of paper, there are variations–printing variations, paper variations, and lighting variations. In this section we are trying to recreate those variations.
Step 2: Open 4 or 5 overlays. I like the shabby ones best…some I’ve created for myself and my CU Shabby Overlays. Drag them into your papermaker file above the color fill layers.
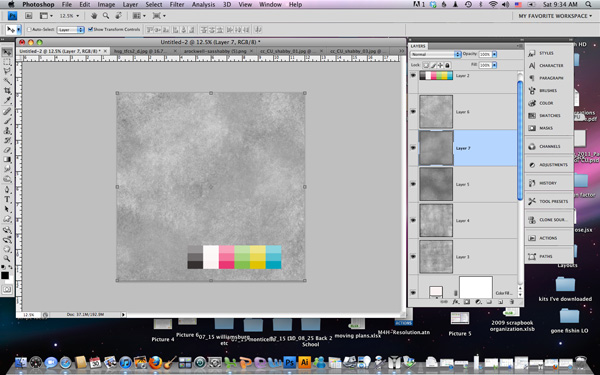
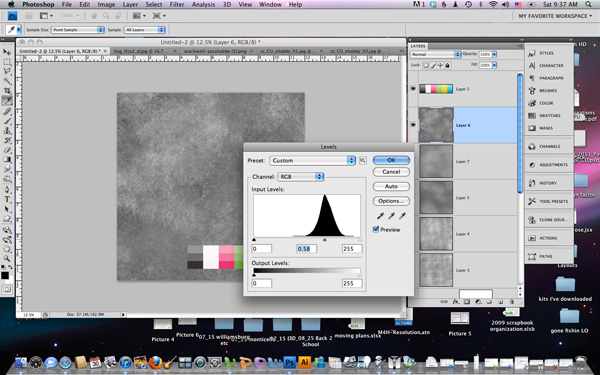
Step 3: Overlays can change the lightness/darkness of your paper if you don’t “normal-ize” them. With the overlay layer selected, open the levels dialog box (Ctrl-L) Adjust the middle slider until it is under the center of the mountain. Select OK. REPEAT for each overlay.
Step 4: Change the blending mode to soft light. REPEAT for each overlay.
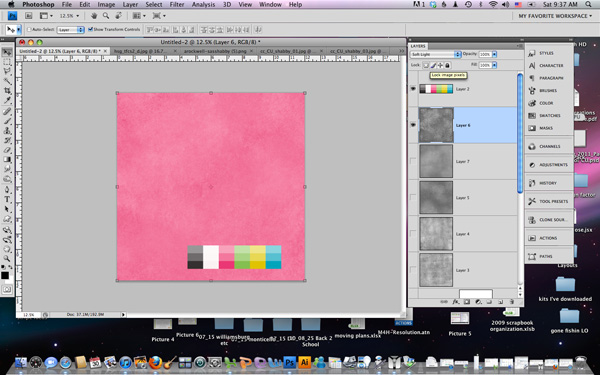
Step 5: Lower the opacity of the overlay. REPEAT for each overlay. This is one way to make each paper unique. I usually set one overlay to about 50%, and the rest around 20%…then for the next color I change the %s again…
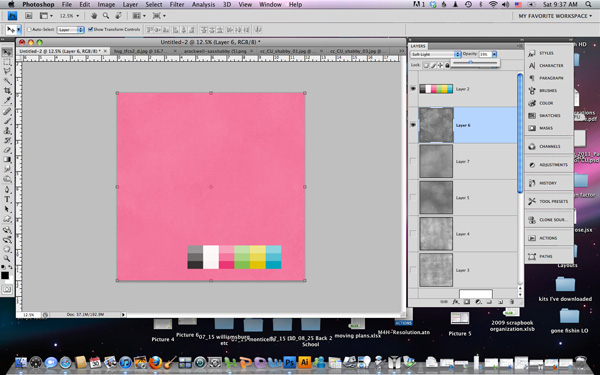
The third part is texture.
Step 6: Open a paper texture overlay and drag it into your papermaker file. Place it on top of the stack.
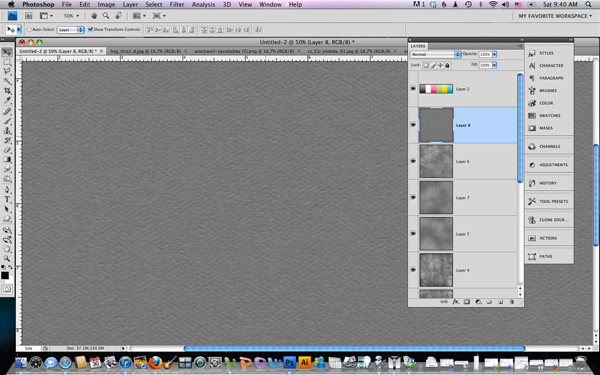
Step 7: Change the blending mode to soft light. Depending on the lightness/darkness of the paper, you may want to duplicate this layer.
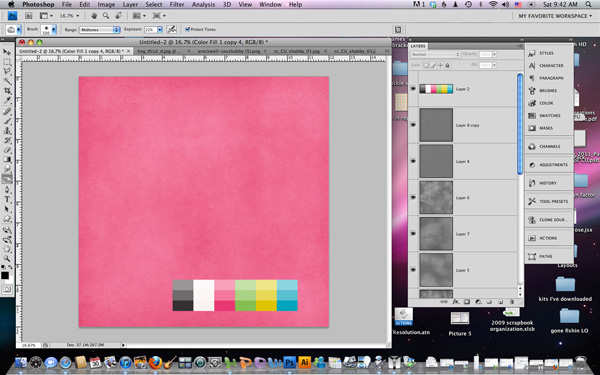
And the final part is color variation. For a solid paper, this step adds personality to your papers…and makes them coordinate.
Step 8: Create a new empty layer between the base color layers and the variation overlay layers. Using a texturizing brush, and a color from your color scheme, paint on your layout…here and there…change brushes and repeat.
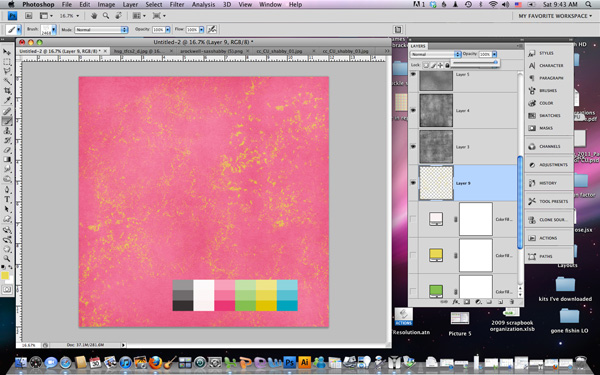
Step 9: Experiment with changing blending modes on the brushwork layer. Try colorburn or screen or soft light. Finally lower the opacity of the brushwork layer.
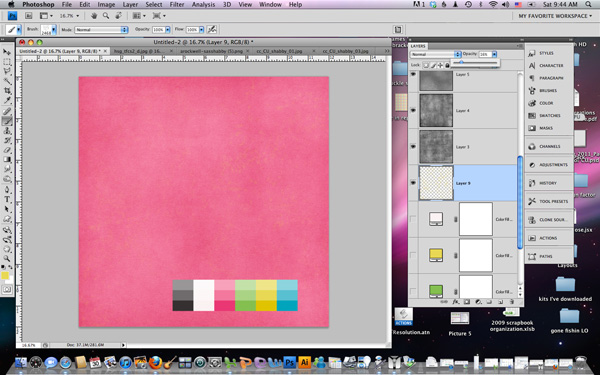
Finally…(here’s where the papermaker comes in handy)…Make the next solid paper: turn off/on the base color layers so you are making a new color. Adjust the opacities of the overlay layers. Create a new brushwork layer…or adjust the old one. And your next “solid” paper is ready to go.
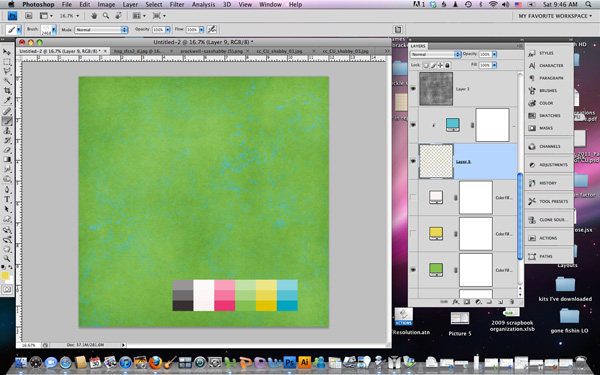
PS. Don’t delete the file when you finish with solids…I’ll show you how to use this papermaker for patterns in another “coming soon” tutorial.


 Hi! I'm Chelle: a 40 something mom of 7. My husband & I live in a rural community in the rocky mountains with our 4 children still at home. In the winters we enjoy sledding & snuggling by the fire. I the cool fall evenings we love relaxing around the campfire & meeting friends at the county fair. Admiring the stars


What a great post! Thanks for sharing such a fun thing!