I LOVE the “undo” part of digi-scrapping…and typing my journaling so there are no errors, but I also like the look of “hand-written” journaling on all those fun journal elements…especially the ones with lines.
There is a simple tool in photoshop & photoshop elements for quickly and easily lining up your journaling on those lines. It’s called adjusting the leading.
Here’s how to do it:
Step 1: Make a text box. With the text tool, click down in the upper left corner of the journaling element, then drag down to the bottom right corner without letting up on the mouse button. When you are in the bottom corner THEN let go. You should see your new text box highlighted (the marching border)
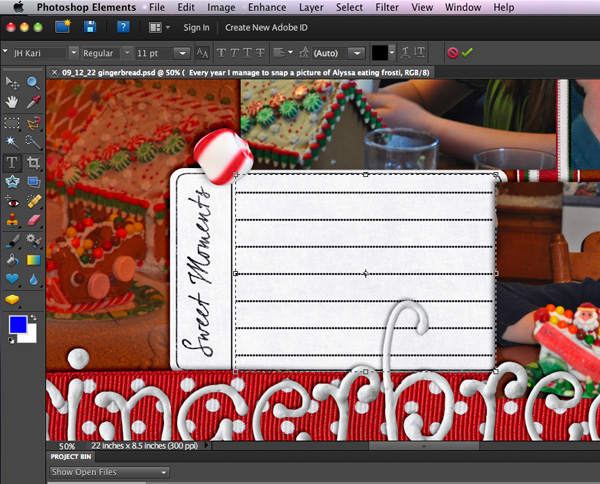
Step 2: Paste your text in the box. I suggest you write your story in a program with spell-check, then paste it into Photoshop/Photoshop Elements. You may need to edit it to fit. Move the text so that the TOP line of your journaling is sitting nicely on the top line of your journaling element.
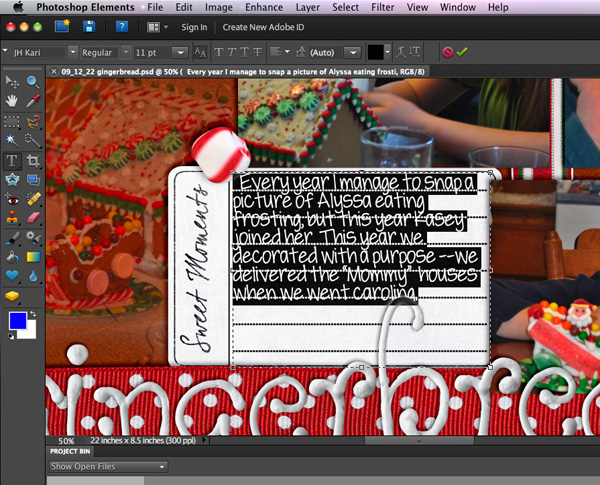
Now we’ll be adjusting the leading. THIS is the little box where we adjust it. (In Photoshop it’s under Window>Character.)
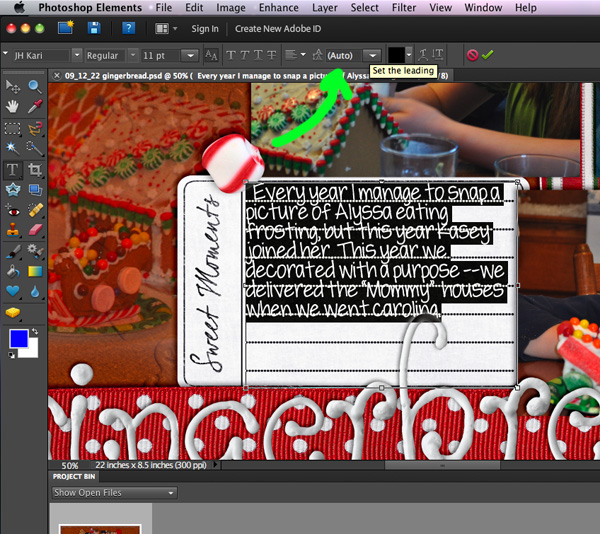
Step 3: Highlight all of your text (Ctrl-A) Then using the drop-down box try some of the preset numbers. Here I tried 18 (too small) then 24 (too large)
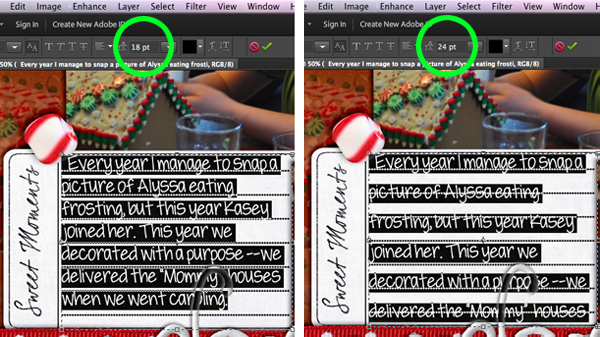
Step 4: Be a little goldilocks and figure out the exact amount to make your text line up with your journaling element lines. Mine turned out to be 19.2
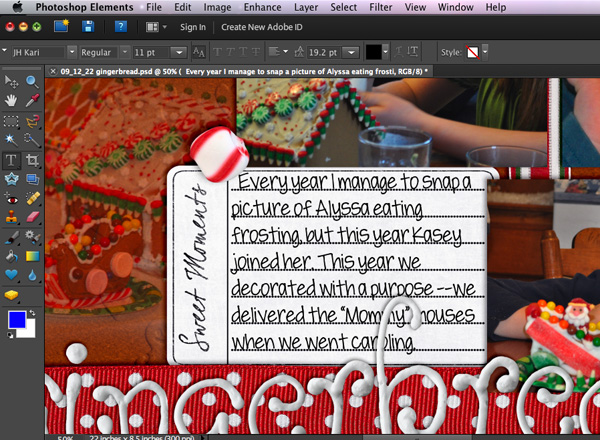
That’s all there is to it. Now you can have “hand written” journaling “on the lines” on all your layouts. It also works great on lined papers…like those in back to school kits.
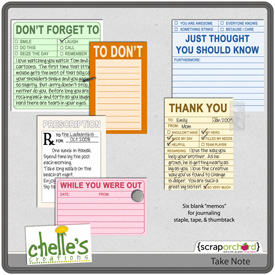
Here’s a couple of freebie journaling elements to practice on:



 Hi! I'm Chelle: a 40 something mom of 7. My husband & I live in a rural community in the rocky mountains with our 4 children still at home. In the winters we enjoy sledding & snuggling by the fire. I the cool fall evenings we love relaxing around the campfire & meeting friends at the county fair. Admiring the stars


Pingback: How do you make your journaling fit on the lines? |
Pingback: 4.11 Words On Wednesday – Where To Put Journaling -
Pingback: Leading - Adjusting The Lines | Digital Scrapbooking Words on Wednesday - Chelle's Creations | Chelle's Creations
Thank you for the great tutorial, Chelle
It took me forever to figure this on my own, til I saw a short cut by Scott Kelby. (I could not find the tip as I think I saw it in a video and I have no idea which one.) After you type your text, highlight it by dragging from the very first letter to the very last. Hold down ‘Alt’, then, using the ‘Up/Down’ arrows, begin scrolling. At first all the sentence lines may pile up in one line, but, keep scrolling until you get the distance between the lines (leading) where you like it. It moves in slow increments, so, keep at it.
You can lessen, or broaden the space between just two lines, if need be, by merely highlighting those two lines.
Thank you for this excellent tutorial!
Su