Today, I’d like to show you some layouts that Chelle’s team members have made to demonstrate using a favorite tip or trick in Photoshop or Photoshop Elements. There are tons of shortcuts and handy tricks in these powerful programs. If you can incorporate a few, you’ll find you are spending less time getting a digital scrapbooking page put together and more time enjoying your memory keeping.
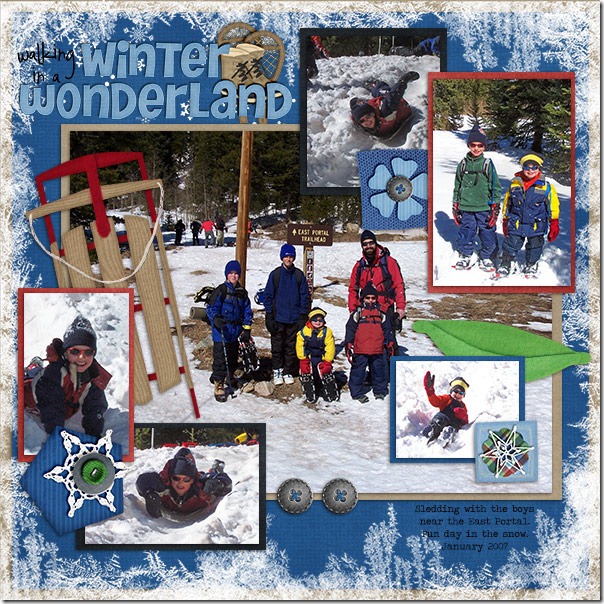
First tip: If you like to mat your photos on a page, Karen has a great tip for you. She makes the perfect mat for a photo by first duplicating the photo (hold down the alt key and drag the photo layer) Then, clip paper to the duplicate on the bottom. Next, select the photo on top and hold alt-shift to constrain proportions and make the picture smaller until just enough of the paper mat is showing on all sides. Center the photo on the mat if necessary. Here’s her page with all her fun pictures matted. Matting the photos is a great way to stack the photos on the page and get more photos included. She used Chelle’s Winter Thrills Bundle. 
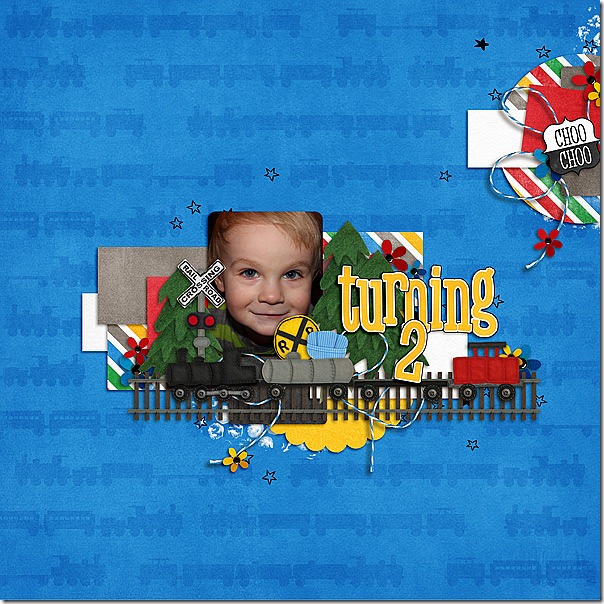
Another great tip is demonstrated by Melissa. She likes to duplicate elements on the page for visual impact. Again, she selects the layer to be duplicated and holds down the alt key while dragging on the layer to create a duplicate. Then she can click on the new element on the page and drag it to a new position. This duplicating action can also be accomplished by selecting the layer and typing the keyboard shortcut <crtl>J. This is a lot faster than finding the element in the project bin and dragging it onto the page. Here you can see Melissa duplicated the evergreen trees from the Choo Choo Bundle on her page in a fraction of the time it would have taken her to add each tree individually. 
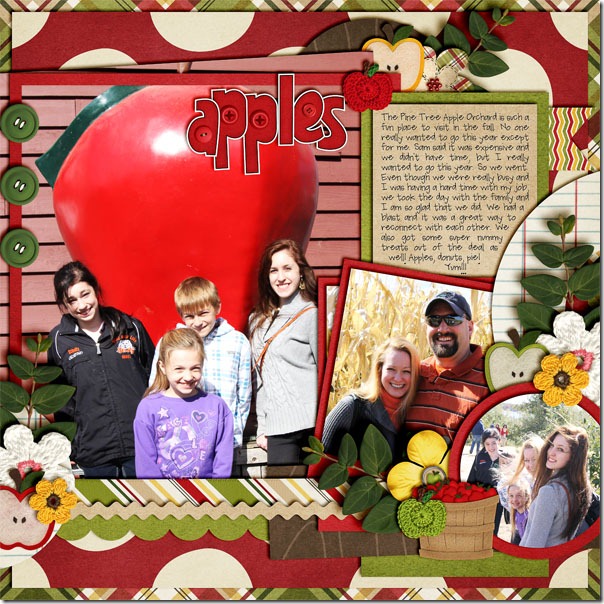
Another great tip after you’ve duplicated elements is to use the align and distribute buttons to locate your duplicates on the page. JennS made a cute page about a family trip to the apple orchard using Chelle’s Apple of My Eye Bundle. She duplicated the green buttons, roughly placed them on the page, and then used the align and distribute button to place them in a vertical line, evenly spaced on the left side of the page. 
Finally, Jenn (jk703) told me that she has a favorite way to preview fonts on her page. Have the Type Tool selected. Click on your journaling layer, and then highlight the text that you’ve already typed out. Next, click on the Character Menu, and locate the font drop down menu. Click inside, where it says the name of the font. Then use your arrow keys and scroll through your fonts slowly. Your journaling will change every time you press the arrow key up or down. So easy to preview! I LOVE this tip!
I hope you’ve been inspired to try something new. I can’t wait to see your pages in the gallery at Scrap Orchard! Be sure to tag your pages with #chelle if you use any of Chelle’s products – I would love to see them!


 Hi! I'm Chelle: a 40 something mom of 7. My husband & I live in a rural community in the rocky mountains with our 4 children still at home. In the winters we enjoy sledding & snuggling by the fire. I the cool fall evenings we love relaxing around the campfire & meeting friends at the county fair. Admiring the stars


