Ever wondered how easy it is to create a custom alpha with one of my Alpha Doodles? Here’s how I do it:
Step 1: load both the “outsides” and the “insides” into the same document:
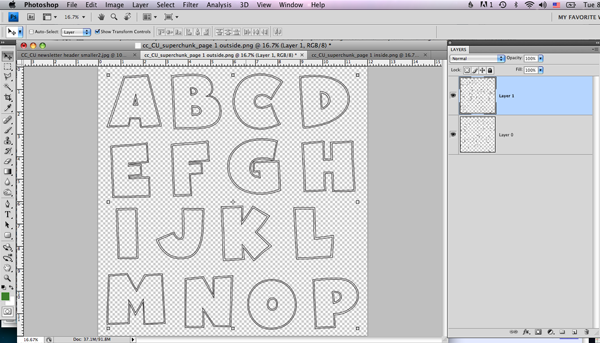
Step 2: Select the insides of each letter (on the “insides” layer) . Expand the selection by 3 pixels. Then on a new layer BELOW the insides doodles, fill the selection.
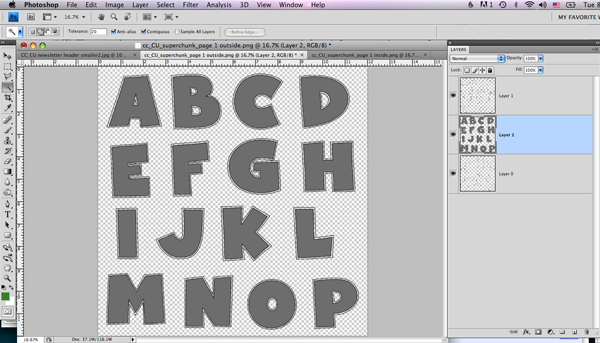
Step 3: Select the insides of each letter (on the “outsides” layer). Expand the selection by 3 pixels, then on the OUTSIDES layer, fill the selection. Note: whether to fill the insides/outsides layers, or to fill a new layer depends on the look you are trying to achieve. I want the inside doodles to show up in my final product, so I did the insides on a new layer.
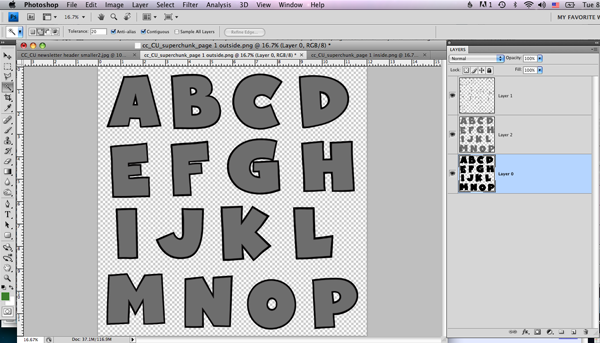
Step 4: Add your papers. A nice color or pattern for the insides…clip it to the insides fill layer. And a neutral (or contrasting paper) for the outsides…clip it to the outside layer.
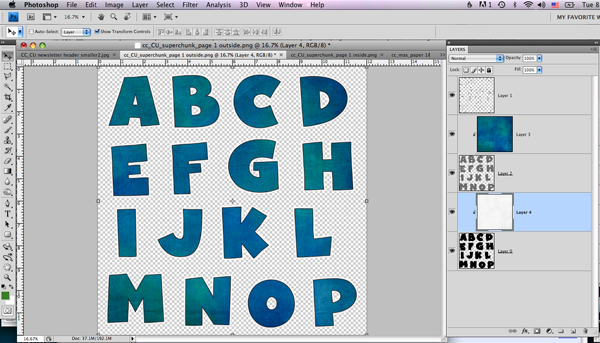
Step 5: (optional–this part works in Photoshop) I like to add a light shading to the outside edges of the color…enough to make them POP.
Select the inside color layer by ctrl-clicking on the image in the layers palette. Create a new layer above the paper color layer.
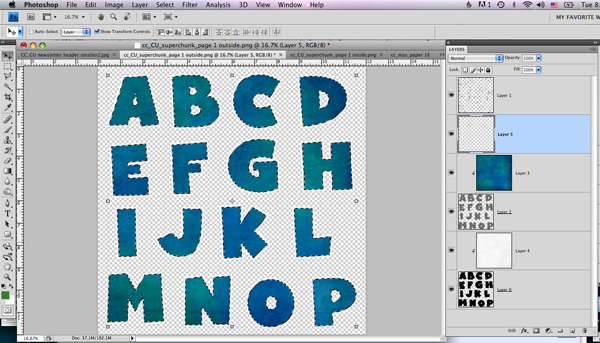
Make a new path. (click on the paths icon…then click on the make new path icon. It’s the one that looks like a circle with arrows pointing around it (on the bottom of the paths palette))
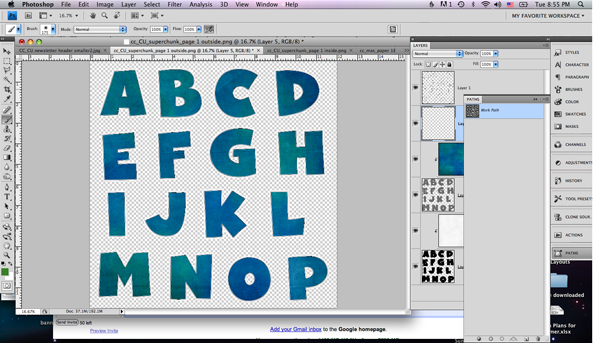
Then with a soft edged brush, stroke that path. (Thats the solid outline circle icon). It doesn’t matter what color is your foreground color, we just need the shape.
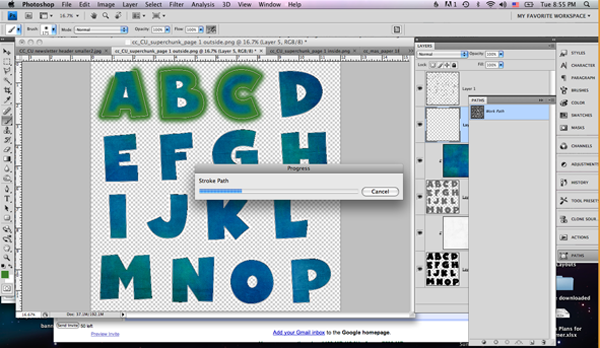
Now select that fuzzy outline shape by ctrl-clicking on the image in the layers palette. Select the paper fill layer and hit ctrl-J to duplicate that shape.
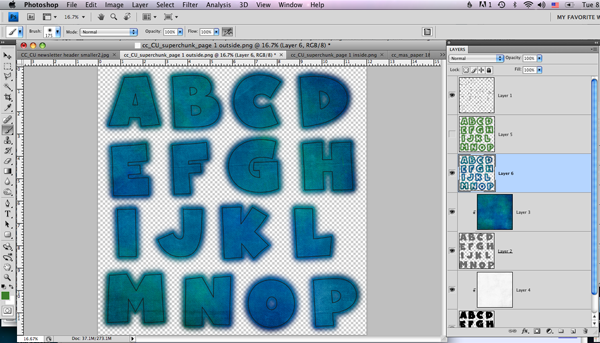
Make the first fuzzy outline layer invisible. (the green one) Change the blending mode of the new fuzzy layer to multiply, lower the opacity to about 40% and clip it to the color paper fill layer.
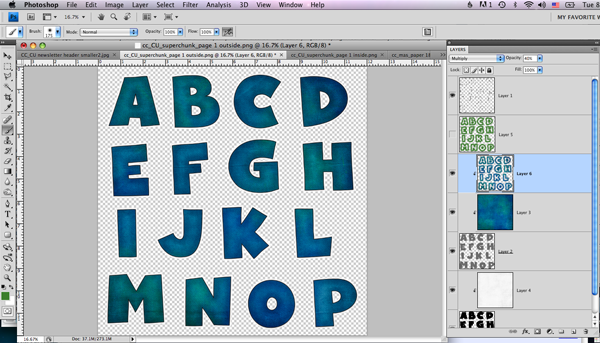
TADA! Now you are finished. You just need to chop it up.
In my newer alpha doodles, I’ve made this part obsolete–the alpha is already arranged on a file compatible with Flergs Alpha Maker (with her permission) but if you have one of the first few…
Step 6: I chop mine up using Flergs Alpha Maker. Open the Alpha 5 (for caps) file. Paste your newly created alpha on top. You won’t need the black alpha layer, but you may want to leave it there so you know which letters go in which box — at least until you memorize what goes where. LOL!
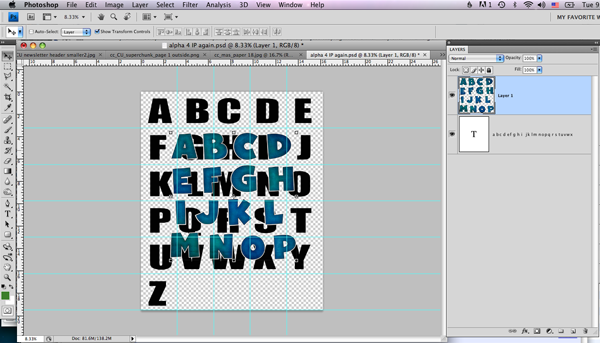
Use one of the selection tools to select the letters one by one. Hold down the ctrl key and with the move tool (the one that looks like an arrow) on top of the letter drag the letter into it’s appropriate box. Then deselect, select the next letter, hold down ctrl and move it into place.
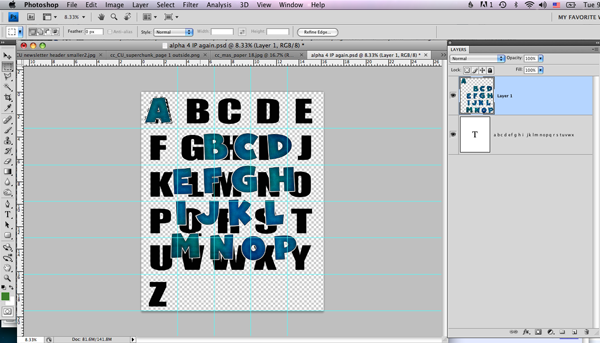
When I’m finished with the first “sheet” of new letters, make them invisible, then I paste in the next set and contine the process. Once the entire alphabet is in place, I merge all layers (except that black alpha one) then run Flergs cutter action.


 Hi! I'm Chelle: a 40 something mom of 7. My husband & I live in a rural community in the rocky mountains with our 4 children still at home. In the winters we enjoy sledding & snuggling by the fire. I the cool fall evenings we love relaxing around the campfire & meeting friends at the county fair. Admiring the stars


Pingback: CU Shazam Playdate & Great Outdoors Sneaky Peek | Digital Scrapbooking Week In Review - Chelle's Creations | Chelle's Creations
Pingback: Perfect Pairs! Puppy Love & Cat's Meow | Digital Scrapbooking Kit Combinations - Chelle's Creations | Chelle's Creations
I have noticed you don’t monetize your site, don’t waste your traffic, you
can earn extra cash every month because you’ve got hi quality content.
If you want to know how to make extra bucks,
search for: Mertiso’s tips best adsense alternative
Ashley the bartender was very friendly. As soon as we sat down she asked
us if we’d like a drink and food menu. She has a really nice smile…
https://popsugar.com
How can you find numerous facts? I like the way
that you organize everything, since it’s really easy to
read. Overall, I can recommend this article to everyone who is
interested in that topic.
Are you able to help me!? I have tried to find a good tutorial for actually making the doodle alpha letters?? There’s not much out there