Tips from Chelle…and a giveaway…| Digital Scrapbooking Freebies(post)

I’ve been fortunate to be able to share some tips at a couple of my favorite digi hangouts this week.

I did a guest post @ simple scrapper sharing one of my favorite easy journaling tips (Let someone else do the journaling)  You can read/see the details:  Where to find the Words for Scrapbooking @ simple scrapbooking  Jen @ simple scrapbooking focuses on keeping scrapbooking doable.  Check out her website & add it to your reader.  You’ll love all the inspiration to keep things simple.

And today is my feature at Keeping Life Creative.  Pam shares a little about me including one of my favorite speedy scrapbooking tips.  There is a discount coupon and I’m giving away a $10 coupon to one of Pam’s lucky readers.  Head on over and enter to win.  And make good use of that coupon code :)

Friday Freebie! Zoopendous Border | Digital Scrapbooking Freebies

Friday Freebie! Zoopendous Border | Digital Scrapbooking Freebies(post)


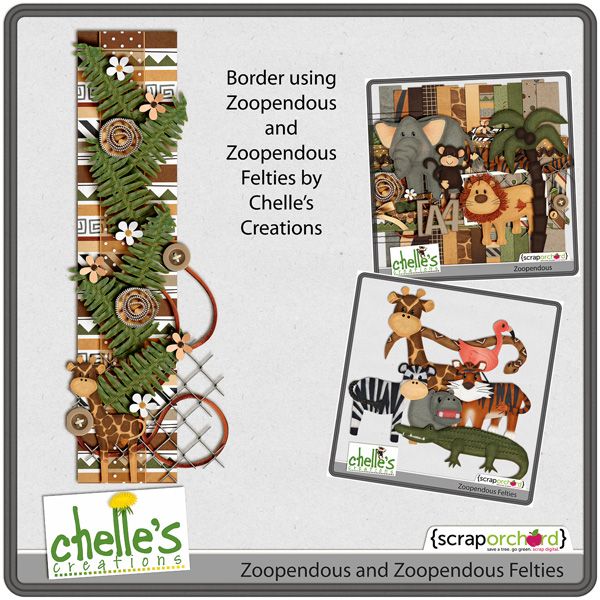
Hello, there! It is Jenn S (September guest) here with a freebie for ya! Sorry technological troubles delayed my post!

Anywho, I absolutely love Zoopendous!! It is so perfect for all those zoo pictures! Here is my border freebie. Enjoy!

click image to download


Friday Freebie! Zoopendous Cluster | Digital Scrapbooking Freebies

Friday Freebie! Zoopendous Cluster | Digital Scrapbooking Freebies(post)

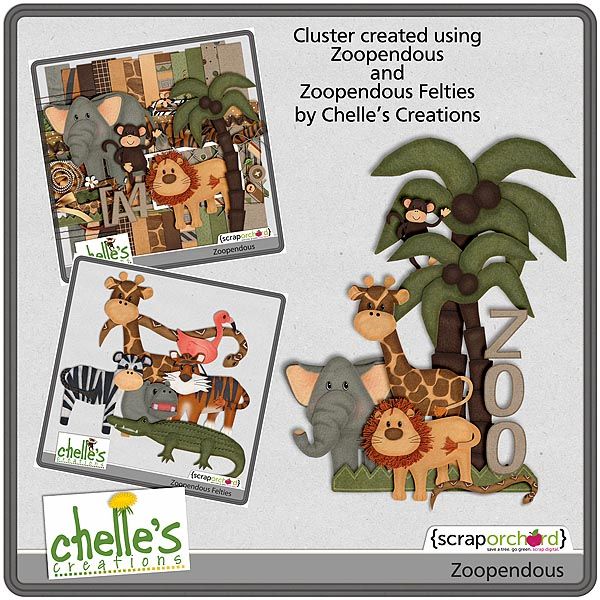
Happy Saturday, everyone!! Jan here and I’m guesting for Chelle this month. What great fun it’s been working with all of her amazing designs. Today I have a cluster freebie for you using her latest release at Scrap Orchard – Zoopendous! This is such a fun kit to use if you have made a summer time trip to the zoo, or maybe, like me, you just live in a zoo!! Just click the image for the download…hope you enjoy :)

Gallery Standouts | Digital Scrapbooking Inspiration

Gallery Standouts | Digital Scrapbooking Inspiration(post)

Happy Monday to you from Chelle and the Chelle’s Creative Team!  Guest Andrea here to show you a couple of fantastic layouts that have been uploaded this week.  It’s been just about a month since July 4th but I think I am still feeling extra patriotic as both of these layouts use Chelle’s fantastic Fireworks!  kit.

The first is by amber565.  I love how she highlighted the black and white picture with the bold white frame in the center and balanced out the outer portions of her layout with the angled papers and stitching.  The combination of the awesome Fireworks Alpha and the classic white typewriter font she used for the date is perfection.  And who can resist that sweet little 4th of July baby?!?

Next we have chocochoco’s amazing page called Feeling Free.  Her photo treatment and blend is just stunning, and it’s angled placement and shape is so eye catching.  Paired with her lovely clusters that have a great sense of motion – you’ve got one fabulous page!


I’m sure you can agree these two are true patriotic gallery standouts!

1.16 Tips: Shadowing and Preferences

1.16 Tips: Shadowing and Preferences(post)

Hi Everyone, it’s Jenn (jk703) here to share some tips with you today. I’m going to focus on shadowing and preferences – because everyone shadows differently, and everyone has their likes and dislikes. It can depend on the blend modes, distance of your shadows, the size of your shadows, the color of the shadows, and the opacity of the shadows. There are so many different things that can change, so that is why I’ll show you a little of my shadowing and preferences. For today’s example, my page is using Chelle’s newest kit – Jump Zone and it’s coordinating (but so versatile) alphabet – Zone {Alpha}. Here is my page: SO_SWLSwtSmpl_CC_Jmpzn_LDJFrndFnt_CLNSmmr2013_WEB
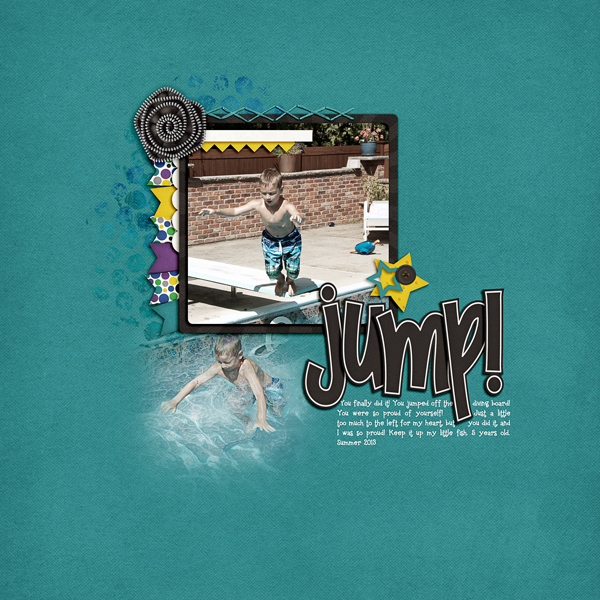
Now, let’s get a little closer. First up, the banner.
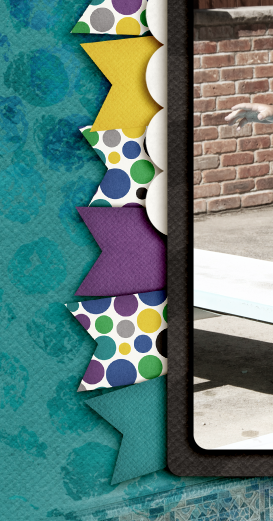
Shadow1

For this particular banner, I have it tucked under paper layers, so it is closer than if it were on top of the photo. For this and the paper layers, I use what I call “Paper Layer + Opposite Edge.”

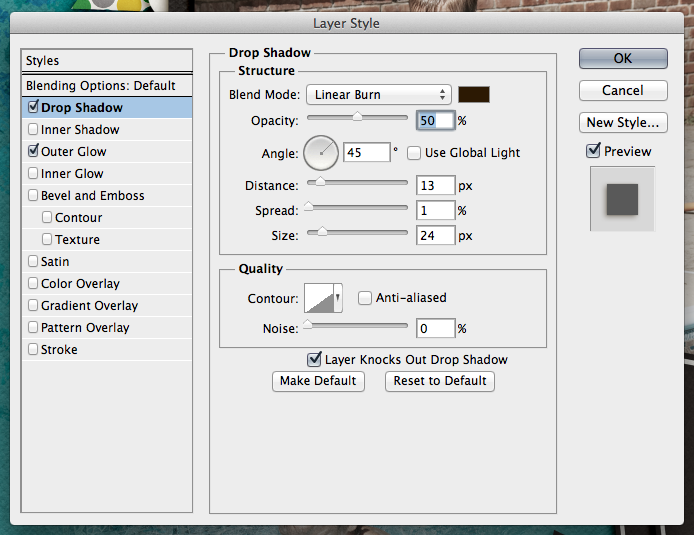
Here is the shadow information. For the basic Drop Shadow layer, my style uses a Linear Burn, 50% opacity, with a Distance of 13, and a sir of 24. The distance will change how far away the shadow will be from the paper or element. The size will determine how “crisp” your shadow is, or how blurry it is.
Shadow2

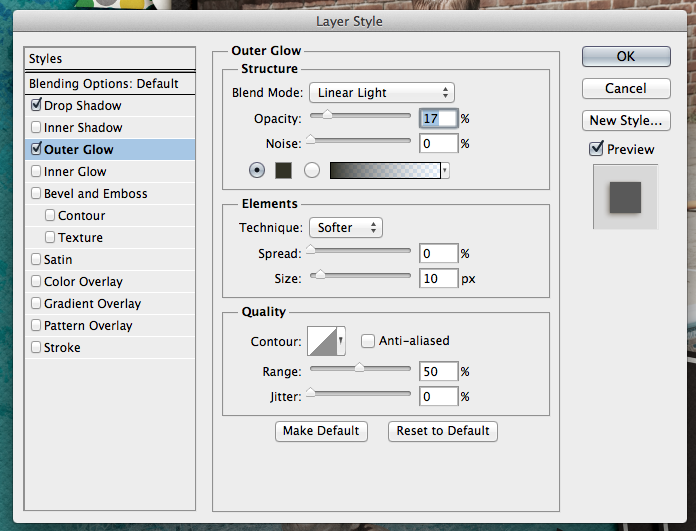
For this and most of my paper layers, I add a shadow to the opposite edge. When I look at a paper, it doesn’t sit perfectly on top of another when stacked – there is a slight shadow around the edge so you know they are separate pages. To get this effect, I add an Outer Glow. I use Linear Light, at 17%, color versus a gradient color, and my size is 10 with a softer Technique.
Shadow3

Next up, how I add shadows to stitches. They are really close to the pages, so I shadow these with a heavier “color.” For me, when I look at pages, the closer the item it and how “heavy” at item is will dictate what kind of shadow you need. You may think otherwise, and that’s ok. This is all about you and your preferences. Here are my settings for the stitching:

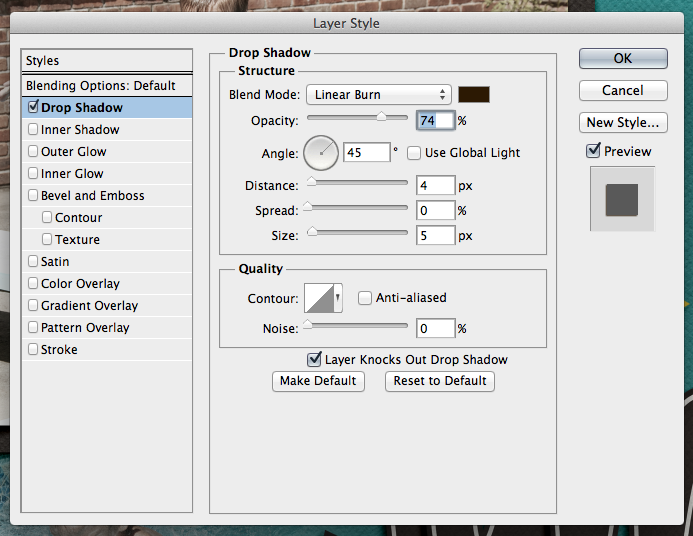
Shadow4

Shadow5

One last shadow, and then I’ll share what the CT made! Flowers. There are SO many different flowers, realistic, paper, doodles, etc, and there are so many more ways to shadow them. For this particular page, I have a zippered flower. To me, that is a heavier flower/fabric, and metal – which deserves a heavier shadow. Here is my normal “higher” flower shadow with a little added for the opposite edge. Shadow6
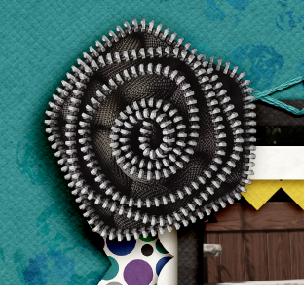
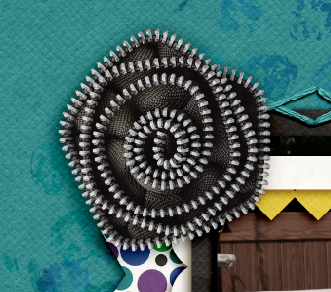
It looks too dark to me. Especially on the darker teal paper. So, I adjusted it, and the color of the shadow to make it more to my liking.
Shadow7

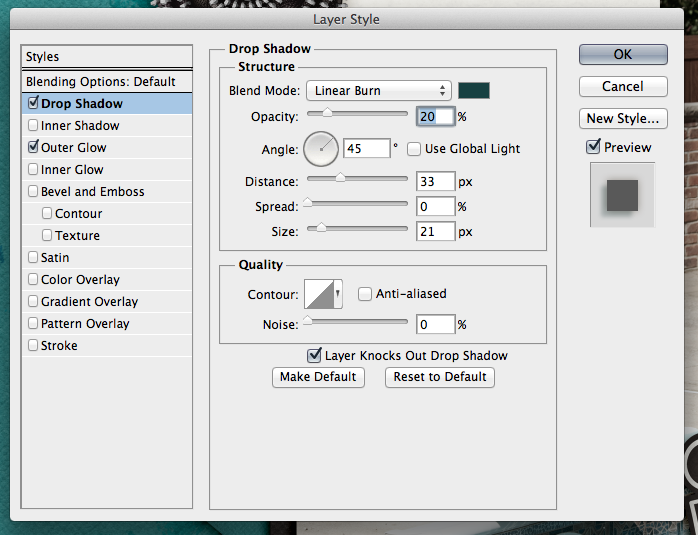
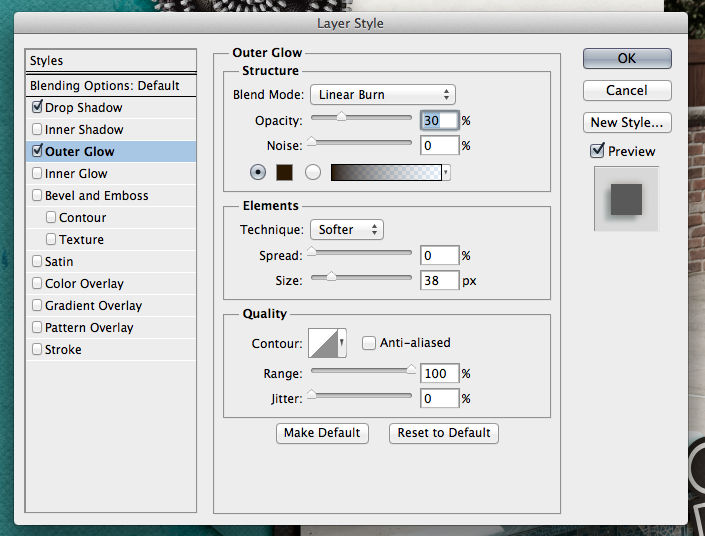
Here are the settings that I used for the second flower. I changed the color by clicking on the color box, and then clicking on my background paper. I then chose a color on the darker end of the slider. I also lowered the opacity, and made the size a little smaller than usual. This isn’t my normal settings, so it took some time to make it pleasing to my eye.
Shadow8

For the opposite edge of the flower, I used the Linear Burn Blend Mode at 30%, along with the Technique: Softer at 38 pixels in size.
Shadow9

Play with your shadows, and make them how YOU like them. Use the shadowing and preferences how you like them! Once you like them, get a test print of one page before printing. By doing that, you can make sure that you like how they look when printed. I wasn’t sure when I printed my first album, but it turned out wonderfully. Recently, I printed a Wedding Guest Book as a gift for a cousin, and again, I loved the book so much, and the shadows really made it stand out. People were “petting” the pages.


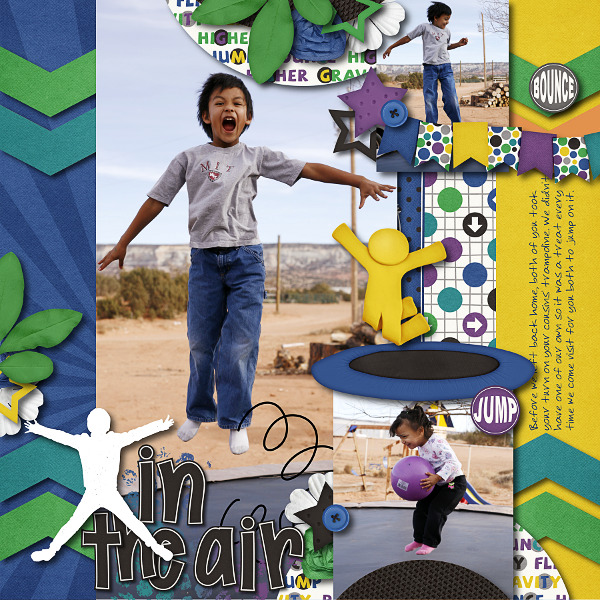
Here is what the CT shared with me. First, Ophelia (navaja77) uses Gimp for her scrapping!  So she gave me some information to share with you all and a sample page of hers! She used Jump Zone and Zone {Alpha}.

“I used GIMP 2.6 and Drop Shadow Script-fu. For the papers – I typically use X: 15, Y: 15, Blur radius: 25 and 65% opacity.  For this page, I used X: 20, Y: 20, Blur radius: 35 and 65% opacity. For the elements – X: 25, Y:25, Blur radius: 55 and opacity 65%.  This page didn’t have stitches or washi tape but for those I typically use X:4, Y:4, Blur radius: 4 and opacity 40%.  For leaves, to get the realistic feeling, I will increase to 30, 30, 60 and opacity 60%.  My settings place the shadows on the lower right side.  If you prefer lower left side, then change X to negative number (e.g. Papers: -15, 15, 25, 65%). If you shadow like Chelle, ten both X & Y would be negative numbers so you get shadowing at upper left.”
2012-12-02-intheair_sm


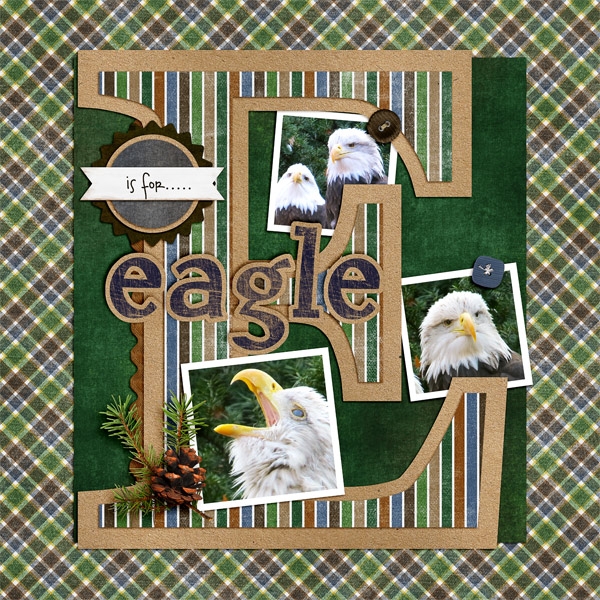
Next up, is Donna (dip332) who created this wonderful page. She added shadows using Chelle’s Me & My Shadow, and then tweaked it to her taste. She said “I made the pine and pine cone really stand out by using both an upper and lower large shadows. I also used a chipboard shadow on the word eagle. The buttons are both a flat button setting. The rickrack is a flat ribbon shadow style.” Perfect way to make it stand out – using two shadow settings on one element! Great idea! (She also used Let’s Camp S’more and On The Trail)
36080

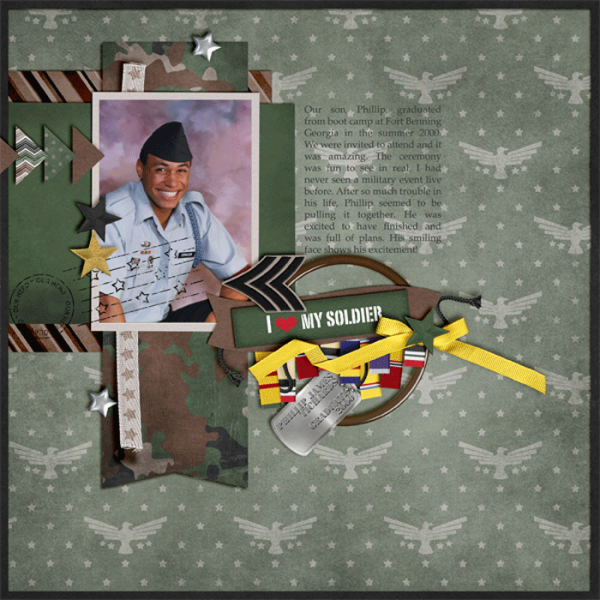
Lastly, here we have a honorable page from Leah (Cat Lady). She said “I start with Chelle’s shadows and expand from there. And I love to put shadows on their own layer and expand and move them to cause elements to “lift” off of the page!”  She used Chelle’s Rolling Along kit and Scrapping with Liz’ December Tuesday’s Template.
35881

Hope you enjoyed today’s post – Thanks for visiting!

by Jenn


Classics: Kraftabulous(post)

Are you a fan of Kraft papers? I am! Chelle’s Creations Creative Team Members have some beautiful digital scrapbooking pages they’ve made combining Kraftabulous with some of their favorite Chelle’s Creations kits. I can’t wait to show you!
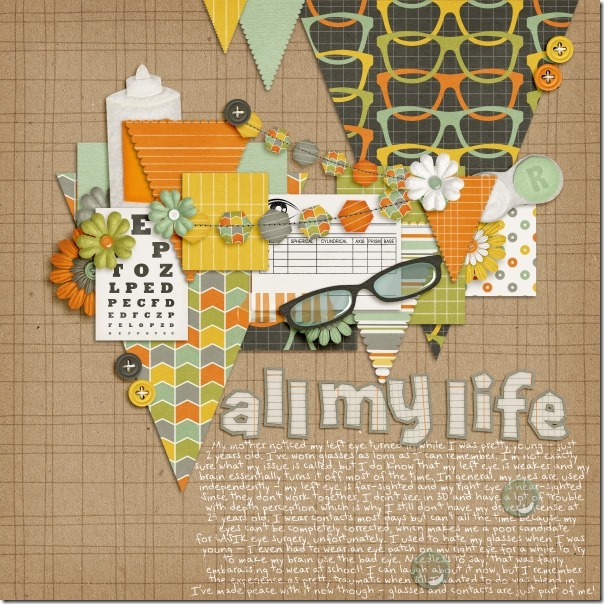
First, Jen made a page about her struggle with vision problems, and she has used one of the Kraftabulous papers as a background for her page. This is exactly why they were made! I love the look of the white journaling on top, and Chelle’s See Clearly Now kit is the perfect choice for her page.   29964Jen

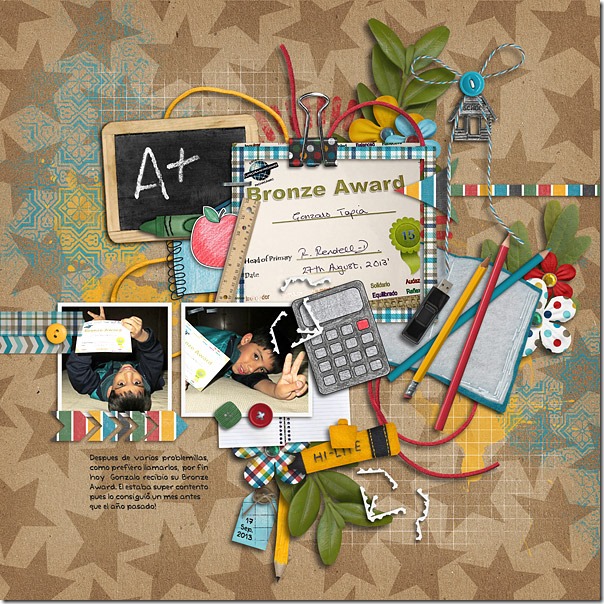
Next, Roxana used a star-patterned Kraftabulous paper for her background. It’s a perfect choice to highlight the Bronze Award her son won at school. Congratulations! Look how well the blue and yellow colors pop off the background bringing a very happy feel to the page. 26-bronzaward-webRoxana

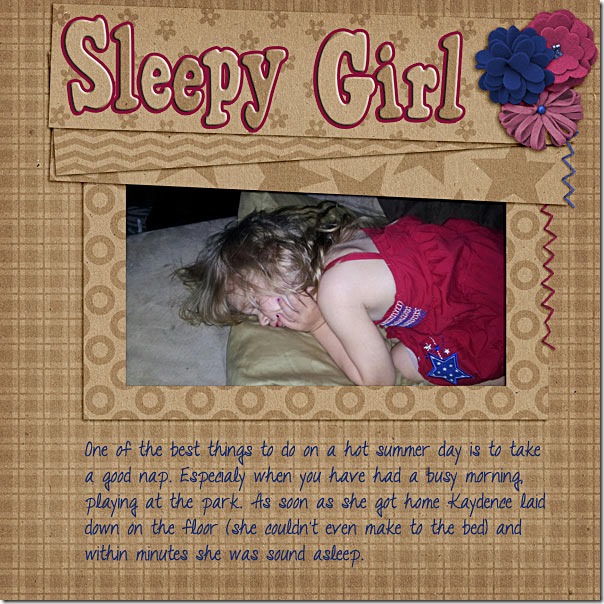
Next, Brenda, one of the guests on Chelle’s team this month, has made an adorable page about her sleepy little girl after a fun day at the park. She has used the Kraftabulous papers for the background and the photo mats, and she even filled the title with the kraft paper. She has added the perfect little pop of color to match her little one’s dress using Chelle’s newest CU item, CU Felt Flowers 2. Kraftabulous---Sleepy-Girl_zps6975dd4dBrenda

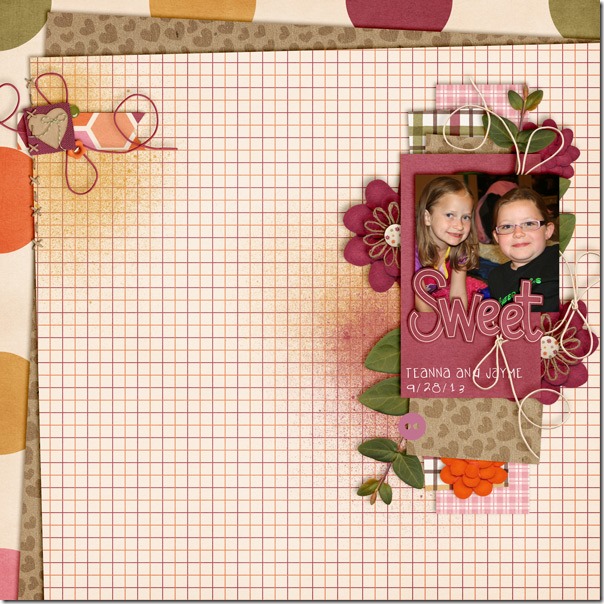
Finally, Mel has used the papers in a bit different way  to show you how versatile they are. She has a stacked paper background with a kraft paper in the middle, and she has added a bit of the same paper in the matting of her photo. The kraft colors are perfect with Chelle’s Indian Summer kit, and the heart pattern in the paper is a perfect complement to the felt heart in the kit.Teanna-amp-JaymeMel

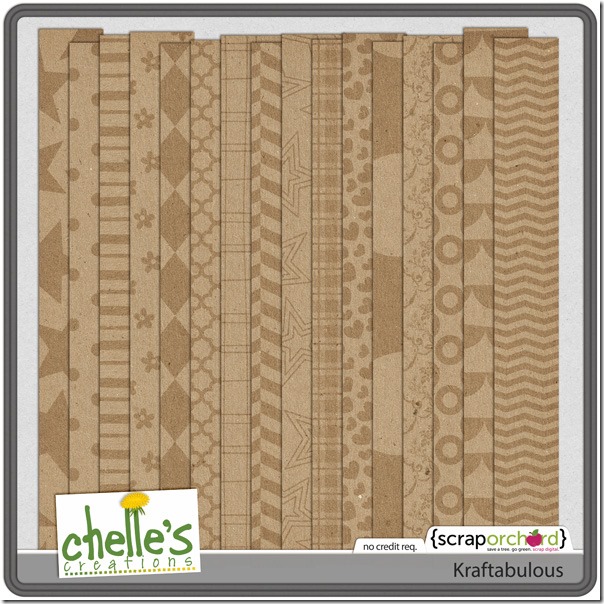
Did you notice how well the papers coordinate with all different colors of kits? Being neutral colors means they will truly complement any kit. Here’s a closer look at the Kraftabulous papers in the market. They’re a great price for such a versatile way to stretch your stash. cc_kraftabulous

by_Cheryl

Gallery Stand Outs(post)

Good day, all! I’ve been taking a stroll through the gallery at Scrap Orchard, picking some of my favorite layouts posted in recent days. Two pages caught my eye that used Chelle’s newest birthday themed kit One Year Older. First, there’s this gorgeous page by larkd (Linda). I love the way she used the banners on the page, and I really like how she added a tight dark shadow to her title words to make them stand out. Did you notice she made a page about the fair with a birthday kit and it works perfectly? I love that.  larkd 

I also love this page by Spudgeon that is about a special birthday celebration using the same kit. I love the yellow paper background, and I love the way she added a semi-transparent paper behind her journaling to allow for easy reading. She also added the names of the children on the photo on top which I love to do in digital scrapbooking. Great memory keeping!spudgeon

Here’s another page that jumped out at me. Keepscrappin (Kayla) made this one using Chelle’s Taste of Home and her Pizza & Pasta Bundle which coordinate perfectly together. The large photo caught my eye, and the way she layered a few important elements on the corners anchoring the smaller photos really caught my attention, too. I love the small clusters with the ribbons tying everything together. keepscrappin

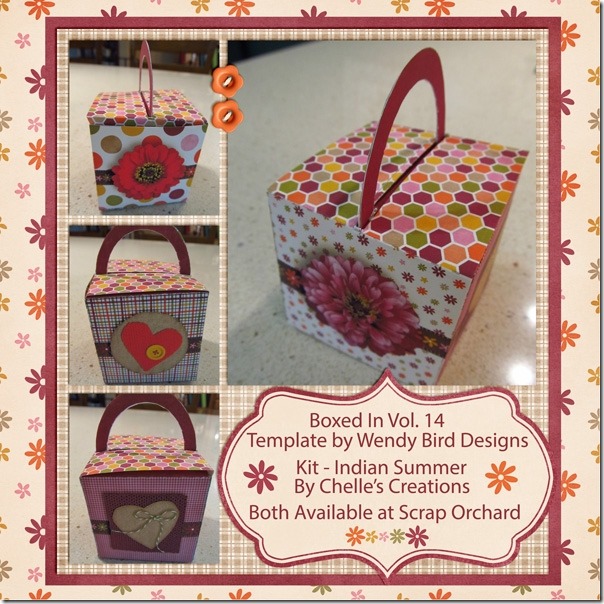
Finally, I found a page by djp332 (Donna) who is a guest on Chelle’s team this month. Look carefully: She has made a digital scrapbooking page about a paper box she made in real life using one of Chelles’s digital scrapbooking kits Indian Summer. I love that it’s a bit recursive to think about! And, I love all aspects of how this looks. The box she made is adorable and will be perfect for a small treat for someone, and the page she made about the box will allow her to save the memory for herself, as well. Perfect!djp332

I hope you are inspired as I am. Take a look in the gallery at Scrap Orchard for more inspiration by searching for #chelle in the search box.

Scrap Skills: Black & White Photos(post)

One of the greatest things about most digital scrapbooking programs is the fact that photos can be edited within the programs in a host of ways. One of my favorite ways to edit a photograph before using it on a page is to convert the picture to black and white. I do it for dramatic effect, but I also do it to eliminate distracting colors in the photo. Changing a color photo to black and white also allows me to choose any scrapbooking kit I want, regardless of color scheme, and my photos will look great with it. Chelle’s Creative Team members have made a few pages as examples to show you.

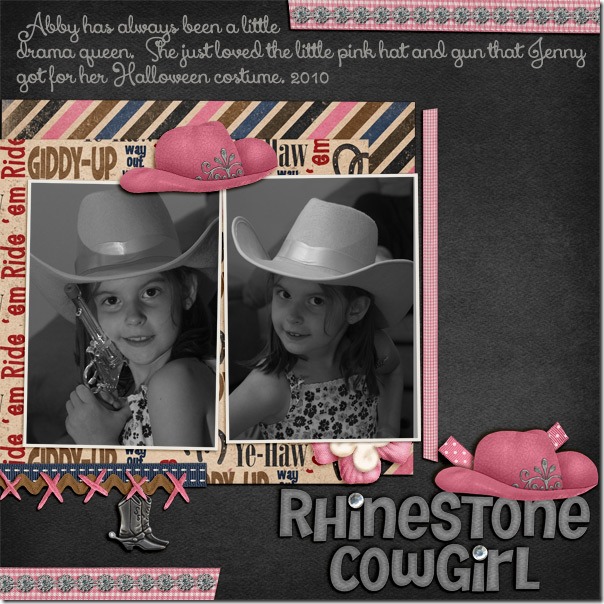
First, we have a page by a guest member Debbie. She has some adorable photos of her daughter in a Halloween outfit that would be complimented perfectly with Chelle’s Cowgirl Up kit. Removing the color of the photos allows the focus to be on her sweet face, and it allowed Debbie to use the kit full of pinks, browns, and black without clashing with any colors in that flowered shirt she is wearing.Abby---Rhinestone-CowgirlDebbie

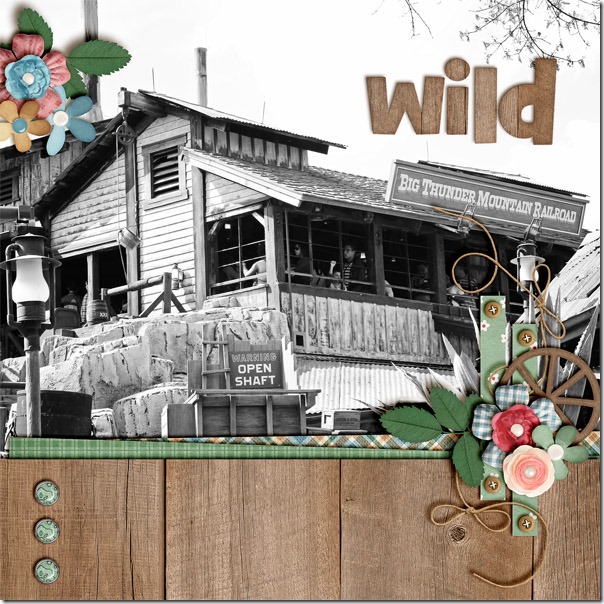
Next, Jenn wanted to use one of Chelle’s newest kits, Choose the Right {TREK}, but she was making a page about a trip to Disney. Even though the theme of the kit is different than the theme of her photo, they are a perfect match with the wooden paper and elements and the rustic feel of the photo. I really like how she made that photo very large on the page and used the kit elements to compliment it, not overwhelm it.wildbigthunderJenn

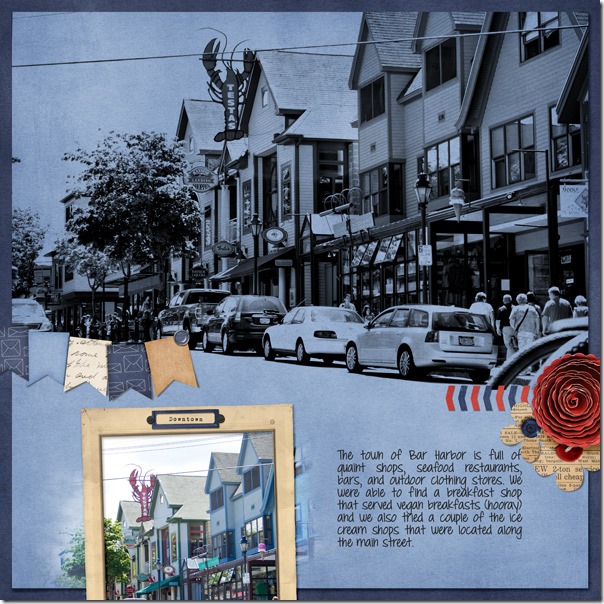
Finally, Leslie has done something a bit different with her black and white photo. She also used the color change to enable her to pick a kit at will, but she went a step further. Her photo of a street at Bar Harbor has been changed to black and white, but she changed the blending mode to Darken which cased the blue paper below the photo to show through and replace the white parts of the photo. It’s a perfect technique for a page about a seaside town, I think. By the way, she used Chelle’s Letters from Home kit for her page.2012-07-Acadia-Bar-Harbor2

I hope you’ve been inspired to scrap with a favorite kit regardless of the colors in your photos. You’ll still have a perfect page capturing your memories if the photos are black and white than you would if the photos were in color, and you’ll have tons of fun using that kit!

by_Cheryl

Scrap Skills: Shadow Styles(post)

Hello Chelle’s friends! I hope your Easter was wonderful and you’ve got lots of new photos to include in your digital scrapbooking projects. Today, I want to show you a tool that will speed up your scrapbooking process so you can get those photos onto pages for everyone to enjoy. Chelle has a collection of shadow styles for sale in the market that can save tons of time, if you’ve been making custom shadows, and increase the realistic look of your pages, if you’ve been using the standard drop shadow styles in PS or PSE. Me & My Shadow is a collection of styles for all different types of elements in 3 popular shadow directions: Lower Right (LR) (120 degrees), Lower Left (LL) (45 degrees), and Upper Left(UL) (-43 degrees). Start a page with any of Chelle’s quickies, and then use the Upper Left setting for any additional elements on your page to match her pre-shadowed styles. Also, she has a video on her YouTube channel to show you how easy it is to use the shadow styles.

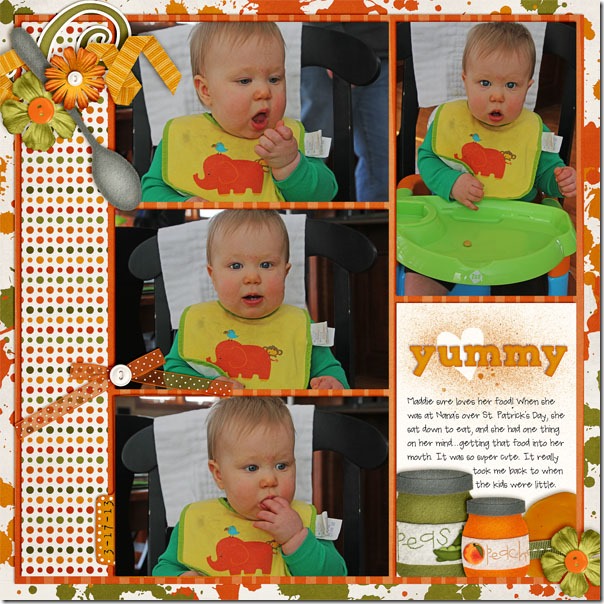
Let me show you some sample pages using Me & My Shadow. First, Jenn made a page for us using Chelle’s First Foods kit and the adorable photos of Maddie easting in her high chair. She used the UL paper shadow style for all the photos and paper mats on the page, the felt/chipboard style for the felt pieces, the small flower for the flowers, and the curly ribbon/string for the ribbon on the left. In addition, she used vellum style for the bow that has a slight transparent appearance.yummy2Jenn

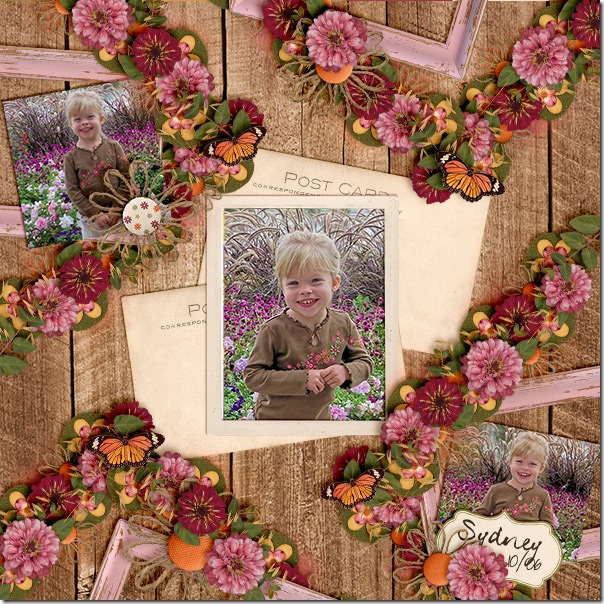
Next, Karen has a page that beautifully illustrates how to do lots of flower clusters to make them look realistic. She used Indian Summer – a perfect kit for her photos. Look closely at how the flower clusters on the page are a perfect match to the flowers on her little girl’s blouse. You can see she has used the thin paper style shadow for her photos and the post card elements from the kit. The flowers, leaves, and butterflies have larger thicker shadows by using the  flower style, while the felt elements on the bottom layer of the clusters have the felt/chipboard style applied. Sydney-flowers_zps81808b3bKaren

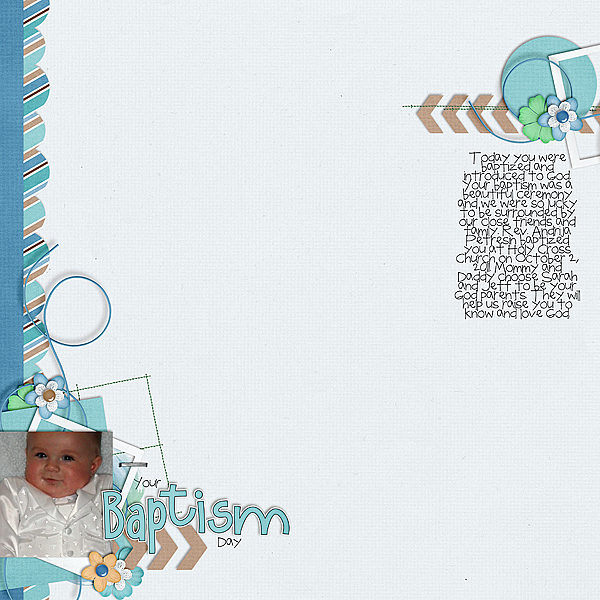
Melissa has made a page with a lot more white space, and yet the shadowing is just as important as a page filled with clusters. Notice how she used the string/ curling ribbon shadow style for her blue strings, and they seem to pop off the page. Also, she has the tiniest stitches perfectly placed on the page, and she has used the staples/ stitching layer style for those as well as for that little staple attaching the frame to the page.
Baptism-Day_zps4043a1d4


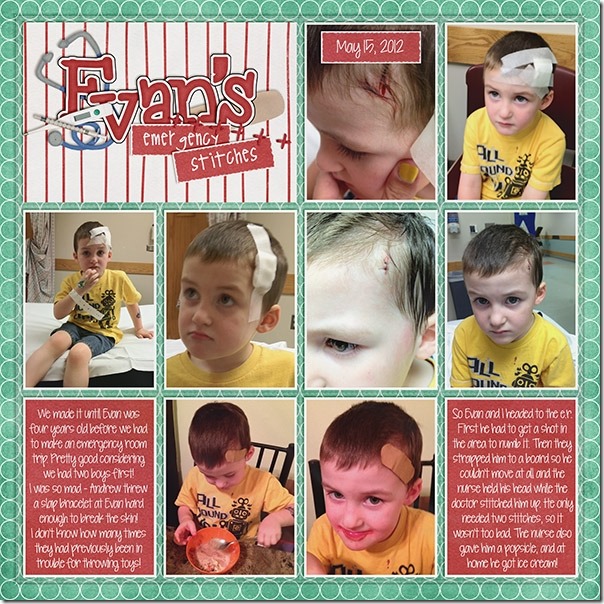
Finally, Brandy has been a guest on Chelle’s team for the past two months, and she has contributed some fabulous pages for us. Today, she has made a page to illustrate how to shadow the plastic pocket layer on one of Chelle’s In the  Pocket {Small} pages.  Here she has documented little Evan’s trip to the emergency room for stitches with lots of photos, and each photo has the paper shadow style applied. She used the acrylic shadow style to give a proper effect to the plastic pocket top layer on the page, and it completes the page with a very realistic look.13177Brandy

Do you own Chelle’s Me & My Shadow? Here’s a closer look at it in the market (the image is linked). Don’t forget, if you’re using any of Chelle’s pre-shadowed quickies, you’ll want to use her Upper Left shadow style from Me & My Shadow. cc_memyshadow_preview

by_Cheryl

Designer Club – Join the Club!(page)

designer_club_graphic_4_sidebar

Build your designer CU stash while you learn & share within a designer community.
Perks include:
• Access to the Design Club community: forum, chats, webinars (and recordings)
• All* of  Chelle’s Creations commercial use products released during your membership period. Excludes: collabs (the portion not created by Chelle), services, classes, & e-books. *maximum of 10 products in one month. Downloads for the entire month will be available on the FIRST DAY OF EACH MONTH. Get your products before the digi world can buy them.  Also includes a 30% discount code for classes.
• Monthly Tips & Tuts webinars. Join us each month as Chelle & guest share new ideas to spark your creativity. (Webinar recordings will be available for the duration of the calendar month.)
• Monthly Q&A webinars. How did she do that? Bring your questions to our monthly Q&A where Chelle answers your questions. Follow along as Chelle shows you how. (Webinar recordings will be available for the duration of the calendar month.)
• Monthly Newsletter. All the news & events summed up in one place. Did you miss something? Quickly scan what’s been happening and make a note of future events you’d like to attend.

How do you sign up? Click here to subscribe to Chelle’s Designer Club  Note:  The club is administered through the ScrapOrchard forum.  You must have a forum username and be logged-in in order to purchase & use your subscription.  (If the link doesn’t work, log in to Scrap Orchard and then try again.)
Remember you can sign up for 30 days or six months for the price of five — that’s one month FREE!

I’d love to see you there!
JOIN THE CLUB!

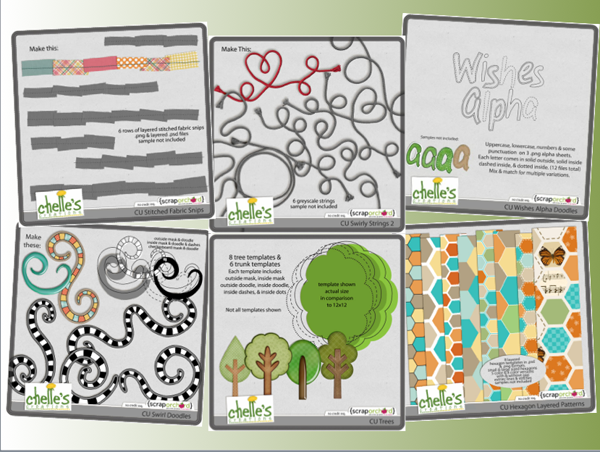
ps.  Still wondering if it’s worth it?  Well, I have 2 things to say:  #1 is MIND-BLOWING recoloring method.  All club members have access to this recorded webinar.  And #2, well, take a look at what was included in some previous months:

July 2012

Or in February 2012

Just try it for one month.  Then see what you think.