Persnickity Prints Semi-Annual Sale | Digital Scrapbooking Resources

Hello Scrappers!

You’ve probably heard me rant and rave about the quality of prints you get from Persnickety.  Just amazing.  I’m always amazed at how FAST they are at getting my prints to me!  So you can start uploading your layouts now…OR you can buy “print credits”.  Get the sale price by paying now, but upload when you are ready.  If you need a Christmas gift idea, print one of your favorite layouts and frame it. Done. Persnickety Prints Semi-Annual Sale starts Saturday!

Hugs!

1st Annual Save Your Photo’s Day | Digital Scrapbooking Public Service Announcement

Did you Save your Photos?”

What is Save Your Photos Day?
Save Your Photos Day is a global event intended to educate the public about the importance of safeguarding their treasured photos. As digital media continues to expand, we can not keep up.  Most of us have not developed a system to organize, preserve, and display our printed and digital photos.  We are literally drowning in a sea of photos.  Unfortunately, in the digital age we live in, it does not just take an event such as a tornado, flood or fire to wipe out our cherished memories. A crashed hard drive, lost cell phone or misplaced SD card can have the same impact on your photos and treasured memorabilia as a flood or tornado.  We want to help you prepare before disaster strikes! Save Your Photos Day is open to anyone and everyone who wants to learn more about safeguarding their photos and treasured memorabilia.
When is Save Your Photos Day?
The first annual Save Your Photos Day is September 27th.  There are currently 59 Save Your Photos Day free events planned in 25 states, 3 countries and it’s still growing!  There is also a free online class available to those that can not attend a local event. To find a local event if your area or to sign up for the free online class go to http://www.saveyourphotos.org/find-event-locations.html.
Imagine how great it would feel if you and all of your loved ones had peace of mind that all of your photos were safeguarded from natural disasters and hard drive failures!
by-Sari

Word Mark.it | Digital Scrapbooking Resources

Hello Friends!

Do you wish you could see what your journaling looks like in different fonts? You are gonna LOVE Word Mark.it

  1. Go to the Word Mark.it website.
  2. Click on load fonts.
  3. Type a word or two into the black bar
  4. Hit enter & watch the magic happen before your eyes.  You’ll soon have those words appear in all the different fonts your have on your computer.

Let me show you the digital scrapbooking layouts that came from our creative team. Karen tried several different fonts before selecting the word markit she preferred. Karen used Zoo Crew {Arctic}
Karen
Kayla used Movie Night & Alpha & Mickey Mouse Club March.
Kayla
Go try it yourself! You will love this quick & easy answer to picking the perfect journaling font.
by-Sari

Back 2 School Hybrid Ideas | Digital Scrapbooking Resources

Hello Friends!

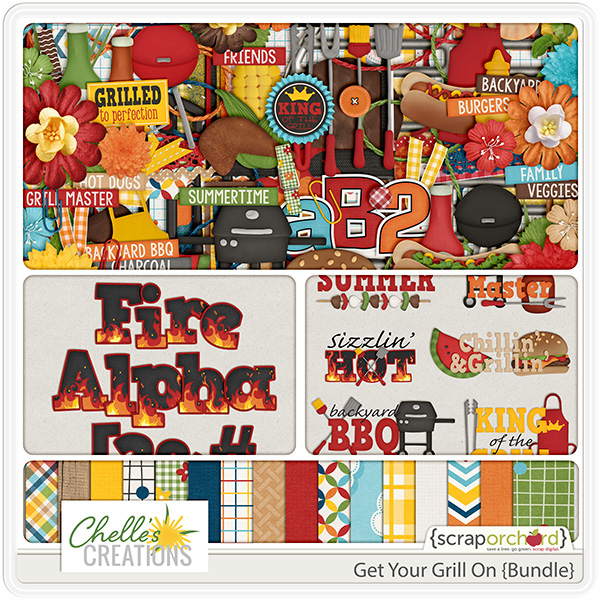
Got some fun ideas for Back 2 School? Let me show you the digital scrapbooking ideas that our creative team came up with.  Our ladies have used some products that have been retired, but Chelle has a fun, new school themed kit releasing this week that you can use to make your ideas.

First Jenn S. made this schedule up for her daughter.

Jenn S

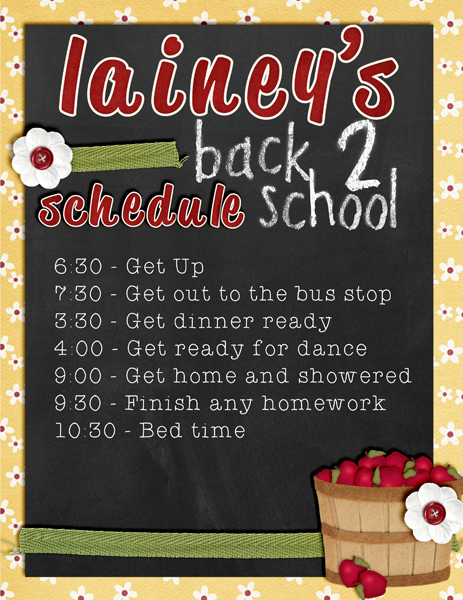
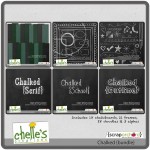
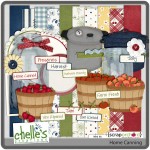
She used: Chalked {Bundle}, Home Canning Mini, Lovin From The Oven Alpha.

cc_chalked_bundle   cc_homecanning_preview_2_post   cc_lovinoven_bundle

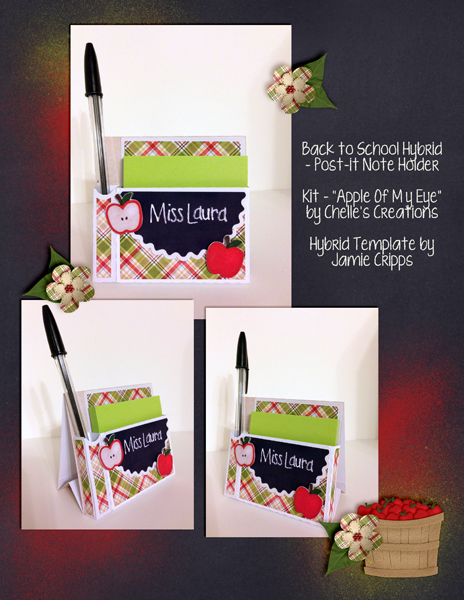
Next, Kristi used Apple of my Eye & the Chalked {Boards} for this noteworthy idea. Sorry folks, Apple of my Eye has been retired.

cc_chalked_bundle

Krista

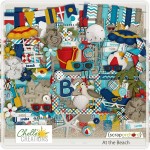
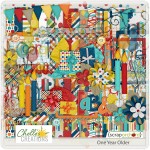
Next Kimberly created this adorable school organizer. She made jar labels for pens and labeled a drawer unit that came with spaces to add photos. She provided this information about her project. She used the Chalked {Bundle) For fun, she used a binder clip from At the Beach and a paper clip from One Year Older.

cc_chalked_bundle   cc_atthebeach.jpg   cc_oneyearolder

For the pens, she recycled pickle jars. If you run them through the dishwasher a couple times and use a little alcohol, all the label adhesive comes right off. If you wanted to, you could use your Silhouette to do a print and cut for the labels, but Kimberly simply printed them off on brochure paper on her ink jet printer and cut just outside the chalked line. She said if she was making a lot of labels, she would have set up the machine, but it was quicker to just use scissors for this project. *Note, if you notice, the jars are a little lighter than the boxes. That is what happens when you forget to change your printer from black and white to color. Color, will give you darker blacks. But black and white will save a little money on your inks.

To attach the labels to the glass, she sprayed the back of the paper with E6000 adhesive and smoothed it into place and glued some ribbon over the edge of the jar using Aleene’s Original Tacky Glue, hiding the screw top of the jar.

This was a CHEAP and EASY DIY organizing project. If you use the CHALKED {bundle} around your house, we’d love to see it. Post a picture in the comments, over on Chelle’s Facebook Page, or in the Scrap Orchard forums.

I hope you’ll use some of these fantastic ideas.

Where is the best place to print photo books? | Digital Scrapbook Resources

It’s a question I get asked frequently:  Where is the best place to print photo books?  And my first answer is always Adoramapix!  Because the quality is OUTSTANDING!  I have printed more than 50 photo books with various companies.  My favorites are definitely the Adoramapix books.  Here’s a few reasons why:

The photos are printed on actual photo paper.   This means your layouts are profession quality photos.  Just amazing.  (And my photos cannot really do justice to the way these books look in real life.)

quality

The pages are actually 8×16 (or 10×20, etc) sheets of photo paper sealed together back to back = absolutely NO gutter.  Not a little gap of plastic = “lay flat binding” but actually  NO GUTTER.  This means I can stick things in the “seam” without any worry of what will be missing.  I’ve put faces & text right down that seam.  Like this:

seam


Note:  This is my son’s FAVORITE book.  He ‘reads’ it all the time & regularly requests it as a bedtime story, hence the well worn cover corners.

And the cover is a strong thick board, covered with your full color photo.  They have templates so you can design your cover to make it exactly what you want.

cover

They have coupons!  No really.  Adoramapix books are not cheap, but they do have awesome deals like these:

From CapturingMagic.me :

adoramapix_coupon_code_aug_15

From Groupon:

Screen Shot 2014-08-07 at 12.02.33 PM

If you’ve never printed your layouts in a photo book, I would encourage you to give it a try.  Just pick your favorite 10 layouts (or 10 of your favorites) and get a book ordered while these coupons are valid.  You’ll love the results!

Now excuse me while I go finish a book.

by chelle

Scrapping Every Day! | Digital Scrapbooking Resources

Hello Friends!

How do you keep up on your scrapping? Leslie, one of our CT Members, provided these bits of wisdom.
“Keeping up with scrapping can be a challenge. And in point of fact, I’m not caught up. Juggling family and a full time job has made my scrapping time difficult to mange. I often feel guilty about spending precious time at my computer and not with my family. But I’ve taken to waking up earlier than I need to to go to work. I’ll fritter on Facebook, read emails, and edit photos to get them ready to scrap. It’s my own little quiet time where it’s just me and my Labrador retriever. Sometimes during my lunch hour, I’ll use Teamviewer to access my home computer and work on a page or get some scrappy chores done.”

About 9 months ago, Chelle set a goal to do some scrapping every day. I get to share those layouts with you each week in our Sunday post, “Chelle Scraps.”  At first it was overwhelming to try it with that BIG deadline everyday, but Chelle founds some ways that have worked well for her. She has scrapped about 95 double page layouts since that time, just by using these simple ideas.

Chunking:
1. Go through your photos for an event or layout, select the photos you want to use, run them through Radlab and save them in a sub folder folder called “To Be Scrapped.”
2. Utilize clusters, templates & stacks that are pre-made (You Tub, Using Stacks)
3. Your layout a day isn’t set in stone. You may have a layout that is elaborate. It may take 2 days.
4. You can finish a layout started a previous day by adding the journaling, clusters, etc.
5. Consistency makes your scrapping faster.
6. Keep a spreadsheet or list of the layouts you still need to do. (Do you scrap by event or by year?)
7. Think about the kits your favorite designer’s are releasing, Then look at your list. Could they be combined and make your layout quicker. Think about elements or clusters.
8. Use your smart phone to keep track of journaling moments. Chelle’s 4 year old son recently told her, “Heavenly Father, Jesus Christ, & Santa Clause are the good guys in case you were wondering.”  You could use any kit to scrap around funny things your little one’s say.
9. Set realistic goals. I can do a layout a day for this week, this month, until this book is done, until this year is done. Suddenly you’ll find that you are naturally taking those 30 minutes a day to get a layout done. Then it won’t be long until you have a book ready to publish.

You can listen to Chelle speak about daily scrapping here.

So Just Start!

The Daily Digi | Digital Scrapbooking Resources

Hello Friends~

Are you a member of the Daily Digi Digest? $7.50/month and you get 7 free kits each month.  Steph asked Chelle to join her on The Daily Digi Digest to speak about TDD’s June Wrap Up & her goals to do a digital scrapbooking layout each day. Want to see what Chelle’s been scrapping? Click here. Can you believe she’s scrapped around 95 double layouts since she set her goal last fall. Later this month I’ll be doing a post about ways Chelle’s manages her personal scrapping.

You can listen below (click on the image below), download here, or subscribe in iTunes.

logo

In this episode they talked about Katrina Kennedy & signs to photograph on your summer vacation. {Aren’t these fantastic ideas?}

  1. Gas Pump Signs or the cost of gas as you head out on your vacation.
  2. Height Marker Signs. Creatively show how much your child has grown over the last couple of years, or how much more they need to grow before they can ride on that amusement park.
  3. Stop Signs. Take a picture that can reveal something about your location. A stop sign with a palm tree int he background
  4. Take a picture of the restaurant sign. Stand to the side to prevent your mirror image from being in the sign.
  5. Entering or leaving a state sign.

What signs could you photograph to your layout for your vacations?

Mother’s Day Layouts | Digital Scrapbooking Resources

Hello Friends!

I’ve been trying to come up with some ideas for Mother’s Day layouts. I was thinking along the lines of:

Chelle has tons of kits that will fit your perfect Mother’s Day layout. In fact, my biggest resource is to go through her store. Click here, Then click on view all {about 1/3 of the way down the page.} Then I start scrolling through all of Chelle’s digi-products. If I select a picture first and then do the fast scroll through Chelle’s stuff, I am sure to get multiple ideas.

Here are some examples from our CT.

Jenny used Fleur De Violette. Love the flower & butterflies!

Jenny

Next, Helen used Zoo Crew {Jungle} for her Mother’s Day layout. Love that precious baby face.

Helen

Jan used Love Grows for her Mother’s Day layouts. Do you have a favorite camping memory that you could scrap?

Jan600

There are so many possibilities. I’m sure you make a {some} good one!

Hugs!

Easter Layouts | Digital Scrapbooking Layouts

Hello Friends!

All ready for Easter? It seems like It was just Valentine’s Day, but here it is. Have I got some digital scrapbooking resources for you. 3 ideas for layouts and Chelle’s goodies for Easter. Our ladies have made some great layouts to get you in the mood. Let me show you.

Kimberly used Hippy Hop Hop and the coordinating Alpha to make her page. She also used Chelle’s CU Watercolor Brushes to make clipping masks for her photo and the two different papers she blended into to the solid background. She also used Me and My Shadows styles for super fast and easy shadows. Did you know there is a style for felt? It’s perfect for a page like this.

cc_hippityhophop  cc_hippityhophop_alpha  cc_CU_watercolorbrushes  cc_memyshadow_preview

& her layout….

Kimberly

Lisa used Hippity Hop Hop, Curled Frames, CU Basketweave Patterns (Blended into a paper from Hippity Hop Hop)
CU Iridescent Styles (Used the brush in the kit and styles to create the pink and yellow glitter at the bottom)

cc_hippityhophop   cc_curledframes  cc_CU_basketweave  cc_CU_iridscent_glitter_styles-01

& her layout… {byw, I LOVE that basketweave pattern on her paper.)

Lisa

Cami used Hippity Hop Hop & Me & My Shadows. Children’s faces certainly express their joy in simple egg dyes.

cc_hippityhophop     Me & My Shadow

Here is her layout.

camijo_hippity_2013