


Hi, Karen here with my first blog post for Chelle’s Creations. It is Thursday which means we are one day closer to the weekend and it is Tutorial Thursday! Today we are going to talk about a trick I learned just a few weeks ago myself, making your text fill the entire text box.
I am using PSE 7, but my sources say it is the same for PSE3 through CS5. First let’s review the obvious ways to justify your text. Here is a page I made using Chelle’s Creations Sew Crafty and when I typed the text this is how it came out:
See how all the text is even on the left side or left justified? Here is how you change that. First you want to make sure you have your text layer selected in the layers palette and that you are using the text tool.
Then while your cursor is anywhere in the text box click ctrl-a to select all of your text. When all of your text is highlighted look for a drop down menu at the top of your screen with a bunch of line on it, this will justify your text in three different ways. You can pick justify left, center, or justify right. Simply select which option you want on the drop down menu.

For some pages those 3 options might give you just the look you were going for, but none of them look quite right for this page. I wanted something that looked a little blockier (is that a even a word?) to go with the blocked background paper.
To get the text to look blockier or to fill the entire rectangle of your text box the first steps are the same. Make sure you are on the text layer in the layers palette and you have the text tool selected. Then select all of your text using ctrl-a with your cursor in the text box. 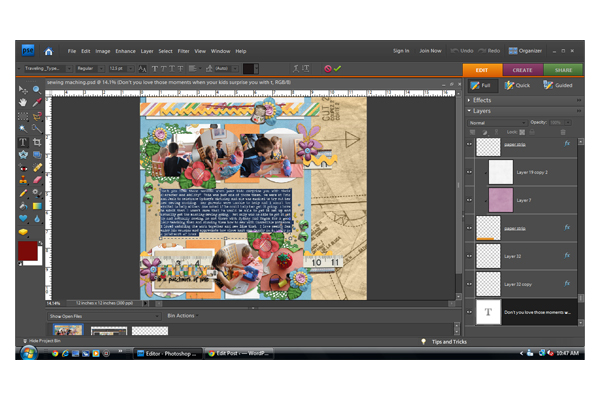
Now hit ctrl-shift-j and watch the magic!
See how the text goes from one side of the box to the other?
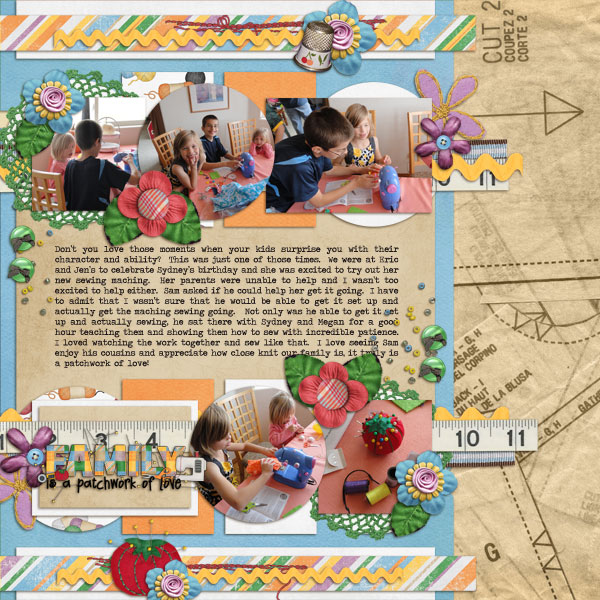
I just love the look of the text filling the block from one side to the other, it works well with the rest of the layout. Remember, while your text is selected hit ctrl-shift-j.
I hope you enjoyed this addition of Tutorial Thursday!


 Hi! I'm Chelle: a 40 something mom of 7. My husband & I live in a rural community in the rocky mountains with our 4 children still at home. In the winters we enjoy sledding & snuggling by the fire. I the cool fall evenings we love relaxing around the campfire & meeting friends at the county fair. Admiring the stars


