9.29 Video Tutorial: Internal Shadows

Have you every wanted to make something appear as if you cut out a section and the bottom layer was showing through? Drop shadows are great for adding realism to your page but for the cut out look, a drop shadow just wouldn’t work. Chelle of Chelle’s Creations has a video tutorial that demonstrates how to use internal shadows to achieve the cut out look without having to cut anything out.

Now let’s take a look at how Chelle’s creative team used this technique on their own pages.

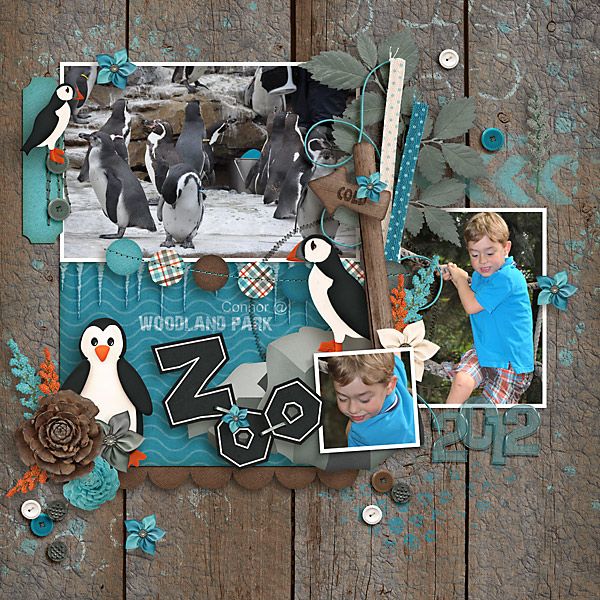
Christine (Carolina Scrapper) added the internal shadows to both of the monster’s mouth as well as her title. Isn’t her page just too cute? She used Street Smarts {reloaded} and Make-a-Monster to create her page.

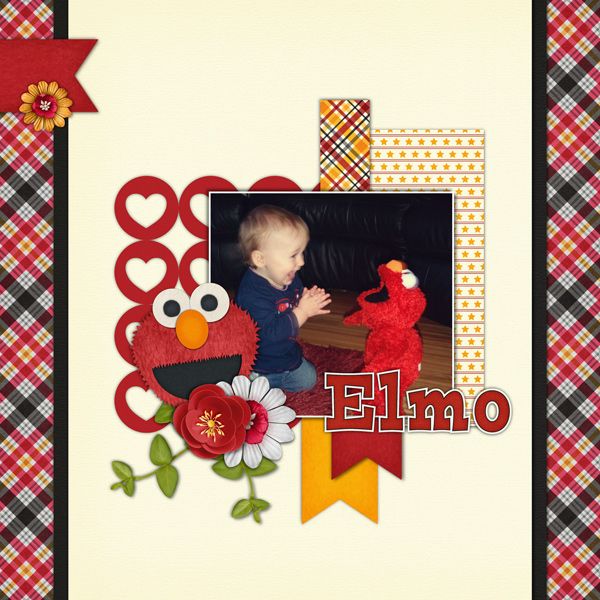
I love how Helen (winipeg1) combined Mickey Mouse Club March {Sampler} and Movie Night along with the Make-a-Monster pieces to create her page. The color combination of these kits are perfect for her Elmo loving little one.

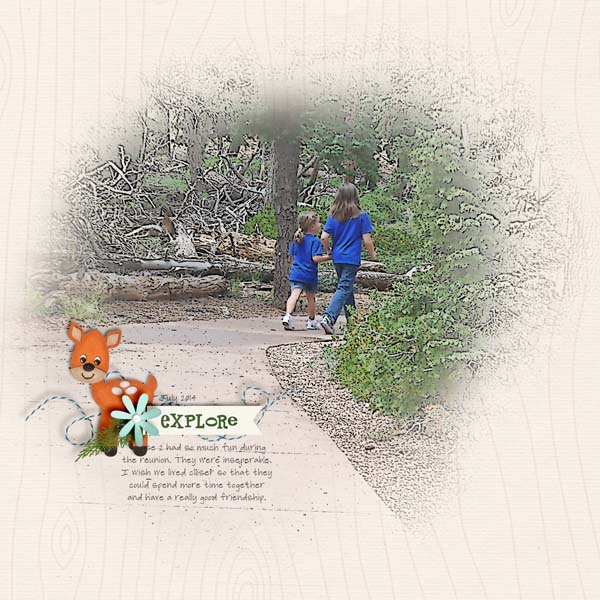
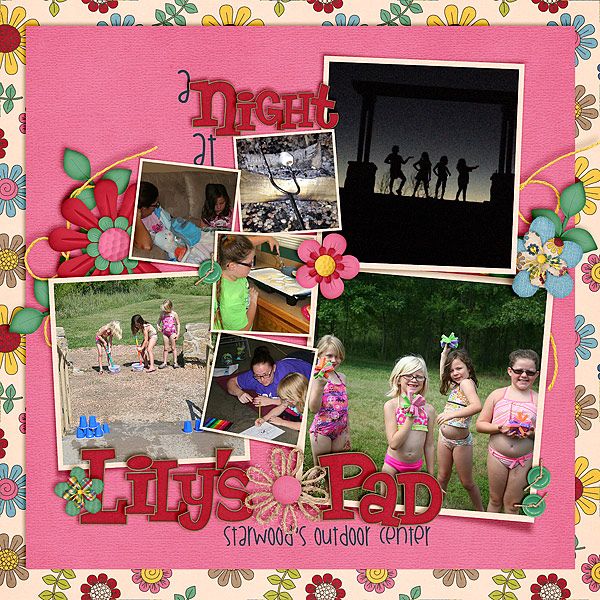
Here is a page that I (Sagediva2) created. I used the Street Smarts {bundle} with a template by Fiddle-Dee-Dee Designs.

Chelle’s video tutorial uses the Make-a-Monster pieces. Head over to her store to check it out and see what other fabulous goodies she has.

Aren’t those monsters just so cute? Be sure to try this technique with them the next time you use them.
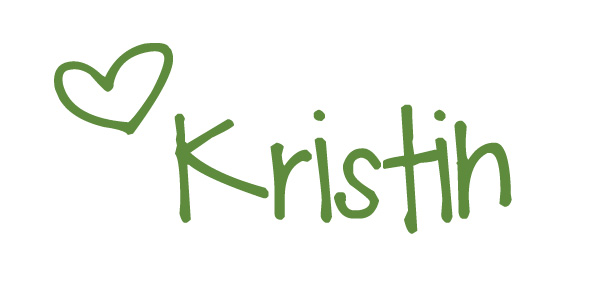
9.15 Video Tutorial: Painted & Drawn

I think everyone enjoys learning new ways to make layouts stand out. Chelle’s Creations video tutorial shows you a few ways to add an artsy flair to you pages. Her video instructs you on how to get a photo to appear as it has been hand-drawn on the page and then painted in on certain areas. Check out the video below so you can add this technique to your next page.

The page doesn’t need many embellishments to make it complete. You want the main focus to be the artsy picture. Let’s take a look at a couple of other great examples from Chelle’s creative team.

Donna (djp332) uses a photo much like Chelle’s skyline. I love how she has the burst bordering the page. Donna used Summer Lovin’ to create this terrific page.

How cute is this page using In the Forest. I love how Heather (htew) combines the muted woodgrain paper with the adorable outdoors photo to create a perfect artsy feeling page. The little deer element just ties everything together.

Chelle’s video tutorial used the kit Oh Snap! kit. The Oh Snap! word bits have been retired. Visit her store to pick up the kit and see what other goodies you can find.

If you use this technique on a layout be sure to add it to the gallery at Scrap Orchard so we can all admire it. Happy artsy scrapping!

9.1 Video Tutorial: Laying it Out There – 3D Curled Frames

Don’t we all want our digital scrapbooking pages to look as realistic as 3D as possible? I know that really enjoy getting my pages to look as if you could reach out and feel the different layers. Chelle’s Creations video tutorial shows you how to use one of her products, Curled Frames, either by themselves or with a template.

Chelle shared several fabulous templates with you during the video tutorial and here are a few more from her talented creative team for a little more inspiration.

Roxana (roxanamdm) layers the frames across the page in one big cluster. I love that these frames give you the ability to create a stunning layout the fits your pictures perfectly. For this layout Roxana used Lucky Me, Lucky Me {alpha}, Curled Frames, and Mark My Words.

Using Boho Summer, Boho Summer {alpha}, and Curled Frames, Mel (KSCroppyChick) created this stunner. I love all the flowers on the page and just adore the silhouette photo she took.

Here is a page I created by replacing the photo slots with the curled frames on a template. I used Zoo Crew {safari}, Zoo Crew {Animal Prints}, Curled Frames and a template by Fiddle-Dee-Dee Designs.

Do you want to create you own layouts using these realistic looking frames? You can pick them up in her store.

I (Sagediva2) look forward to see the ways you arrange these frames on your layouts.

8.18 Video Tutorial: Sticker-ize Elements

As a kid I loved to place stickers everywhere. Did you know you can get your elements to have a sticker look to them. Chelle’s Creations has this video tutorial to show you just how easy it is. Chelle uses elements from her kit Play & Grow for this video.

Here is some creative team inspiration using what they learned from the video.

Jen (supergirljennie) adds the sticker look to different elements from the See Clearly Now kit. I love how she combines a font with the See Clearly Now {alpha} to create the title on the page. She used a template by Scrapping with Liz.

This technique does not have to be used with just elements. Melissa (prettypeaches) sticker-ized the Hard Hat Required {alpha} on her layout. I love the split design of the Little Green Frog template she used. Isn’t that cluster on the bottom of the page too cute? She used the Hard Hat Required kit for this adorable page.

Love the kit Chelle used in her video? You can pick Grow & Play up in here store.

I can’t wait to see what you decided to sticker-ize!

8.4 Video Tutorial: Stretch Your Stash – Blending Papers

Have you been looking in a kit for a paper to use and can’t find just what you were looking for? Chelle’s Creations created this video tutorial to give ideas on how to get that perfect paper by blending two papers together. For this video she uses her kit About A Boy, but this technique can be used with any two papers.

Now let’s check out how Chelle’s Creations ladies used what they learned from this video.

Carol (Iowan) created a fabulous muddy looking background paper. She used the small elephant print paper from Zoo Crew {Animal Prints} with a blending mode of darken at 100% opacity and the Zoo Crew {Jungle} paper woodgrain to create this cool looking background. In addition, she used Zoo Crew {Arctic} and the Zoo Crew {Arctic Alpha}.

Next up Melissa (pretty peaches), used Chelle’s Creations kit coming coming out this week called Good Night Teddy. She placed the white starry paper over the light blue paper. She then changed the opacity of the starry paper to 15% to give it the nice soft look.

I would have been a nervous wreck having this guy hanging outside my house. Jan (QuiltyMom) on the other hand was even quick enough to get these great photos of him. She used a combination of Chelle’s kit to create this fun layout: On the Trail, Zoo Crew {Safari}, and Zoo Crew {Jungle}. Jan blended a patterned paper from On the Trail with the textured brown paper from Zoo Crew {Safari} to give the background paper a creased look.

This video tutorial features the About A Boy kit.

Have fun trying out the technique on your next layout!

7.21 Video Tutorial: Photo Collages

Photo collages are the perfect way to scrap when you have a lot of photos of one event. They let you get a page complete in a short amount of time and allow you the flexibility to embellish a little or a lot. Chelle has a video tutorial sharing how easy it is to create a layout with her college templates (Collage Templates {square} and Collage Templates {long}).

Now let’s get inspired by the work of Chelle’s talented group of ladies.

Carol (Iowan) created this stunning 4th of July layout. I really like the way she made the title of the page large and really stand out. For this layout she used the mini kit, Liberty, and the the Liberty {word art}.

Using the Game On kit, Roxana (roxanamdm) created this fun layout. I love the way she uses the word bits on the different pictures.

I start to drool every time I look at Jenn’s (jennschultz) page. She does a fantastic job combining the different pattern papers on her page. For her page she used Lovin’ from the Oven.

This tutorial and sample pages feature these products:

Try out scrapping with the collage templates today to get a page done in a flash.

7.7 Video Tutorial: Using Watercolor Brushes

The watercolor look is an awesome effect to dress up any type of layout you create. Today I’m going to share a video tutorial in which Chelle show you several different ways to use her CU Watercolor Brushes on a layout. You don’t need to be a designer to get a lot of use out of these fun brushes.

Ready to see a couple of examples to get your creative juices flowing?

First up Donna (djp332) used the brushes to add a festive look to her Easter page. The multi-color brush spots remind me of dyed Easter eggs. Donna had the same thought because she had tried this page multiple times before creating this gorgeous page. She used Hippity Hop Hop, the Hippity Hop Hop Alpha and a template by Connie Prince to create this page.

Next up I (Sagediva2) created a page. After seeing how Chelle cut out letters in the brushes I knew the page I wanted to create. I love how the brushes remind me splattered sauce. I used Pasta La Feasta for this page. If you like this kit check out the coordinating Pizza Amore kit and word art.

This tutorial features the CU Watercolor Brushes.

The kits used in sample layouts in the video are:

While your in Chelle’s Creations store be sure to check out the other watercolor items she has.

5.26 Video Tutorial: Digitizing Autographs

If you are like me you have a book filled with your favorite characters autographs and would love to be able to use them on your scrapbook pages. Today’s video tutorial by Chelle’s Creations shows you have to accomplish this task.

You can watch the video here:

A couple of Chelle’s creative ladies used what they learned to create pages of their own. As you will see the items you use don’t have to be just autographs.

Donna (djp332) created two fabulous layouts after visiting memorials on a recent vacation. Instead of autographs she has a National Parks Passport that she has stamped at each park or memorial she visits. She used the same process to digitize the stamps from her passport. The first layout combines Gone Fishin’, CU Torn Bundle and the alpha from History Lessons. She also used a template from Butterflies and Bluebelles.

The second layout combines Gone Fishin’, History Lessons and CU Sketched Alpha Doodles with a Scrapping with Liz template.

Melissa (prettypeaches) created this adorable page using Love Grows. She plans on creating a custom book with the autographs she collected.

This video features the Happily Ever After kit.

Also check out the Happily Ever After Wordart.

Have fun turning handwritten item into digital masterpieces.

5.12 Video Tutorial: Recoloring Alphas

Hello Kristin here to show you another fabulous video tutorial from Chelle’s Creations. We all love ways to use things we have in our stash in new and different ways. Chelle is going to show you how to recolor the Anchors Away {alpha}.

Here is the video to watch.

Now check out how Chelle’s Creations’ ladies uses the videos to recolor alphas they have in their stash.

First, Jennifer (jmlijensen) used the Anchors Away mini with the Anchors Away {alpha} to create this cute page. I love the painted smear behind her photo and cluster.

Next, Karen (zippyoh) used Lucky Me, Rainbow Golds and the lime alpha, that she recolored, from Lucky Me {alpha}. She also used a template from Scrapping with Liz to create with colorful character encounter layout.

This tutorial features the Anchors Away {alpha}.

Next time you can’t find an alpha to match you can try this recoloring method.

4.28 Video Tutorial: Coloring in Doodles

Good morning! Kristin here with you to share another one of Chelle’s amazing video tutorials. This time she is going to show you have to color in doodles.

Learn how by watching this video.

Now that you know how; let’s look at some inspiration to get those creative juices flowing.

Karen (zippyoh) colored in the adorable frogs and lilypad from the Toadally Doodles for this sweet layout. The colored in frogs are a nice touch to add to the Toadally kit she used along with a template from Little Green Frog.

The dark green flower doodle is super cute on this page my Melissa (prettypeaches). She combined Hippity Hop Hop and Leafy Treetops along with the Toadally Doodles to create this fun Easter page.

You can use the same technique to fill in alpha doodles. Donna (djp332) filled in the Delightful Alpha Doodle with the plaid paper and the outer section with white paper. It give the title a fun pop. She also used At the Beach and a template by Scrapping with Liz.

This video features the Toadally Doodles and papers from the Toadally Add-on kit.

Grab some doodles and see what kind of creations you can make.

See you next month with two more video tutorials!