You can never have enough flowers in a kit can you? I’m here today to share a video tutorial by Chelle of Chelle’s Creations showing you how to add a pattern to her CU Accordion Flowers. This way you can create flowers to match whatever kit you choose to scrap with. Enjoy learning something new!
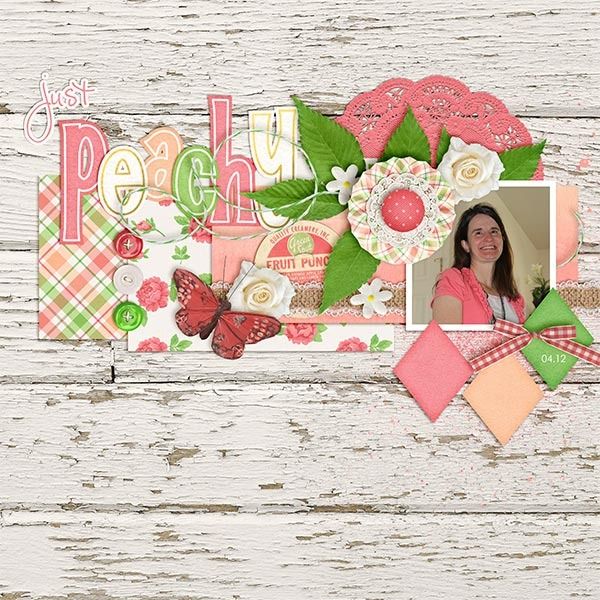
Have you seen Chelle’s newest kit released today, Creme de la Peche? It is gorgeous and these flowers are perfect to add. Kayla (keepscrappin) used them on her beautiful layout along with Chelle’s CU Accordion Flowers and a modified Fiddle-Dee-Dee Designs template.
Head over to Chelle’s store to check out her new kit along with the accordion flowers. While there browse her other kits and pick up a few or create a wish list.
Spring has official arrived and we are almost done with another month in 2015. I can’t believe how quickly time goes by. If you are anything like me you try to capture as many memories as you can. With the boost in technology a lot of phones these days take really decent photos. Have you ever thought about using your phone to scrap those photos? Chelle of Chelle’s Creations is going to show you how to create a layout with in your phone in about 10 minutes. Have fun learning something new!
There are so many different programs that can help you scrap a layout besides the ones Chelle mentioned in her video. Here are a few the ladies used and the layouts they made.
Using the Zoo Crew Arctic {Journal Cards}, Karen (zippyoh) created this layout of a memorable vacation. She used PicStitch and Over on her phone.
I love to see personality in a layout. You can just feel the love between this mother and daughter in Jan’s (QuiltyMom) layout. For her layout she used Toe Picks & Figures 8s and PicStitch and InstaQuote. After playing around with it Jan found out that she didn’t care for the InstaQuote because it didn’t allow her to use the full image and if you look closely there is their logo on her page.
With so many different apps out there these days for you phones there is bound to be one that will fit your needs. When you have some free time pick up your phone and see what looks interesting to you and play around. You might just find a new way to quickly get some layouts done.
How’s the weather where you are? I hope some of the states that received a lot of snow are starting to thaw out. Here in Central Florida we are back to nice and sunny 80 degree weather. Today I am going to share Chelle’s Creations video tutorial on how to make certain words in your journaling really stand out. Take a moment to watch as Chelle explains how to use her set Mark My Words.
As always Chelle’s talented group of ladies created a couple of layouts to show you what the learned from the video and put to use.
Christine (Carolina Scrapper) used a template by Scrapping with Liz to create this adorable layout. Chelle’s Creations At the Beach kit is perfect and just look at how Christine used the Mark My Words to emphasize part of her journaling.
Check out Helen’s (winipeg1) layout. It looks as if Chelle designed the Fabulous 50s kit colors for that photo. Helen recolored the pieces of Mark My Word to match the kit so her journaling still stands out but it also coordinates. What a great idea Helen!
Are you ready to use what you learned in your very own layout. Head over to Chelle’s Creations store and pick up Mark My Words today.
Have you ever noticed photos where just a certain object in the photo was in color and the rest was black and white? Do you know how to get that same result with the photos you take? Chelle of Chelle’s Creations has created a video tutorial to explain just that. Let’s take a moment to watch and learn.
Helen (winipeg1) has used what she learned from the video to created this simply adorable layout. It almost seems as if Chelle designed the kit around the color of her bow because they go together so well. Helen used the Put a Ring on it kit to create her gorgeous layout.
Unfortunately, the kit used in this video tutorial is retired but take a look around Chelle’s Creations store to see if something else catches your eye. I hope you this video tutorial has given you a new way to showcase some of the photos you have. I hope to see some layouts featuring this technique in the galleries. Happy scrapping until I’m back next month with another fun and exciting tutorial to share with you.
Are you looking for a way to add a more realistic touch to your layouts? Chelle’s Creations video tutorial is going to share how to give papers in your layouts a torn edge look. Chelle Creations has created a bundle to make it even easier.
Here are a few inspiration pages from Chelle’s creative team.
Krista (kc71595) combined the CU Torn: Whites with Anchors Away and Liberty to create her lovely page. She also chose a template by Scrapping with Liz. I love how the torn paper adds a little texture to the page.
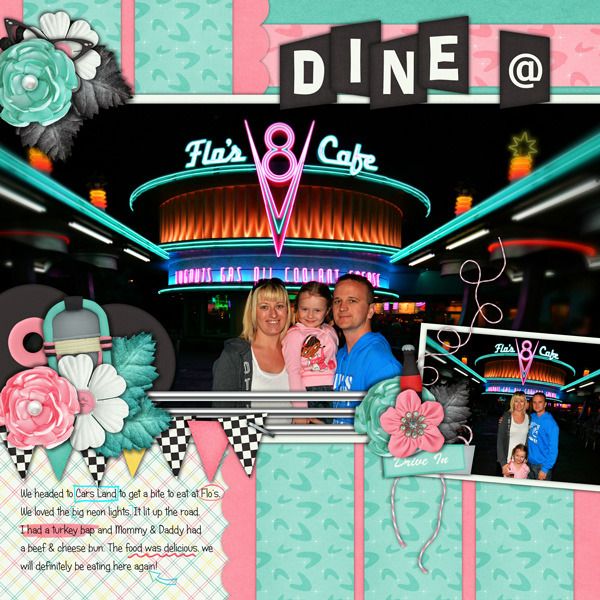
That smile would definitely melt my heart. Helen (winipeg1) used Fleur de Violoette to create this adorable page.
Do you want to easily be able to create the torn paper look on your own pages? Check out Chelle’s Creations CU Torn Bundle featured in the video. While there check out other great products that Chelle has to get your pages going.
Welcome to the new year and another video tutorial by Chelle of Chelle’s Creations. Today she is going to give you a few pointers to ensure that you journaling doesn’t get lost on busy background papers or photos.
A couple of Chelle’s talented creative team members provided layouts using the techniques they learned while watching the video.
Lisa (kelseyll) used the outer glow method by casting a blue hue around all the text. Since the date was on a really busy part of her layout she also added a slight shadow to help it to be seen. For this cute layout Lisa used the parts of Loom Love (Sampler, Solids, and Alpha).
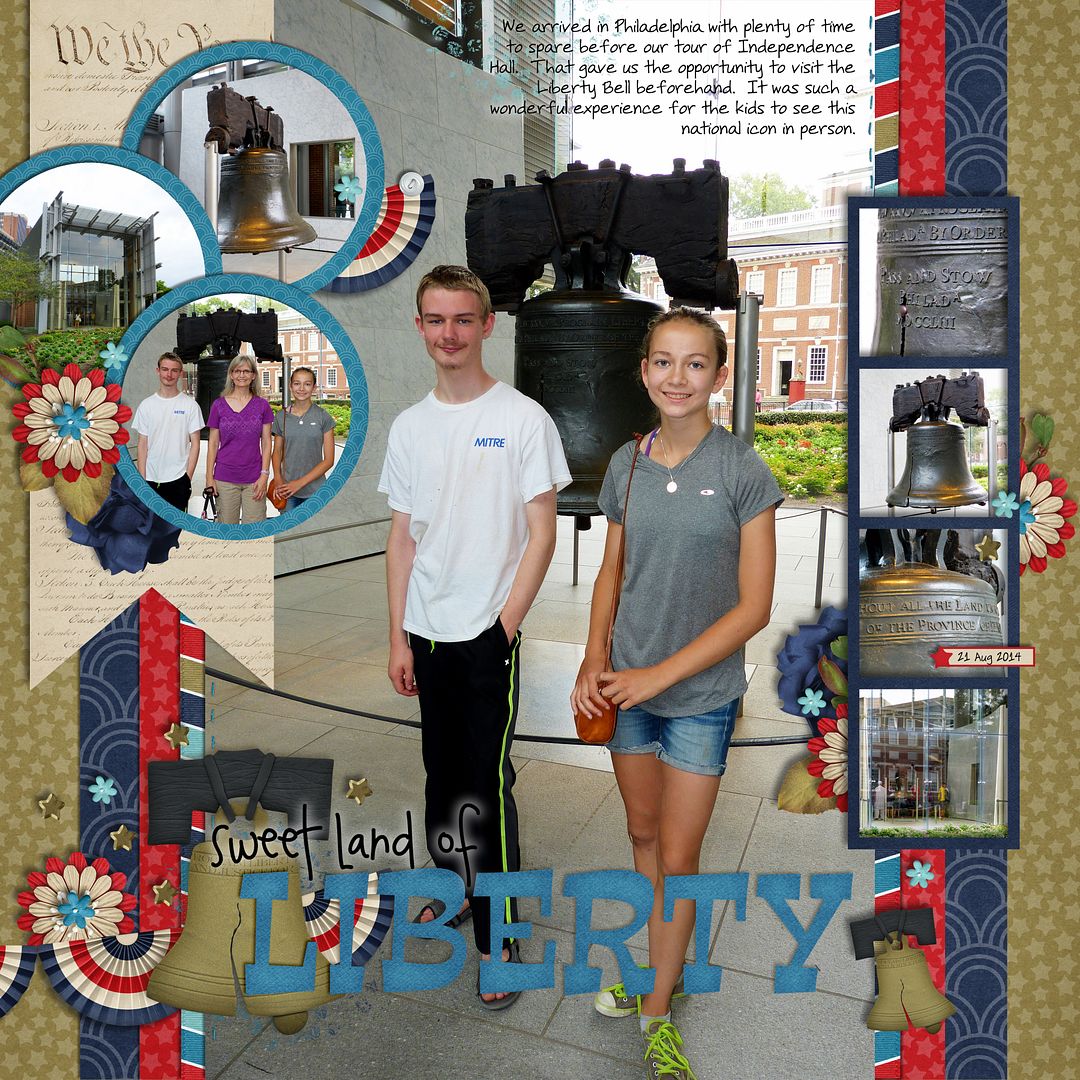
The outer glow method doesn’t work just on text, but it also works on word art as Jan (QuiltyMom) demonstrates with her layout. To make the black letters stand out and not fade into the black of the Liberty bell the outer glow creates the perfect contrast. She also used the outer glow method on her journaling to ensure the words didn’t blend in with the photo. For this fabulous layout Jan combined Liberty and Liberty (word art) with a template by Cluster Queen Creations.
This video features Chelle’s Creations Falling 4 U kit. Visit Chelle’s Creations store here to see this kit and her other fabulous creations.
You don’t want your journaling to get lost on the page. You placed it there to remind yourself and tell others about the experiences you had. The next time you are finding it hard to read what you wrote try one of Chelle’s tricks.
You must be logged into the ScrapOrchard forum for the link to work. $14.99 per month OR $74.99 for six months = Six for the price of Five.
About Chelle
Hi! I'm Chelle: a 40 something mom of 7. My husband & I live in a rural community in the rocky mountains with our 4 children still at home. In the winters we enjoy sledding & snuggling by the fire. I the cool fall evenings we love relaxing around the campfire & meeting friends at the county fair. Admiring the stars on a clear summer night and splashing in spring mud puddles. We love making memories together. Me? I love blueberries, fresh salmon, creating, memory keeping, & above all my family & my faith.


 Hi! I'm Chelle: a 40 something mom of 7. My husband & I live in a rural community in the rocky mountains with our 4 children still at home. In the winters we enjoy sledding & snuggling by the fire. I the cool fall evenings we love relaxing around the campfire & meeting friends at the county fair. Admiring the stars


