


Hi everyone… this is a photo tutorial.  It’s Jenn, aka jk703 here to share a fun and maybe new to you technique! Hope you like it!
Step 1: Open your photo in Photoshop or Photoshop Elements. Save as a new file. This way the original will be available if you need it.
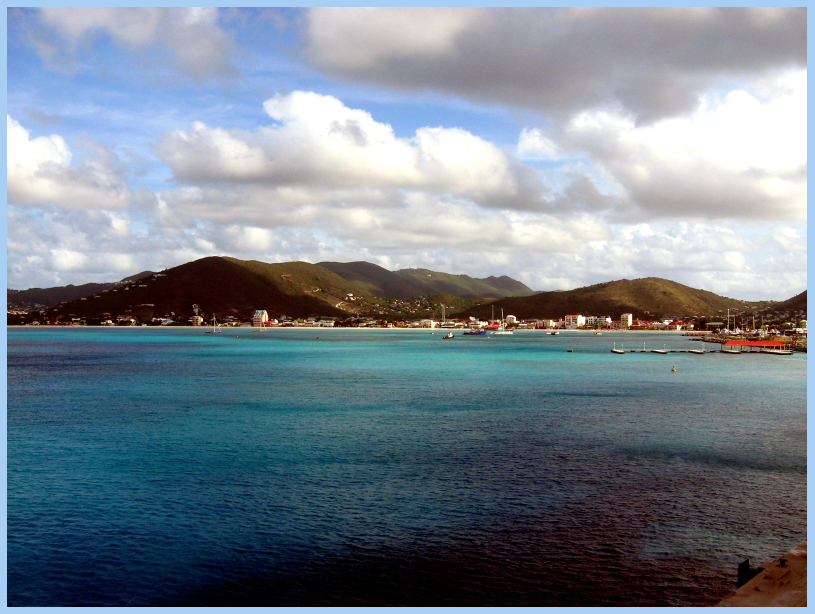
Step 2: Choose the Quick Mask Mode. It is the little box with a circle under the Foreground and Background Color boxes.
![]()
Step 3: Choose the Gradient Tool. On the sub menu, click on the reflective gradient (3rd box), and also make sure that Reverse is checked. You can use any of these that fit your picture though.
![]()
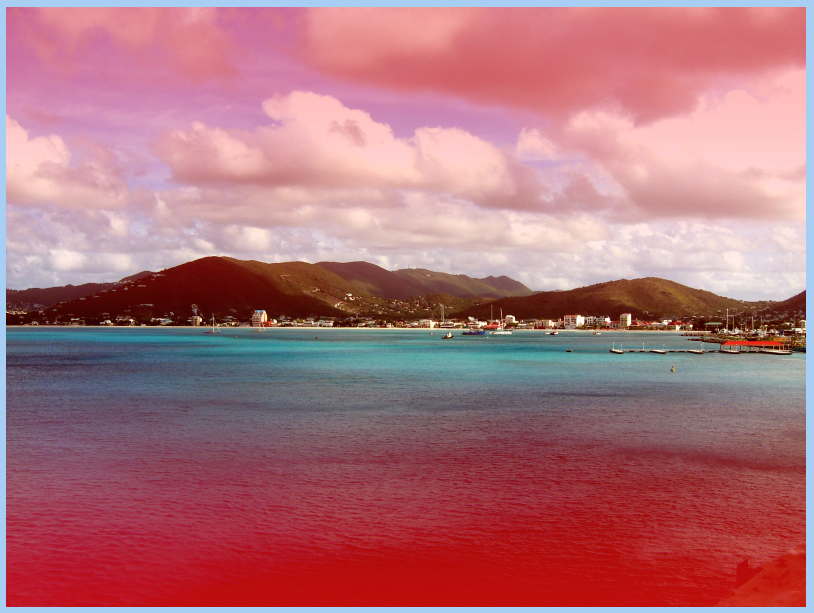
Step 4: Select the part of the photo that will be the miniaturized portion. To do this, click, and drag up. Let go when you feel you have a good space that will be mini. After I let go, my image gets the red gradient mask. The portion that doesn’t have as much red will not be blurred as much.
![]()
Step 5: Click the Quick Mask Mode to turn off the red, and you will see marching ants marching on your photo.
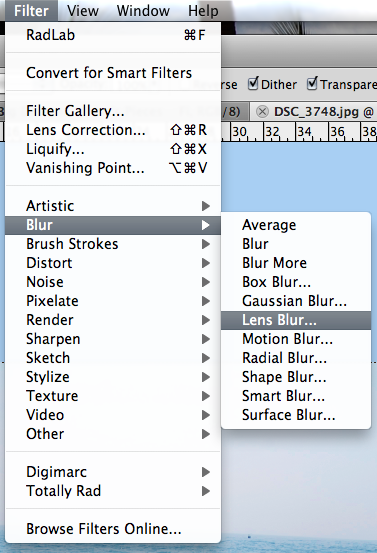
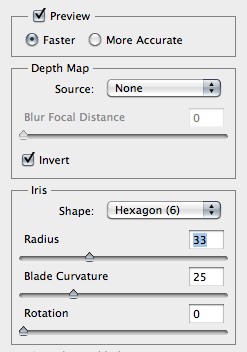
Step 6: Click on Filter > Blur > Lens Blur. A large screen will pop up, showing all the options that you can play with. When doing this type of photo, I used the Invert and Radius (below). Play with them, and see what you like for your photo.
Here is what my photo looks like now:
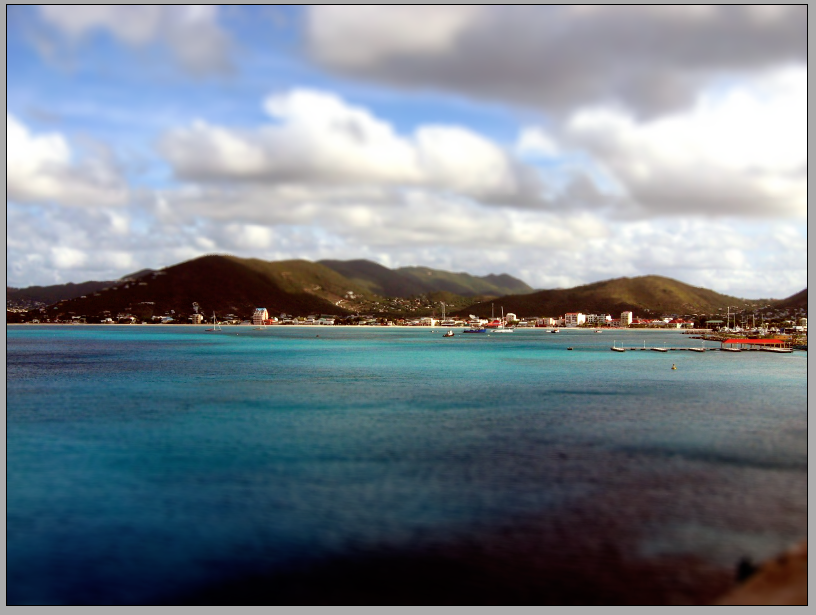
Looks pretty cool, yet still shows off that wonderful island! Here is some more layouts and photo examples by Jennifer/jmljensen and Erica/Stanworth:
Jennifer’s Before:
Jennifer’s After:
And here is Jennifer’s Layout, and she used the Summer Lovin’ Kit:
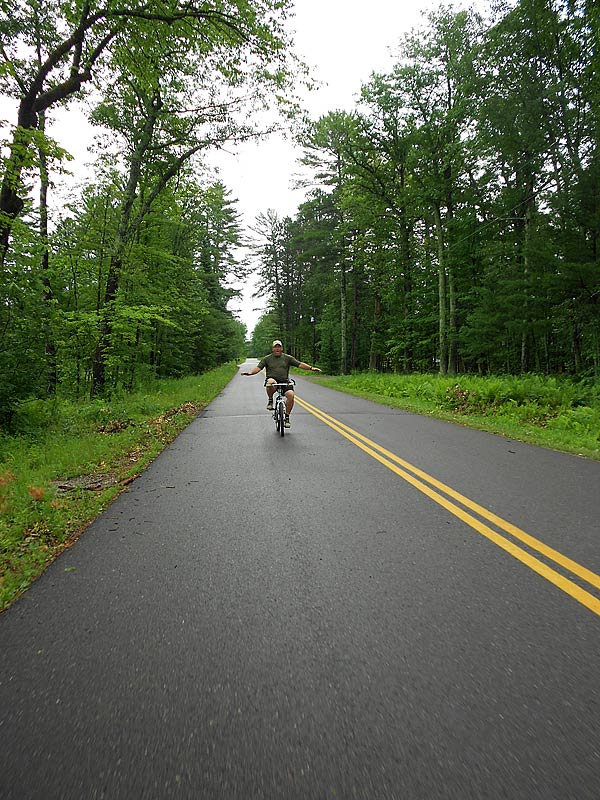
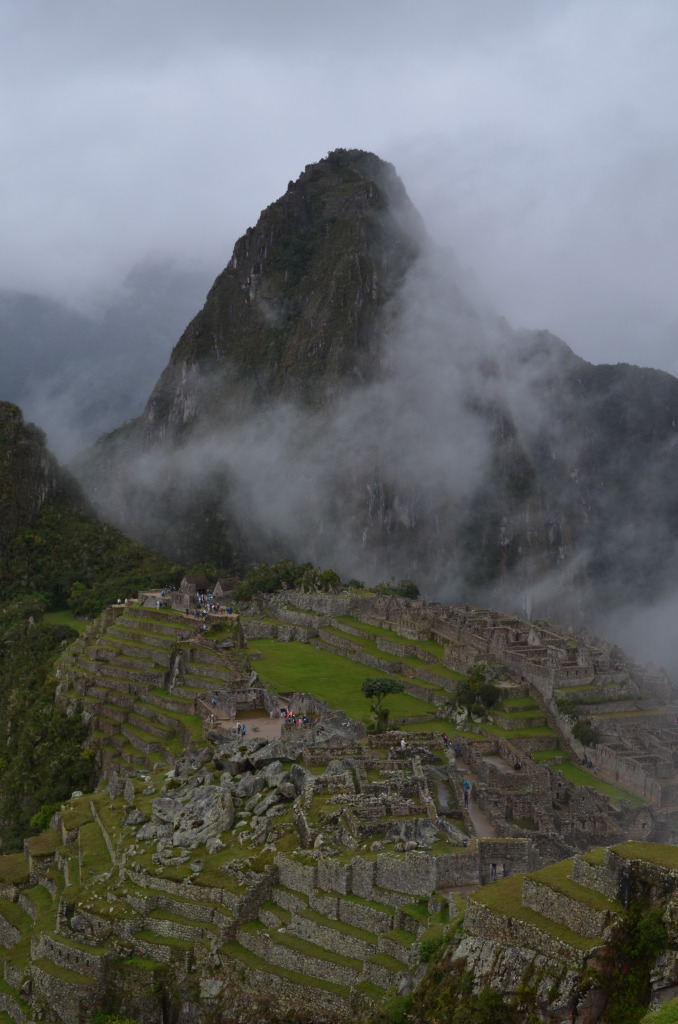
Eric’s Before:
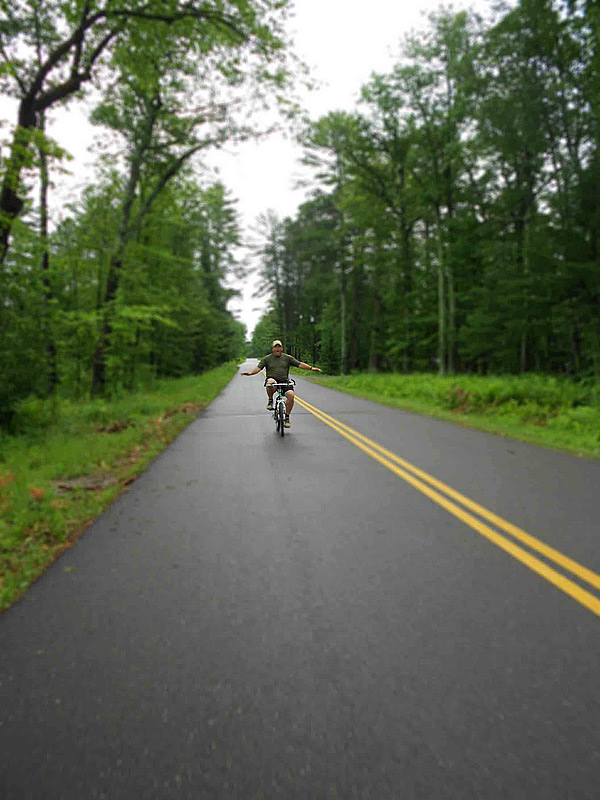
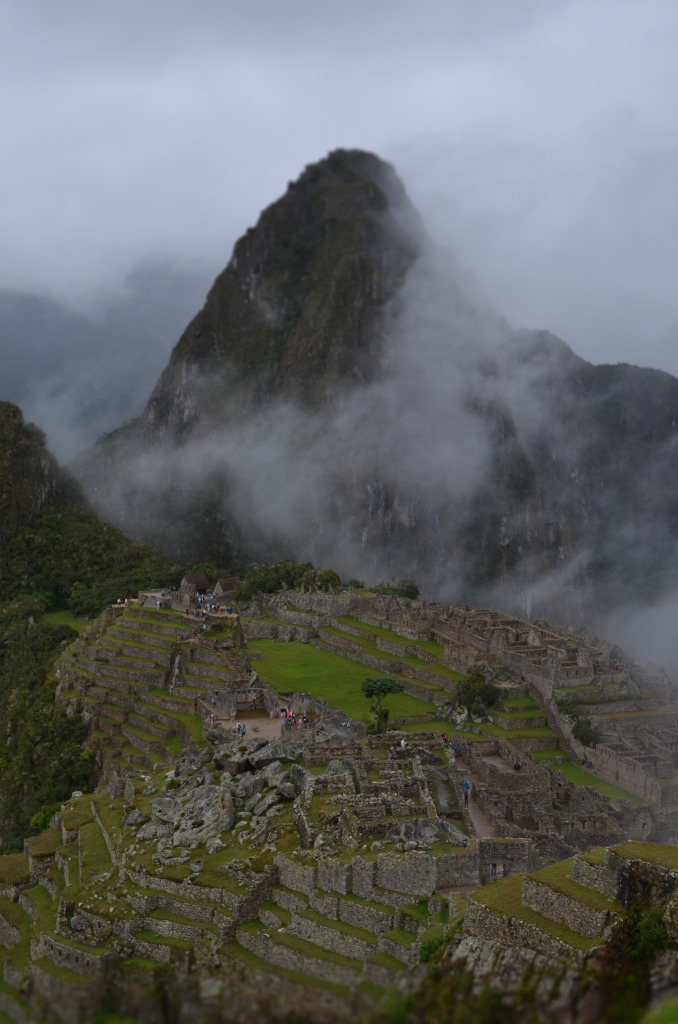
Erica’s After:
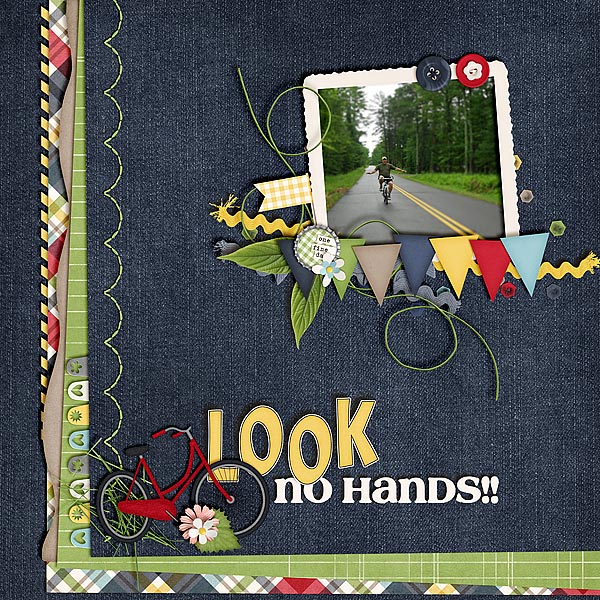
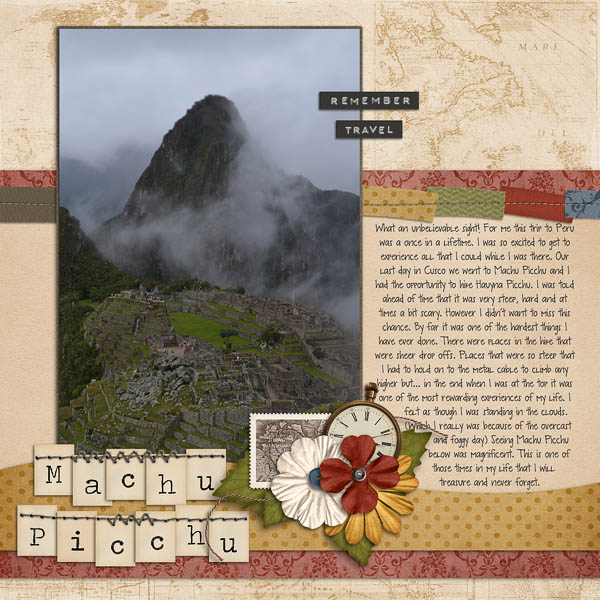
Erica’s Layout, and she used the Traveler Collection:
Well, a quick tutorial to add a “little” miniaturizing to your photos! Hope you learned something new!
Have a great day, and thanks for stopping by!


 Hi! I'm Chelle: a 40 something mom of 7. My husband & I live in a rural community in the rocky mountains with our 4 children still at home. In the winters we enjoy sledding & snuggling by the fire. I the cool fall evenings we love relaxing around the campfire & meeting friends at the county fair. Admiring the stars


