


Washi tape is super fun, and a great little embellishment to have in your stash! This is Jenn, aka jk703, here to bring you Washi Tape Shadowing Techniques today. There are a lot of way to shadow, and we all have our little quirks, so hopefully one of these might work for you and your layouts!
Shadowing washi tape is a little tricky, but it doesn’t have to be. Washi tape is a fun element, to tack items down, use as a journaling/date location, and even as a border with multiple pieces across a whole edge on a layout. Once you use it, you will be “stuck” wanting to use it over and over again!  Here are a few ways we can shadow washi tapes.
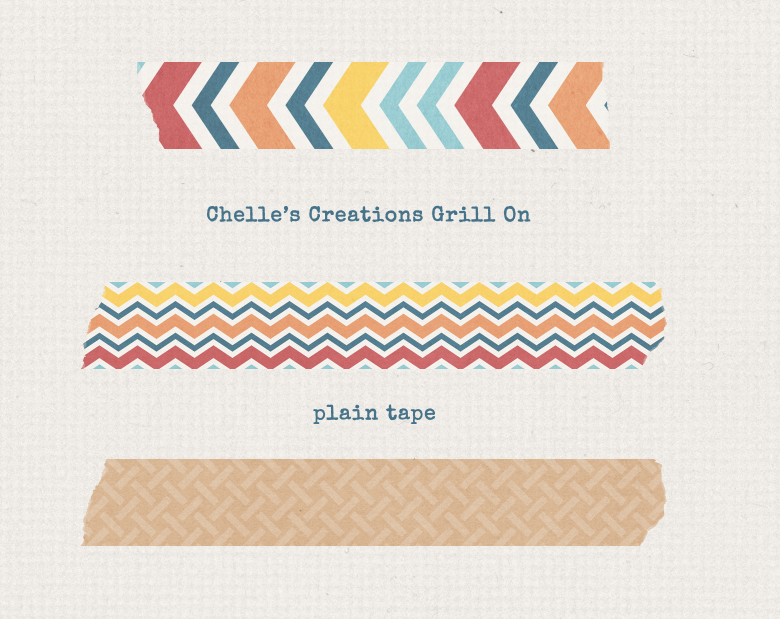
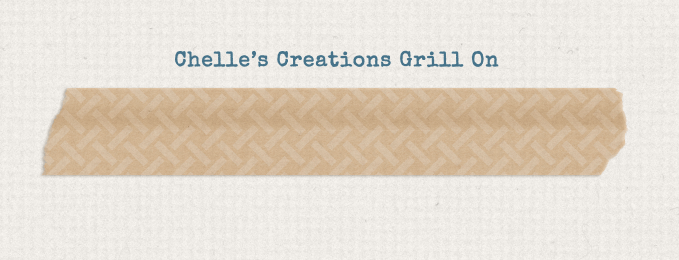
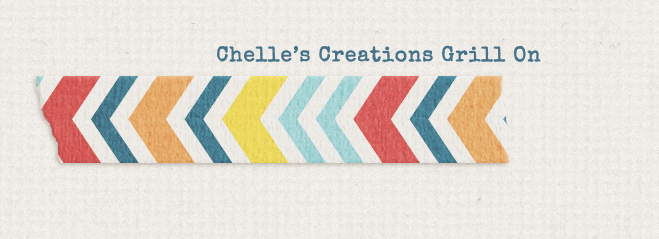
Here are the tapes that I have used for my examples. They are a part of Grill On. Plain Tape
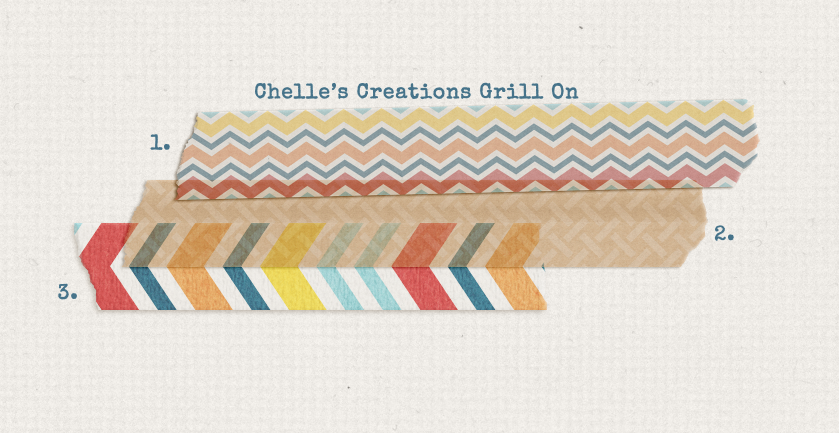
Tape with Shadows – layered for you to see how they might look stacked.
#1 Easy Peasy
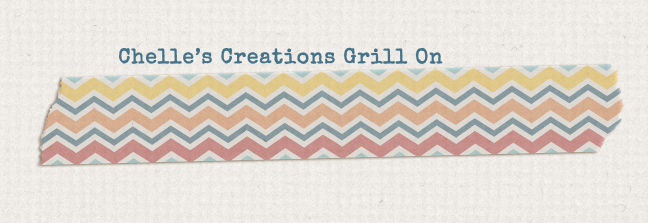
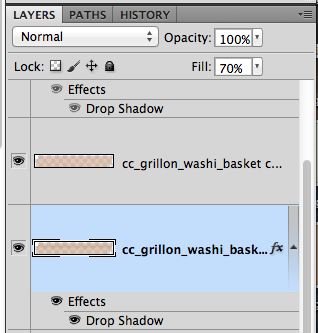
You start out with a piece of washi tape. First, you will want to make another (duplicate) copy of the original tape – right click, and choose duplicate. For this shadowing technique, I’ve added a shadow (mine are 45* – down and to the left) to the lower of the two copies. I have a distance of 4 and a size of 5. I lowered the opacity to 74, and used the Linear Burn Blend Mode. 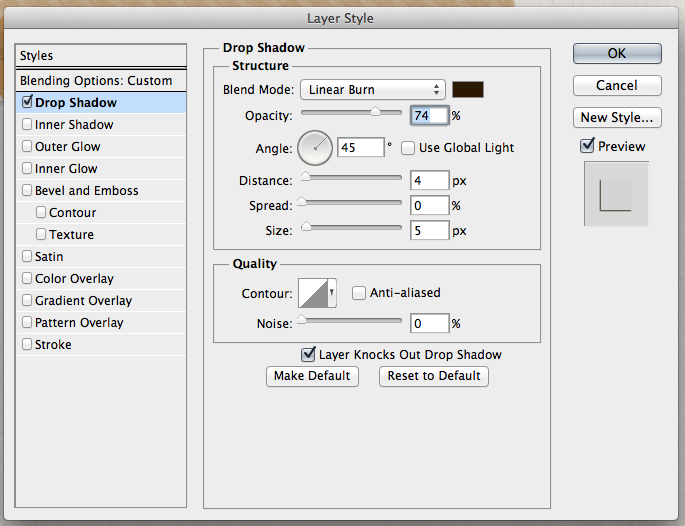
The bottom layer tape has a blend mode of Overlay, and a Fill of 34%.
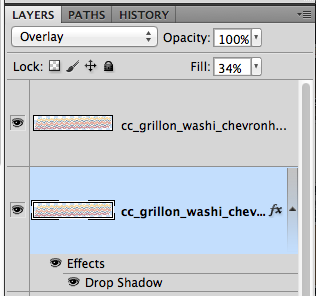
The top layer of tape has a Normal Blend Mode, and is at 51% opacity.
See, that wasn’t so hard! Next up, we will try something else – adding a little depth over paper. Oooooohhhhh…. 😛
#2 A Little Burn Won’t Hurt
Here is what my finished tape looks like stand alone. I’ve made it appear as if part of the tape has a higher lift on the top portion. This will be layered onto another piece of paper. If you look above, you will see this on top of another tape layer too. It will appear as if the edge of the underlying paper has put an edge into the tape.
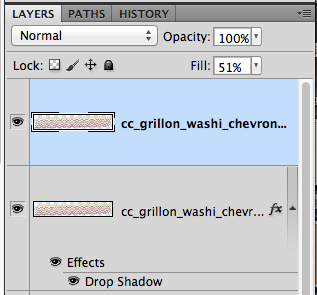
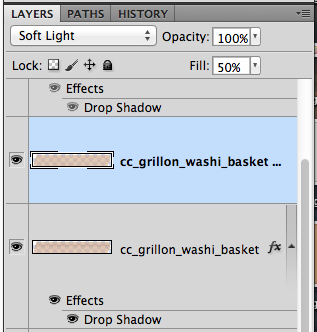
For this shadowing process, you will want to have two duplicate copies of the tape layer. With the bottom one selected, I’ve set my shadows to Linear Burn, 40% opacity, Distance of 4 and a size of 5.
My bottom layer has a Normal Blend Mode, and a Fill of 70%
The top layer of tape has a Soft Light Blend Mode, with a fill of 50%.
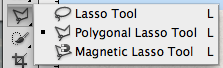
Next, with the bottom layer of the tape selected in the Layers Pallette, you will choose the Polygonal Lasso Tool. You will use this tool around to make a box around the tape portion that is OVERLAPPING something – a piece of paper, or a photo, whatever the tape is overlapping. Once your box is made, you will get marching ants.
Now, click on the Burn Tool. It’s the one that sort of looks like the fingers/hand are making a circle.
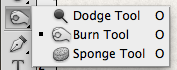
Now, my settings are at 65 size, Exposure 30%, and Protect Tones is checked.
![]()
At this point you should still have marching ants on the bottom layer of tape. With the Burn tool, brush over the bottom edge of the marching ants – where your tape overlaps another paper/photo, etc. You should get a slight darkness added to this layer of tape. Almost like a crease.
No too bad, and looks especially good when using on top of paper layers. Makes it just a little more realistic with a darker bump where the overlap occurs.
#3 Textured Tape
This is a fun shadowing technique for washi tape. It adds a little dimension where you might not have realized you wanted it, lol!
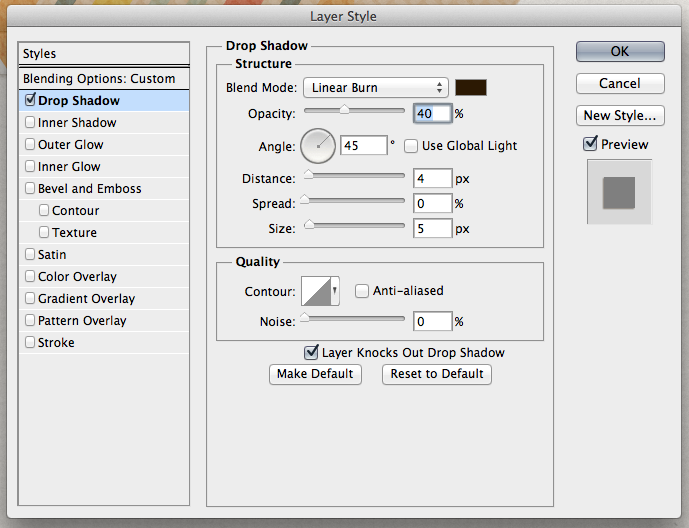
Make 3 copies of the tape for this shadowing technique. My piece of tape above has a Drop Shadow using Linear Burn, 34% opacity, Distance of 5 and a Size of 10.

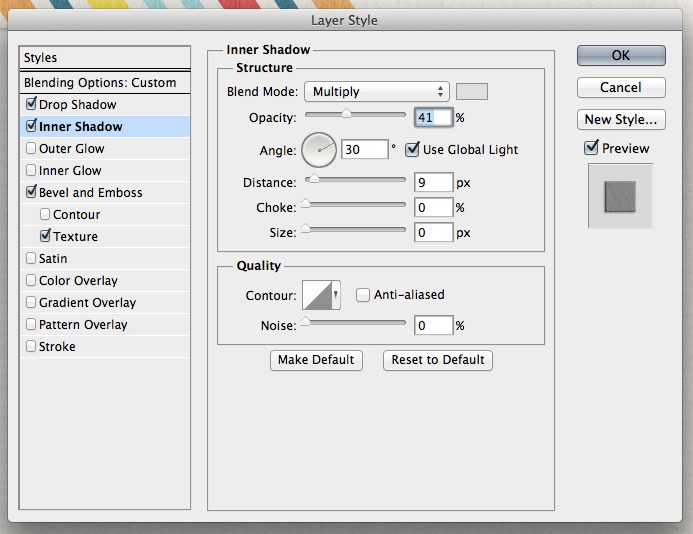
THEN, it also has a Inner Shadow using a Multiply Blend Mode at 41%, and a Distance of 9.
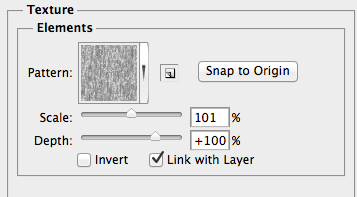
THEN on top of that, I have a Bevel and Emboss – Texture added! My Scale is 101%, and my Depth is 100%.
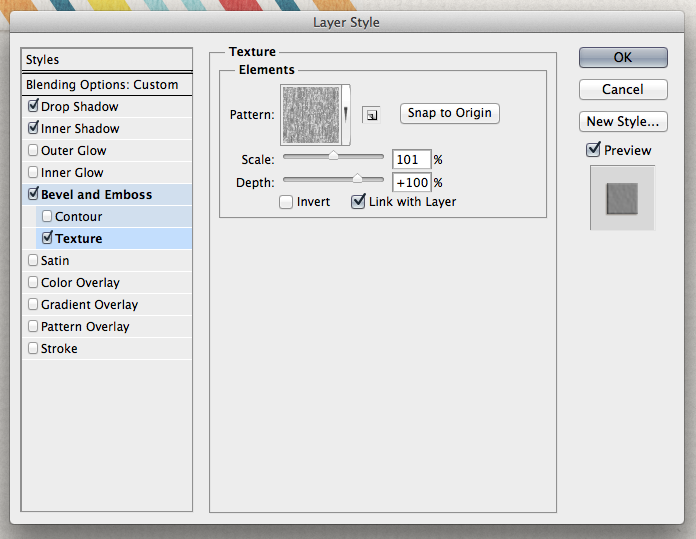
See that little triangle pointing down on the right of the pattern box? Click that, and choose a pattern that you like. I’ve chose Wax Crayon on Sketch Pad.
Bottom layer of tape is set to Linear Burn, with 50% opacity.
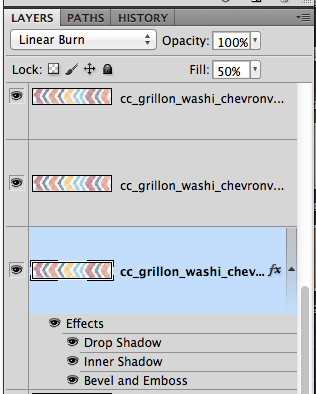
Middle layer of tape is set to Overlay, and 49% opacity.
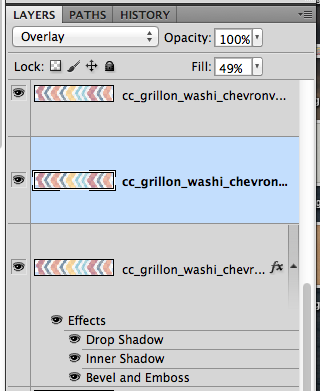
Top layer of tape is also set to Overlay, and has a 51% opacity.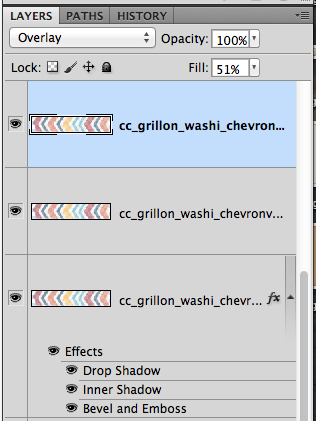 There you go – a textured, fun, washi tape.
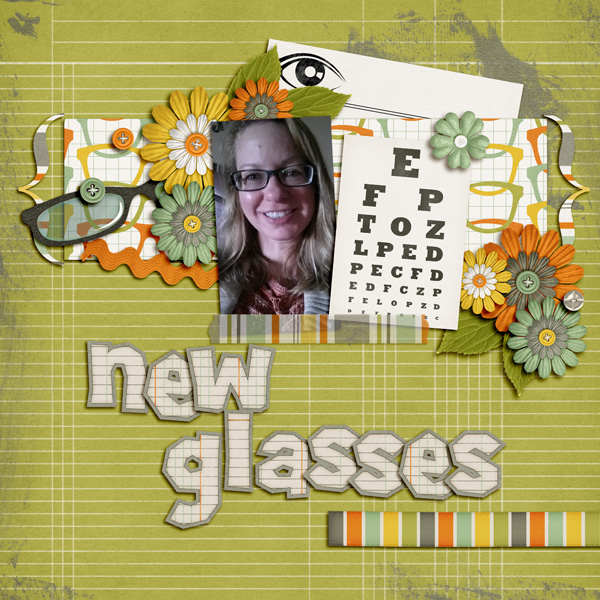
Jenn (jennschultz) created this fun page using tape from See Clearly Now. She tacks down her picture and the eye chart with it.
Hope you learned something new with Washi Tape Shadowing Techniques. There are so many ways to shadow things in PS/PSE. Make sure you like what you have, and play with the blend modes. They can make or break the coloring. Have fun! Thanks for stopping by today! See you next time.


 Hi! I'm Chelle: a 40 something mom of 7. My husband & I live in a rural community in the rocky mountains with our 4 children still at home. In the winters we enjoy sledding & snuggling by the fire. I the cool fall evenings we love relaxing around the campfire & meeting friends at the county fair. Admiring the stars


Pingback: CraftCrave | DigiFree | CraftCrave