Scrap Skills: Blending Photos | Digital Scrapbooking Skills

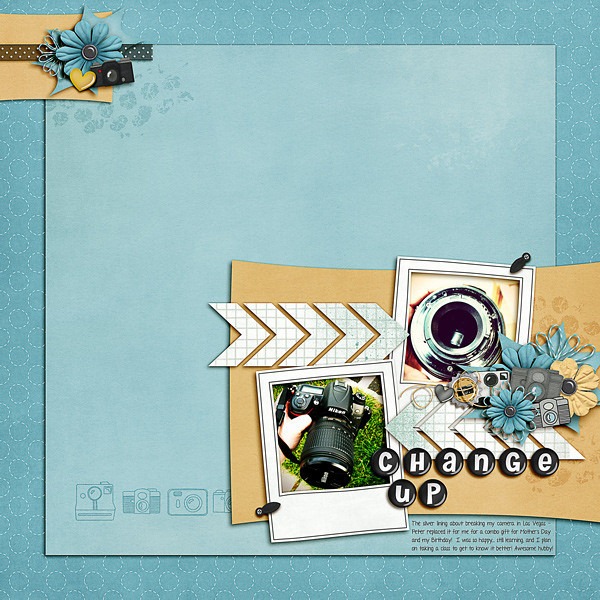
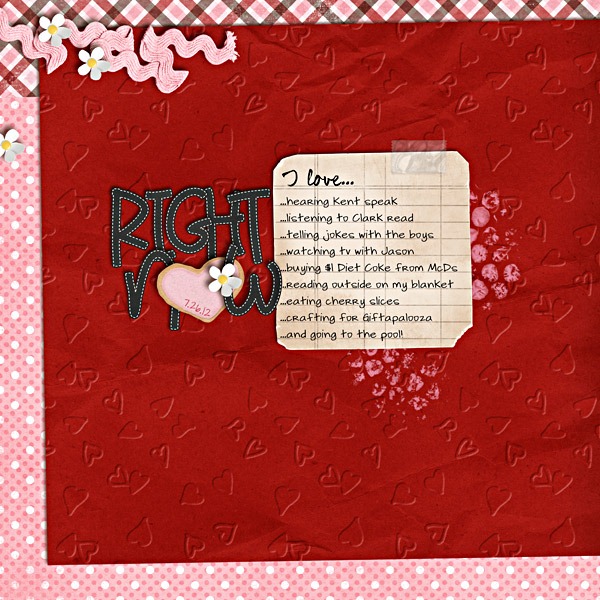
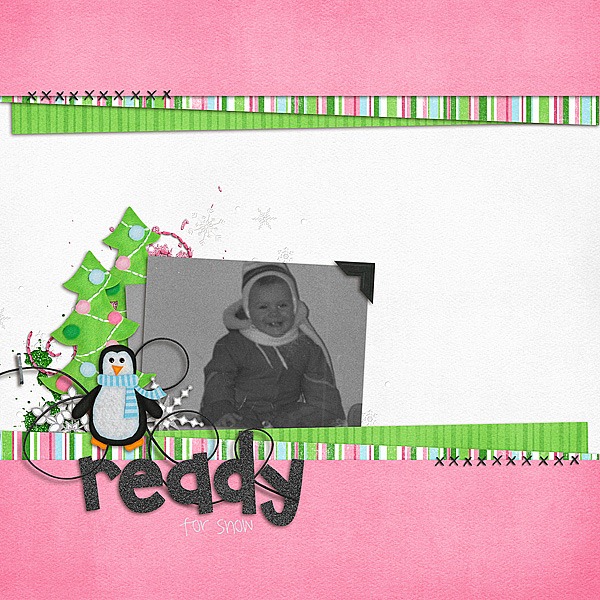
One of the things that attracted me to digital scrapbooking was the ability to use photos in unique ways on a page. Blending photos is definitely something that can’t be done with traditional paper and scissors, but the effects can be so very striking.  Chelle pointed me to this GSO post of blended photos that inspired her here . The pages there are amazing, and when I first looked at them, I thought, “I’ll never be able to do that,” so I searched through Chelle’s YouTube channel for a video on blending. She has lots of terrific tutorials there, including one on blending photos into the background of a page here. She does such a good job explaining it, I can’t wait to try it!

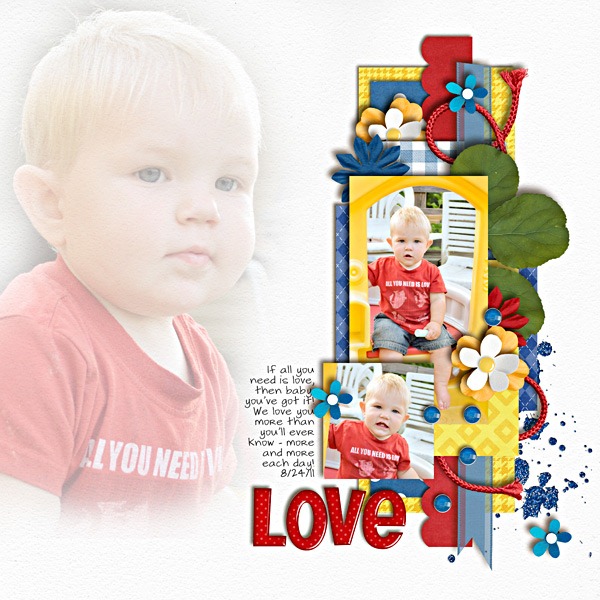
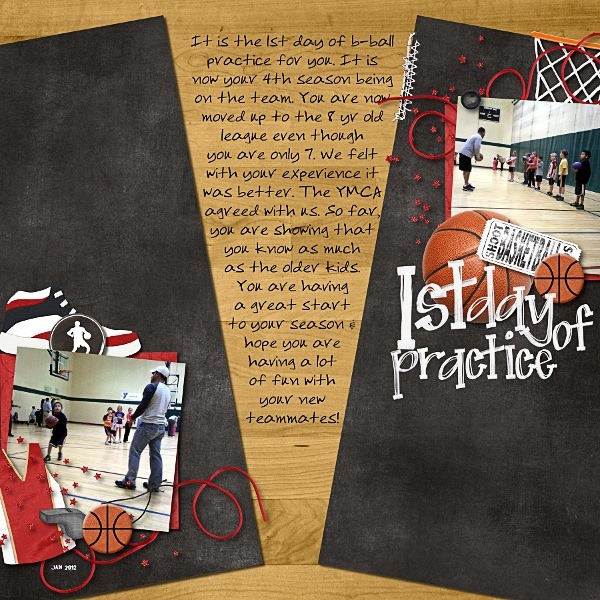
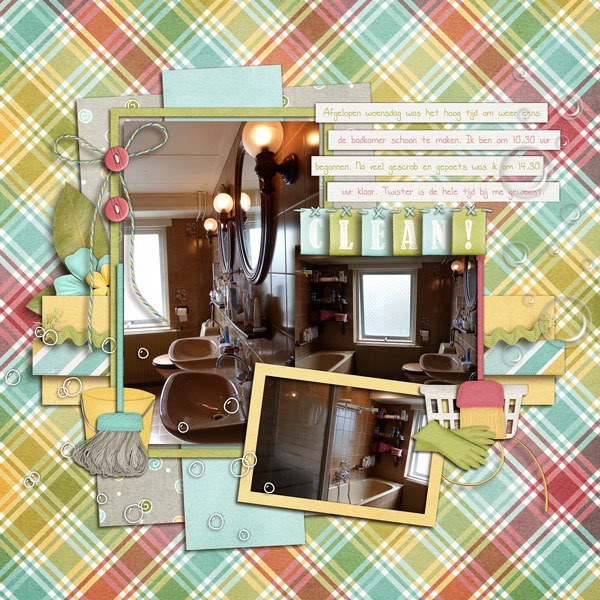
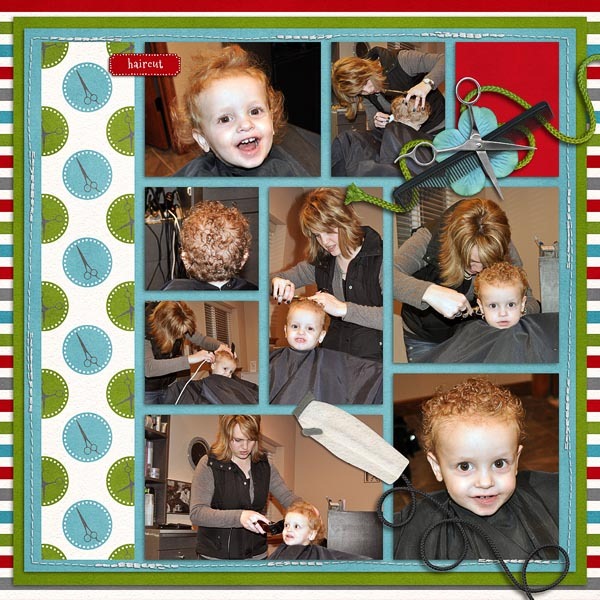
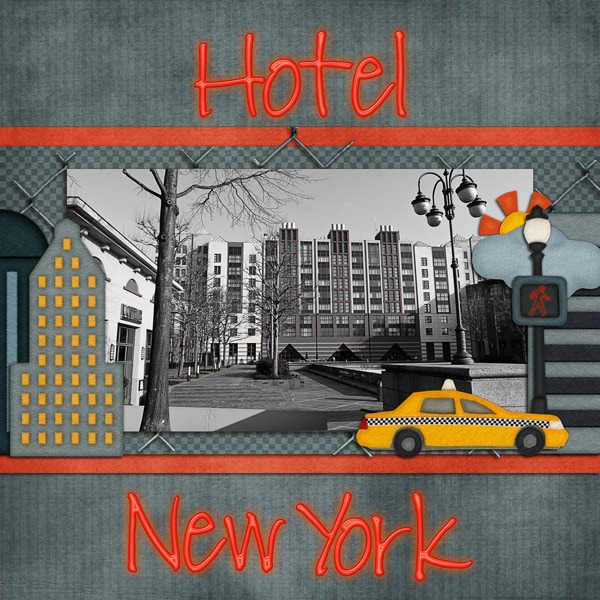
Chelle’s very creative team members have made some example pages for you to see. Melissa has an adorable little boy, and she made a page about his first bath given to him by the nurse and his daddy while she was recovering in the hospital. A special event like this deserves special attention, and she gave it the emphasis it deserved by blending the photo of him wrapped in a towel into the background while the focus picture is out front and matted. First-Bath-RSMelissa 
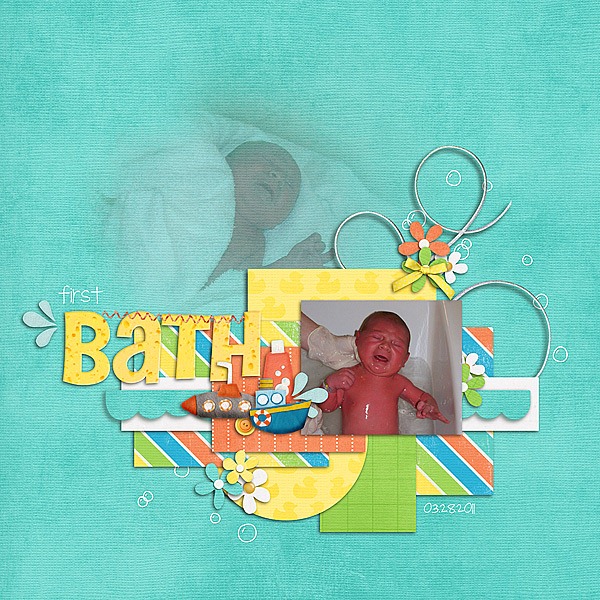
Next, Roxana made a gorgeous travel page, and instead of blending a person’s photo into the background, she used a scenery photo for a stunning effect. Roxana’s pages always make me want to travel to where she has been, and this one is no exception. That sunset looks spectacular in the center. 29-sunset-webRoxana 
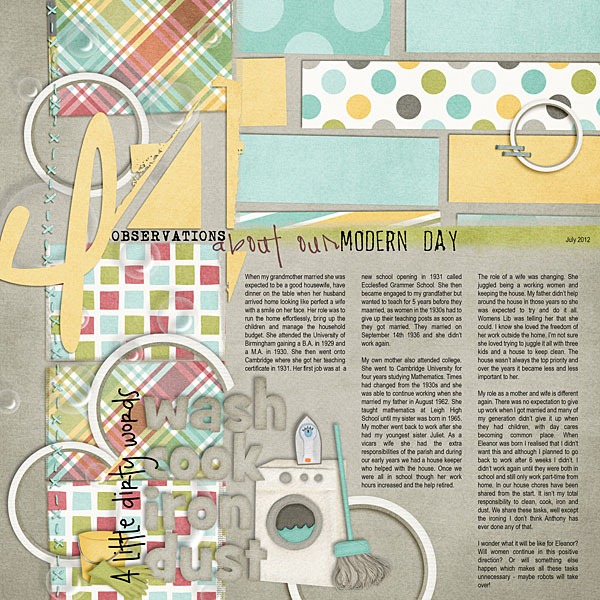
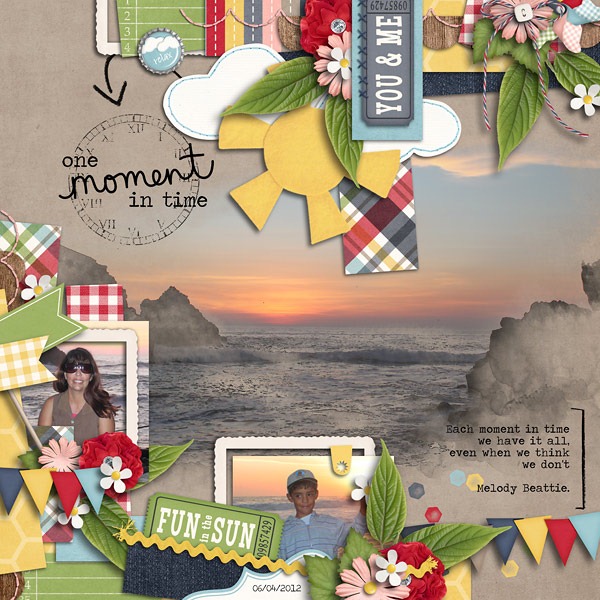
Next, Ophelia has used Chelle’s Black Belt kit to scrap a page about her child leading the karate class in their practice session. Blending the class photo is such a unique way to show the whole room on the page. 2011-08-03-runningpractice_smOphelia 
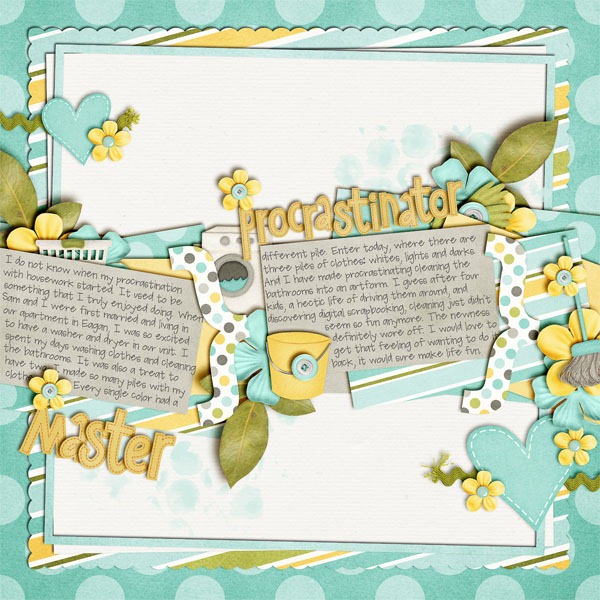
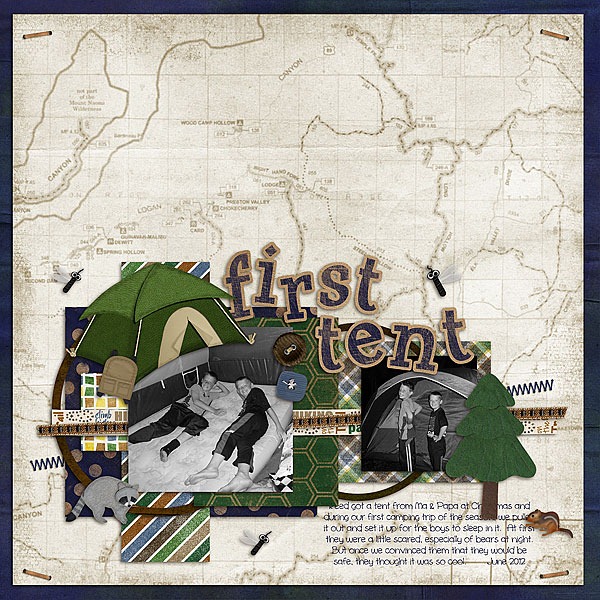
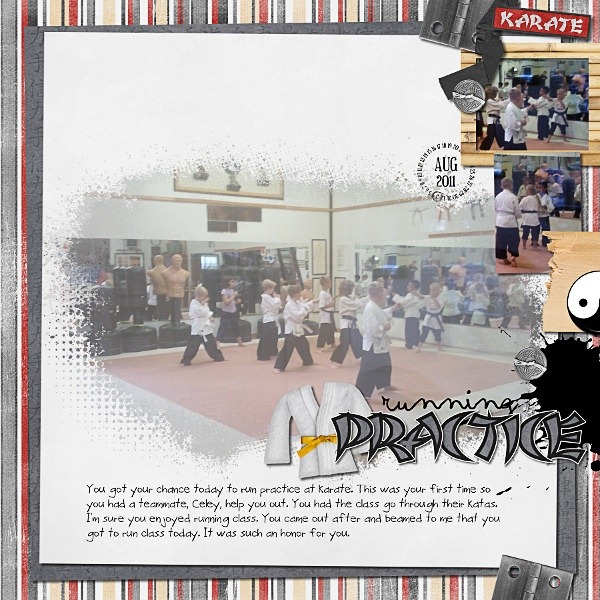
Finally, Kayla used Chelle’s newest kit Tea for Two to make a gorgeous page with a photo she took on a recent family vacation to Disneyland. She chose to use the blended photo as the only photo on her page, and it looks awesome.  
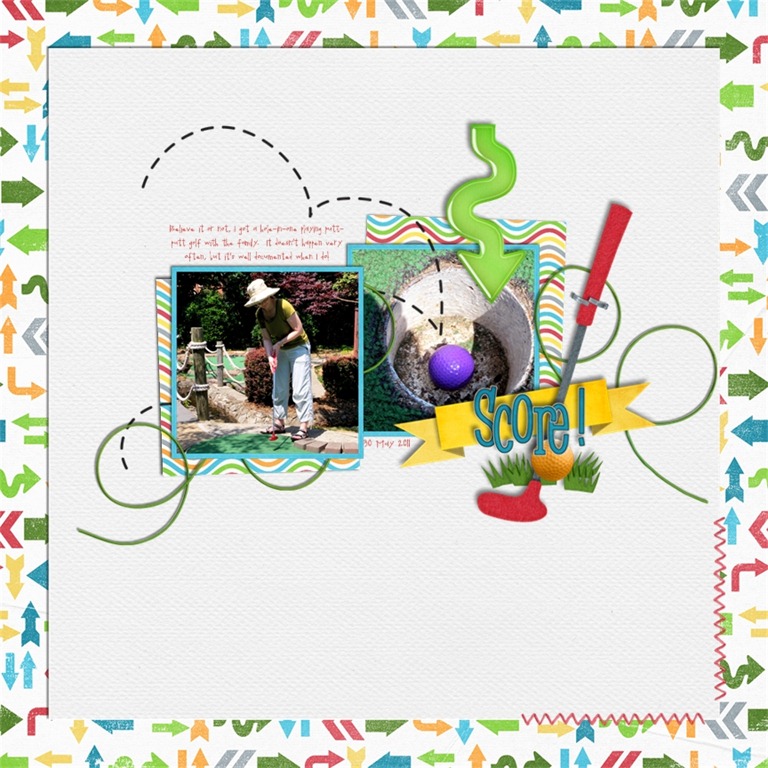
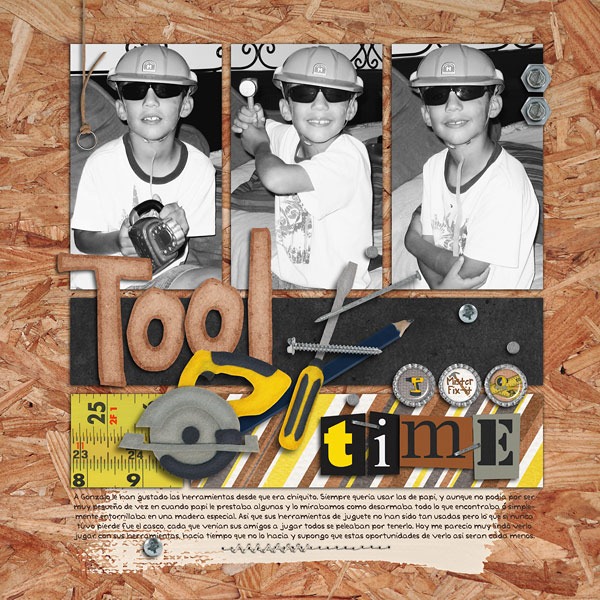
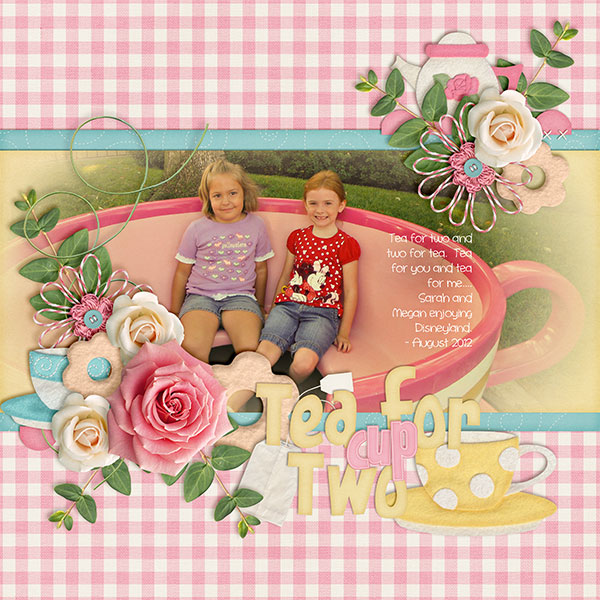
By the way, the Tea for Two Bundle is still on sale for a short time more, and right now, the gingham papers are free with purchase of the bundle.

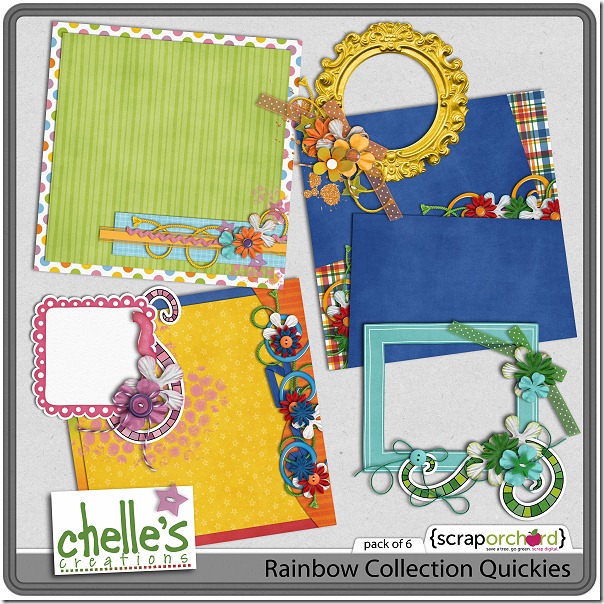
Each of these layout artists has used a different blending mode for her photo and a different type of photo, but each page looks amazing. I hope you are inspired as I am to give this technique a try. If you haven’t stopped to watch Chelle’s video, stop to watch it now. You won’t  be sorry!
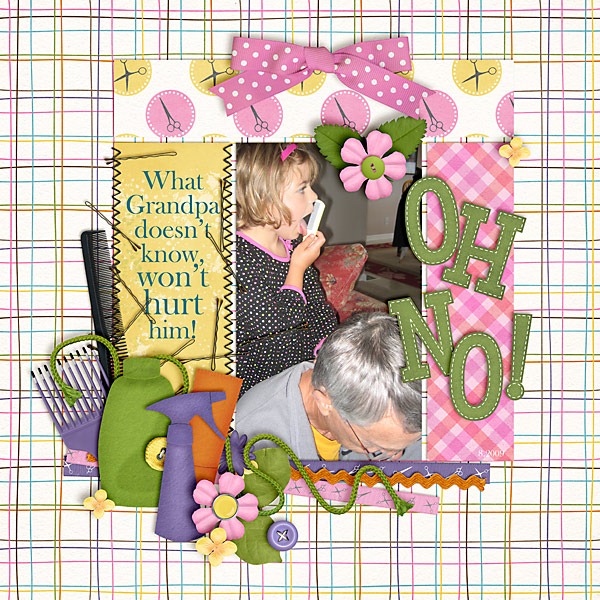
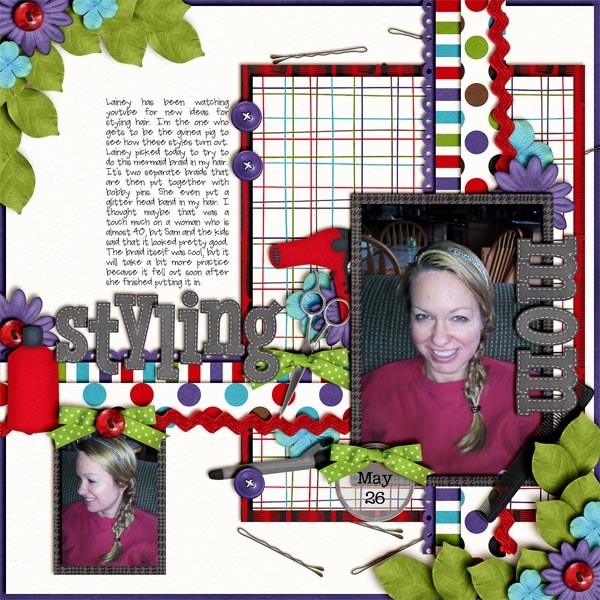
Rainbow Collection | Digital Scrapbooking Classics

Have you ever wished you had just one giant digital scrapbooking kit to be the backbone of your entire collection? Before I knew about Chelle’s Rainbow Bundle, I wished for a multi-purpose kit to be the basic background for any layout, and then I could add elements from specialty themed kits, if needed. The Rainbow Bundle is that staple I needed. Chelle’s team members have been playing with the bundle, and I want to show you their layouts.

First, Mary used the Rainbow Bundle to make a page with some photos of her sweet little blonde boy. She has used all bright colors in the kits, various elements from the primary color sets, to make a cheerful page with her gorgeous photos. I love how she used the phrase on his t-shirt as the inspiration for the page, and her clustering of flowers and strings is the perfect background for the pictures.kentlove-2011Mary

Next, Kairyn made a double page layout with the Rainbow Bundle. Her children made adorable lapbooks about subjects they had in school, and her pictures of them proudly holding their projects are the focus of her pages. First, the left side2008-04-29Lapbooking-LKairyn then the right2008-04-29Lapbooking-RKairyn and here’s what the double layout looks like altogether 2008-04-29Lapbooking-2pgKairynLisa I love that yellow gingham paper in the background and the many buttons and stitches holding down the photos.

Here’s a closer look at the bundle in the market: cc_rainbowcollection_bundle

and in case you want to try it out on a smaller scale first, I love the quickies Chelle has done. cc_rainbowcollection_quickies

Aren’t they just cheerful and happy? I know you’ll have fun with these, and they will certainly be a staple of your stash of supplies.

Scrap Skills: Using Arrows

I love arrows on digital scrapbooking pages. In fact, I have been known to purchase a KIT just because it contained several cute arrows. They are great for directing attention to what I really think is important, especially if it is a small detail that might otherwise get overlooked. I also like to use them to direct the flow of attention because a scrapbook page doesn’t necessarily need to be read left to right, top to bottom, as we do for books, and arrows can add interest and emphasis and a unique artistic element. For example, consider the following layout by Jan. She used a background paper full of arrows that give a general feel of movement to the page, and then she added a large arrow to point to the photo of the ball in the hole in her game of mini golf – all from Chelle’s Putt-Putt kit. I also love the dashed lines she used to create a bouncing ball path. scoreJanJenn used a different kind of “arrow” on her page. Like Jan, she used arrows to keep the pictures as the focus, but she created her own arrows from chevrons using the shape tool in her program and then clipped a paper and splatter from the kit to the shapes. By the way, she used the Oh Snap! kit and the Button Alpha on her page. i-7sCm6pF-LJenn

Chelle’s newest release Mark My Words has several arrows in it as brushes and PNG elements that can be added to a page for emphasis. Shannon used several of the arrows from this to add emphasis to her page. Notice how well the arrows help to draw the eye all around the page to read the important information, and they add visual interest and a playful feeling to her page.17-SL-LBH-MMWShannnon Here’s a closer look at Mark My Words in the Market (image is linked). cc_markmywords I hope you are inspired by these layouts as I am to try some of the techniques the ladies have used. If you haven’t used arrows in a while, maybe this is just what you need to jumpstart your page.

My Sweet Valentine | Digital Scrapbooking Classics

Let’s talk chocolate, shall we? I LOVE chocolate in all varieties. Chelle has a yummy digital scrapbooking kit called My Sweet Valentine that has lots of chocolate elements in it, so, naturally, it is one of my favorite kits. Yes, the kit is great for a Valentine’s Day themed page, but it works for many other subjects. It is also full of hearts and red and pink patterned papers, so it is perfect for pages about things we love, whether they include chocolate or not.

Mary felt like making a page documenting a few things she loves right now. Her page is simple and sweet, and it really gives us insight into her heart which is so very important in getting our memories on pages. I love that red heart embossed paper, and I love how she used the heart-shaped cookie as a place to journal the date on her page.rightnow2012loveMary

Jenn also made a page about something she loves – fudgy brownies. I love fudgy brownies, too, and I love how she took a picture of the brownie box to include on her page. I think she will enjoy looking back at this page in years to come to see how this product has changed and think about how much she loved those treats back in the day. iheartbrowniesJenn

As I said before, this kit is one my personal favorites, and I found it the perfect kit to use for pictures from a recent trip to New York City. My friends and I  had read about a cupcake bakery in the city before we arrived, and when we discovered there was a storefront for Baked By Melissa on the same block as our hotel, we felt it our duty to support the local economy. Of course, we took pictures, and I just had to use the embossed cupcake paper and felt cupcakes to make this page.  78BakedByMelissaPB

I’ll leave you with a closer look at the kit in the market. I’m feeling like I need a snack already. cc_mysweetvalentine_kit

Using Glitter | Digital Scrapbooking Skills

Have you ever wondered what to do with the glitter elements or papers in a digital scrapbooking kit? Maybe you tend to shy away from them, but I would encourage you to use them once in a while to give a little sparkle to your layouts. Chelle’s Creations has glitter in various forms; for example, the Pearly Whites kit has glitter frames and brads in various colors, and the Ho! Ho! Ho! Bundle and the Holly Jolly Bundle each have a pack of glitter papers. The elements that are already glittered can simply be added to a page, and the papers can be simply added, as well. But, Chelle’s very talented team members have made some pages to show you some simple ways to add glitter where there wasn’t glitter already in the kit.

First, Roxana used the Mane Event kit to make a page about a trip to the salon, which was a perfect kit for her photos. She used the black glitter paper from Holly  Jolly Holiday Glitters to clip to the banner elements from CU Banners V3, and she also clipped the glitter to a paint splatter. Using the black glitter in multiple places on the page draws attention to their dark hair and helps to keep a reader’s attention on the “mane” point of her page.29-haircuts_webRoxana Next, Melissa used the glitter splats in the Holly Jolly kit on her page, and she clipped a glitter paper to her title alpha. It is the perfect compliment to the vintage black and white photo she used. Ready-for-SnowMelissa Finally, Ophelia used the red glitter paper to clip to the stars scatter on her basketball page.2012-01-03-1stdayofpractice_smO

Let’s take a look at a couple of bundles in the market that have glitter papers and elements.

cc_hohoho_bundle_preview_2postcc_hollyjollyholiday_bundle_preview_2post

I’m planning to use this technique of clipping glitter papers to elements when I scrapbook my pictures of the nighttime view from the top of Rockefeller Center. Even though I visited New York City in the summer, I will use glitter papers from these winter kit bundles because I think my pages will benefit from the sparkle. Think outside the box: do you have some pages that need sparkle? Clip some glitter papers to some elements; I think you’ll like what you see.

Spic-n-Span | Digital Scrapbooking Classics

Laundry is that chore that is never finished. Wash, dry, iron, fold, clean, sweep, then do it all over again. If you are participating in a Project 365 this year, you have probably taken a picture of the laundry room already. Chelle has created the perfect digital scrapbooking kit to accessorize your pages called Spic-n-Span.  Take photos of your children doing chores, or of a house renovation (lots of cleaning required there!), or you can even make a chore chart from the elements in the kit. Her CT has been playing with the kit to show you a few possibilities.

First, Patty has some photos of her new bathroom all clean and ready for use. I love how she used the bubbles to float over the whole page, and I love that title made from the green and blue alphas. Patty is a talented scrapper who has been a guest member of the CT for the past few months, and we have loved seeing her pages with Chelle’s kits.Patty_SpicNSpan

Next, Ronnie made a photo-less layout and wrote about her observations and feeling about chores and the evolution of responsibilities for cleaning in our homes. I hope you will read it, as it is very well written. At the end, she wonders whether robots might take over. I would love for some of my house chores to be taken over by machines.aA Free 44 Observations Template

Next, Jenn also made a photo-less page with this kit and wrote about how she has become a master procrastinator with chores. I learned that Jenn and I have a lot in common! And, I love her clustering on the page with the leaves and flowers behind the note-card journal spots. I think I would much rather make a pretty scrapbook page about cleaning house than actually clean my house. masterprocrastinatorJennS

Finally, Melissa made a page about her little boy helping to clean the house. Her blended photo on the page is beautiful, and the way she has the photo of Dylan on the right layered under the laundry basket so that he looks like he is sitting in the basket is too cute for words. It reminds me of my own children enjoying laundry days because they enjoyed pushing each other around in the laundry basket. Mommas-HelperMelissa

The colors in the kit are peaceful and calming, and I can’t believe I’m typing this, but I am actually inspired to clean something now so that I can take a picture of it and then use this kit to scrapbook about it. (I may have a slight addiction to digital scrapbooking). But, I am also reminded that I would love to have memories recorded of the fun times I have had with my children in doing the necessary chores at home.

I’ll leave you with a closer look at the kit in the market (the image is linked) because I now feel the need to do laundry (with my camera close by).

cc_spicnspan_kit

Sign the Birthday Card Winner

Thanks to you all for wishing Chelle a happy birthday! We’ve had a great month of celebrations. We have a winner chosen at random from all of you who signed Chelle’s birthday card. There were 125 posts, and the winning number was 8  Random number

which means Cynthia who said, “Happy Birthday Chelle!” on July 25 will receive a $10 coupon to Chelle’s store. Check your email for a message from me, and Congratulations!

Happy Birthday Game for Chelle!

Chelle's-card2

Hello Chelle’s Creations friends and fans! Chelle has a birthday this week, and she’s bringing all the presents! Let’s show her how much we appreciate her by signing the birthday card. Leave a comment below telling her happy birthday by 11:59 EST on Saturday, July 28, 2012, and I’ll come back on Sunday sometime to choose a winner at random for a $10 coupon to Chelle’s store. Happy Birthday, Chelle!

Mane Event | DIgital Scrapbooking Classics

We’re taking a look at a classic digital scrapbooking kit today: Mane Event. It’s a terrific kit for scrapping about your child’s first hair cut, or a teen’s up-do for prom, or even a mom’s adventurous side letting a young one practice braiding skills on her (right Jenn?). But, this kit is also great for non-hair related themes because of the bright, cheerful color scheme. Chelle’s very Creative Team members have made some gorgeous new layouts to show how versatile this kit is. Watch out! There’s even a page dedicated to a place some call the “happiest place on earth!”

First, let’s look at Erica’s page of a child’s first haircut. Erica is a hairstylist, and she assures me that every baby’s first haircut instantly transforms him from baby to toddler. That fact is evident in her layout. I love that cluster of scissors, comb, and string on the top right. Collage Templates and The Mane Event - by Chelle's Creations Next, take a look at Carol’s page. She used the Mane Event Add-on kit. Look closely at what her granddaughter is doing with that comb before she combs grandpa’s hair. So CUTE! But, I’m sure he didn’t mind.  CarolJ_maneEvent Now, look at Jenn’s page. Remember that adventurous mom I mentioned? I think her daughter did a great job with the mermaid braid on her first try. I know I can’t do any better. And, I think Jenn was smart to make a scrapbook page about it. Sometimes, the fun, everyday moments are the ones we need to remember when days aren’t so fun. JennstylingmomFinally, you need to take a look at Heather’s page. She is a Disney fan, through and through, and she participates in a scrapper’s forum online where she was challenged to make a page about a recent trip to the “happiest place on earth.” The challenge was to do a scavenger hunt through her pictures of specific things that could be seen in the park. She chose Chelle’s Creations Mane Event kit and her Askew Templates, and they a perfect match for her pictures. Look how she was able to fit lots of photos and journal boxes on the page and how the purple brings out the happiness of the photos.Heatherscavhunt12_600 Here’s a closer look at these kits in the market. Images are linked, if you want to click and shop.xctmpfOBu7qxctmpN4MlM9 And, if you are interested in a bargain, here’s the bundle of the Mane Event kit, the Add-on, an alpha, and Word Art: xctmphLOIcy

Using Black and White Photos | Digital Scrapbooking Skills

Have you ever converted your photos to black and white to add them to your digital scrapbooking project? It’s a great way to add interest to a page. Converting to black and white can change a casual photo to a more formal look, or it can give a romantic look to a photo, or it might help give a cohesive look to several photos you are using on a page. Chelle’s Creative Team members have made some examples to inspire you.

First, Patty took a photo of her hotel in New York, and printing it in black and white gave it an Ansel Adams quality with the strong parallel lines in the building.  Patty_BigCity Next, Lynett had a special photo of her daughter at the band queen coronation. Her daughter chose her brother to be her escort, and of course, the photo of her two children at such a special occasion deserved special treatment. The black and white contrast gave the photo the formal look it deserved. I think it is a very special young lady who would choose her brother to escort her, and I applaud her for that loving gesture. Lynett_stunning Next, Jennifer had a much less formal event to scrap, but her use of colorless photos is also a great choice because the visual emphasis is on the subjects of the photos – those two cute boys with their first tent. The map patterned paper is a great addition to the page, as well, as it coordinates so well with both the photos and the papers. Jennifer_web_first-tent Finally, Roxana’s page shows how using gray scale in photos is a terrific idea for profile shots. Look how the focus of the page is on her son’s cute face in the series of three photos across the page. The use of the colorless pictures also coordinates with the kit she chose. Roxanna8-handymanny2-web

Next time you have a special photo, a picture of a city scene, a profile shot, or just some photos that deserve a little something extra, try converting them to black and white before you scrap them. It’s a fun way to add interest to a page, and it might help jumpstart a project you’ve been hesitant to begin.