


Hi Everyone! It’s Jenn, aka jk703 here…. bringing you a fun and really fast tutorial today! Love the dreamy look to some older photos that you see? Well, you can quickly add them in five minutes! Ready?
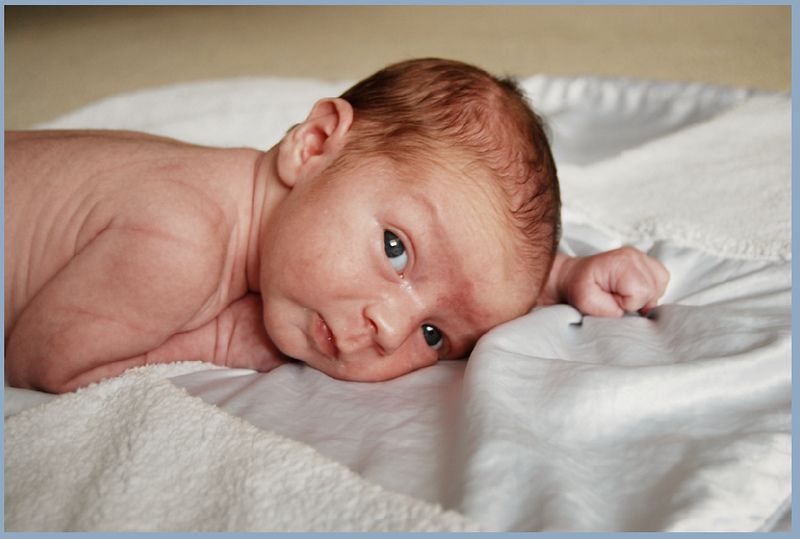
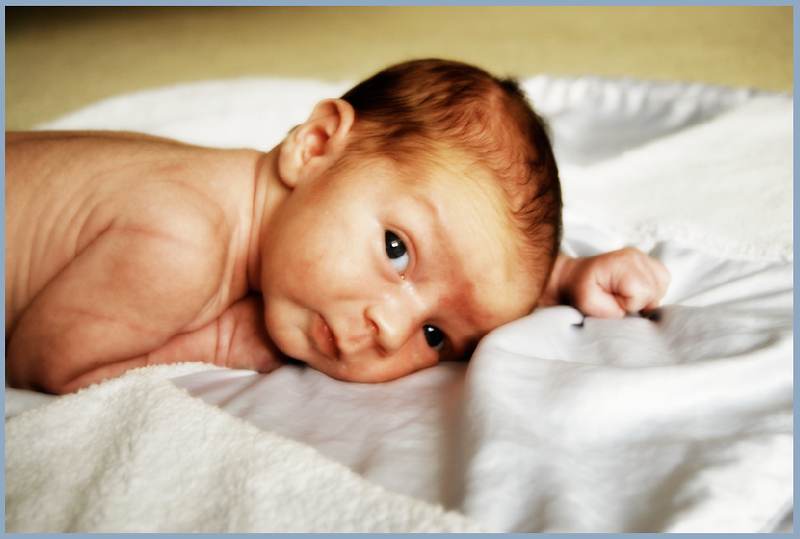
Here is my original photo of my son, Colin.
Step 1: Open your image and re-save it. This way the original will remain intact for future use.
Step 2: Duplicate the image. (Cmd+J or Ctrl+J or by Dragging the Background Layer to the “New Layer” button on the bottom of the Layer’s Palette.) This is what the New Layer button looks like: ![]()
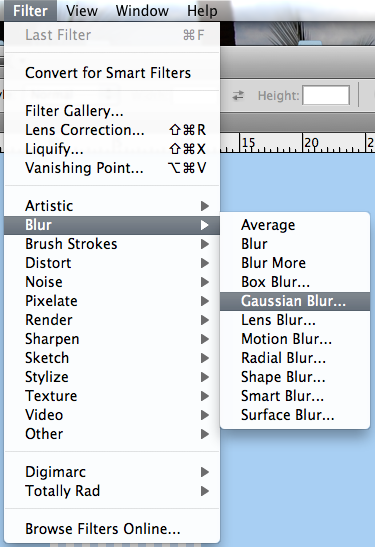
Step 3: With the Duplicate layer (or Top Layer) selected in the Layers Palette, Click Filter > Blur > Gaussian Blur. A pop up will “pop” (lol). Enter 10-30px. Look at the preview to see the changes that are made. Play with the amount of blur that you like, and just make sure that the outlines of the face are evident. Click OK.
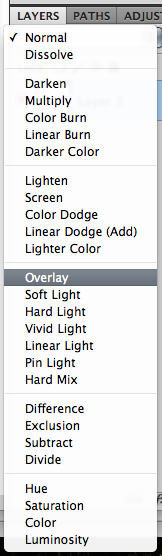
Step 4: With the Duplicate Layer selected, change the blending mode to Overlay. Your photo will take on a softer, dreamier look. This is within the Layers Palette, and near the top left corner.
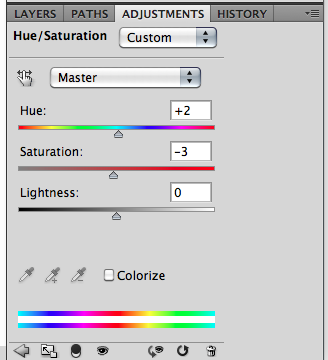
Step 5: If your image is too RED, click on the little black and white circle on the bottom of the layers palette – the Adjustment Layer. Choose Hue/Saturation and set the Hue to around a positive 2 or 3 and the Saturation around a negative 2 or 3. Make sure Lightness is set to zero. Click ok. The way the photo appears can be played with in the Adjustment Layer – some photos may need more of an adjustment, so play with the numbers so the images is to your liking.
TIP: To get a specific color for the dreaminess, you can add an additional adjustment layer. With the Duplicate layer selected, choose the icon for the Adjustment layer again. Choose Photo Filter. Pick a color from the drop down menu, and choose the Density. You can add a pink, yellow, or blue dreaminess for the photo. Whatever color you are looking for!
Here is Colin… Dreamified! 
Now, for some CT Inspiration for your enjoyment! From Melissa, and she said “When I did this, it made my background really dark, so I turned down the opacity by 10% and it made it have a softer look!”

From Kayla. She had to work with the adjustment layer and advised that her photo was really red so she had to adjust the hue to +7 and saturation down to around -15 to get it to look right.
From Carol, who mentioned that she followed a different technique, but inspired by the Dreamy look. She said that she followed the following steps: Duplicate image, Filter > Blur > Gaussian blur, and then she added mask layer, gradient (circle setting) with a stroke from face to edge.
There you have it – Dreamy Looks in 5 Minutes! Thanks for stopping by to visit,


 Hi! I'm Chelle: a 40 something mom of 7. My husband & I live in a rural community in the rocky mountains with our 4 children still at home. In the winters we enjoy sledding & snuggling by the fire. I the cool fall evenings we love relaxing around the campfire & meeting friends at the county fair. Admiring the stars


