


Hi Everyone! It’s time for a tutorial! Yay! I’m Jenn, aka jk703 – happy to be here to share a easy but useful workflow process to save you time! A couple of my recent tutorials focused on the Shape Tool for using it to make a Custom Shape, and another for Rounded Edges. This tutorial will show you how to save your custom shape to your shape library. There are many ways to do things in Photoshop and Photoshop Elements – I’m just sharing one of the ways. To me, this is a very easy way.
Now, I understand that this is not as amusing or fun as creating your own custom shapes, but it is definitely helpful to learn. If you save your custom shapes as you create them, you can reuse that shape over and over again. When I made my rounded edges square, I saved it – so I could use it for background mats or photo mats later on. I’ve done this with irregular star shapes, fun wavy shapes, and flowers too!
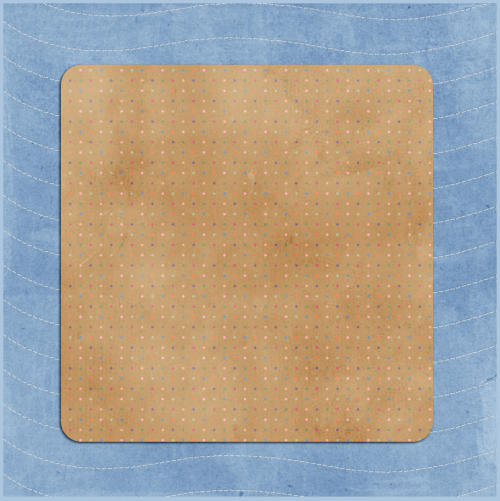
For this tutorial, I’m going to use the Rounded Edges Example from the previous tutorial. It is HERE if you would like to look at it again. That tutorial ended with us clipping a background paper to our new square shape with rounded edges, as seen below.
 Let’s save that shape!
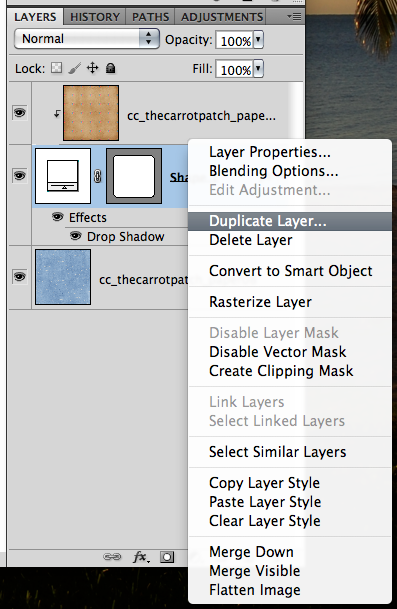
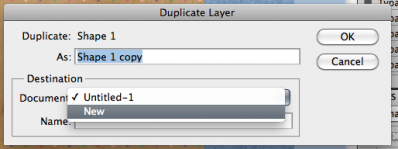
Step #1: In your layers palette, you will want the shape layer active. Right click on it and click on Duplicate Layer. A Duplicate Layer pop up will appear. Click on the Destination Document and choose New. I duplicate to a new document so that I don’t ruin anything in the layout I am working on, and so I don’t save the wrong item as my shape.
Step #2: Next, you will be in the New Document, and the only layer will be your shape. Right click on it, and choose, Clear Layer Style. This clears your shape of any styles, such as shadows.

After removing the style, this is what your layer should look like.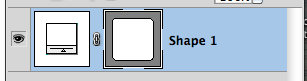
Step #3: In the Layers Palette, click on the actual shape once. In the above picture, there is a slight double line on the corners of the Shape Box. That is important for the next step.
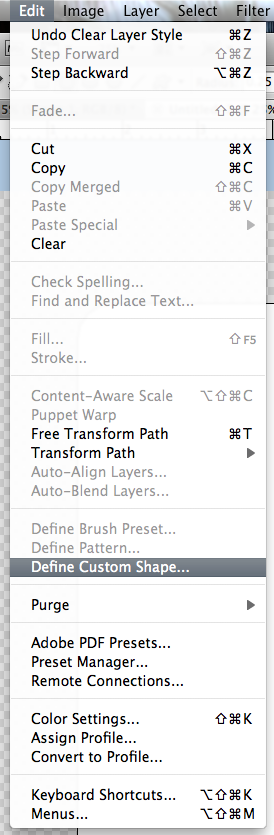
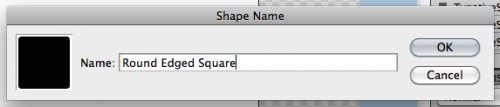
Step #4: Then on the Top Menubar, click on Edit > Define Custom Shape. A pop up will show, and ask you to name your shape. Enter the name.
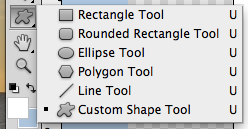
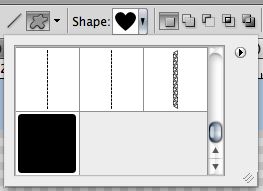
Step #5: Choose the Shape Tool. In the Shape Tool Options bar, click on the small arrow next to the shape and you can scroll through the shapes until the end. Your shape should be the last one there. Tadaa!
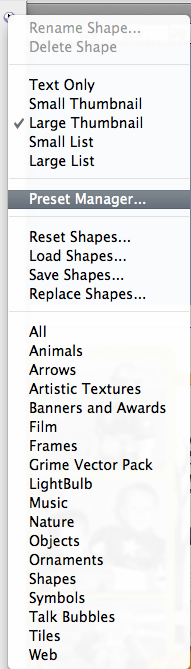
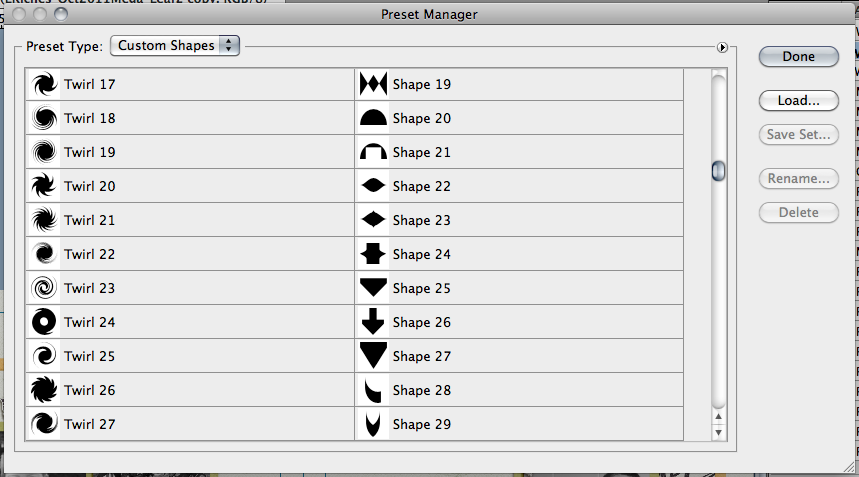
Tip: To organize or delete shapes after creation, just click on that arrow next to the shape listing on the right. It’s really small! Then choose Preset Manager. In this pop up box, you can move shapes, rename them, and delete them. You can also save your favorites as a set!
There you go… creating a shape, creating rounded edges, and now saving your shapes. I think we have shapes covered!
Here is some awesome inspiration that the CT came up with! Check these layouts out!
From Jenn (jennshultz). She made strips for her title and for a little pattern breaks here and there! Look at that blended photo – it pops!

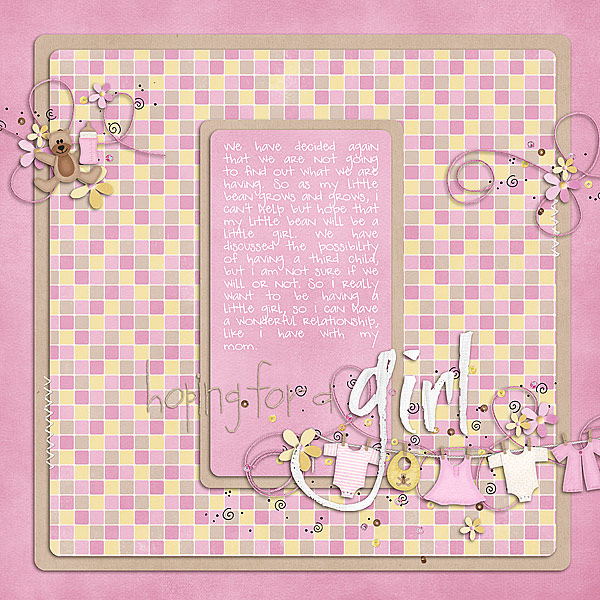
From Stefanie (eyeore). She used the heart, and clipped a background paper, adding an overlay too! Awesome twist to this kit!

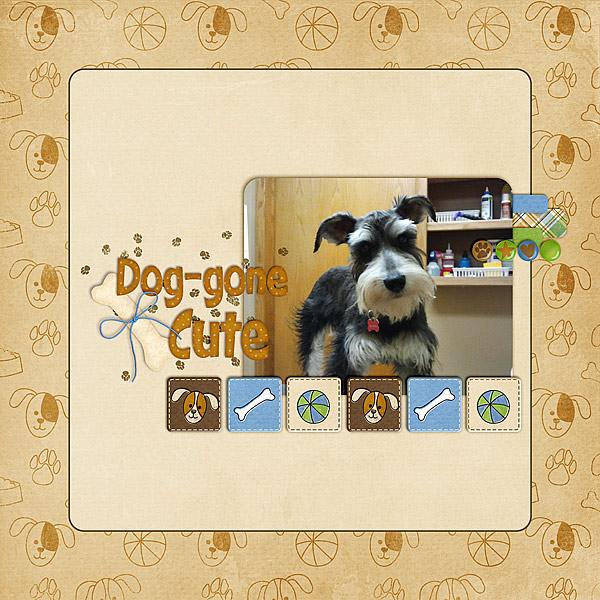
From Jennifer (jmljensen). She used the rounded edges to make her edges rounded like the little epoxie element! Great idea!
From Melissa (prettypeaches). Love the way the rounded edges look – but the focus on the layout is her journaling! Beautiful!
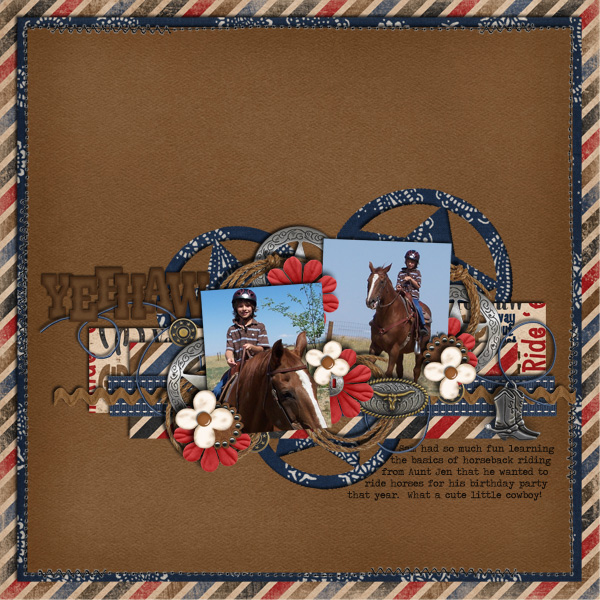
Lastly, from Karen (karen32). Look at the shapes below her layers and cluster work – see what it is? It is the silver circle with the star in the center! How awesome is that shape – and once saved – it can be used over and over again! Even for journaling! Love the shapes and how they are cut out of the brown paper! Really cool!
Well, there you go…. shapes and saving them! Hope that was helpful! Thanks for visiting!


 Hi! I'm Chelle: a 40 something mom of 7. My husband & I live in a rural community in the rocky mountains with our 4 children still at home. In the winters we enjoy sledding & snuggling by the fire. I the cool fall evenings we love relaxing around the campfire & meeting friends at the county fair. Admiring the stars


