


Hi Everyone! It’s Jenn (jk703) here for today’s tutorial! How are you all doing – can you believe it’s almost September!! I’m in the Northeast US, and I am NOT ready for summer to be over… or school to start! Homework is not my favorite!  I accidentally found a cool filter in Photoshop that I’d love to share with you today – and it is really fun for wet or watery photos! I think with any tutorial I write – it all take s a little practice as well as patience to try new things! Sometimes, pressing the wrong button will get you results that you will love!
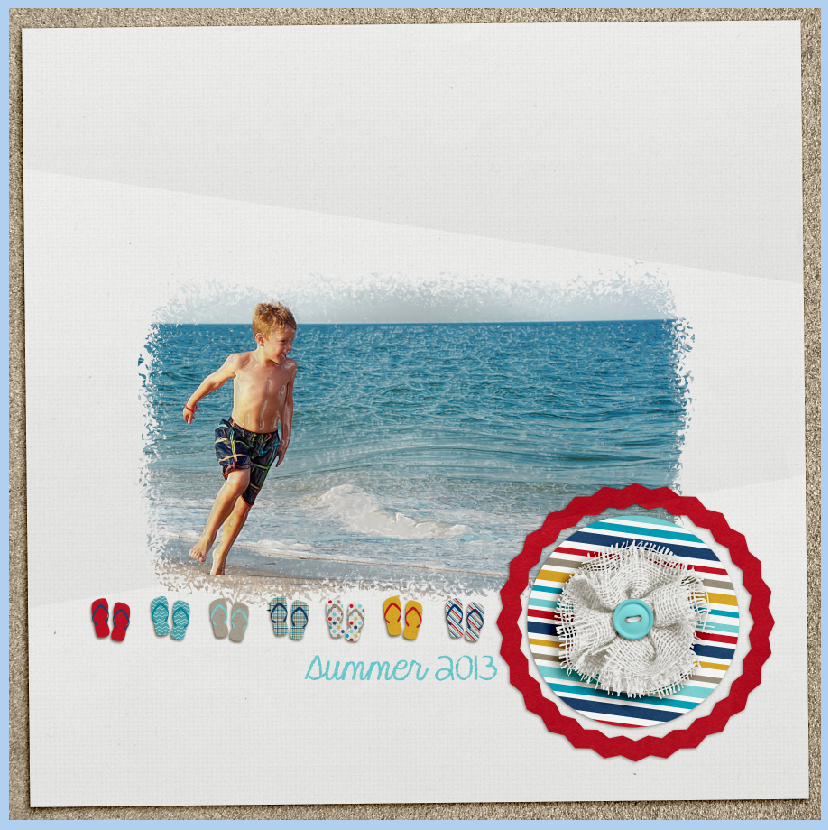
Here is my beginning layout – I’ve used Chelle’s At The Beach kit along with some goodies from Scrapping with Liz. My photo looks a bit pale and washed out. That isn’t my intention… so I’ve decided to give it a little oomph and add a little Plastic look.

Next, before you get really into it, my sugestion is to make a few (or more) duplicate layers of your photo. This way you can run the filters and if you don’t like it, you can delete, or if you do but want to run it again or change the blend mode, different layers will give you different looks.
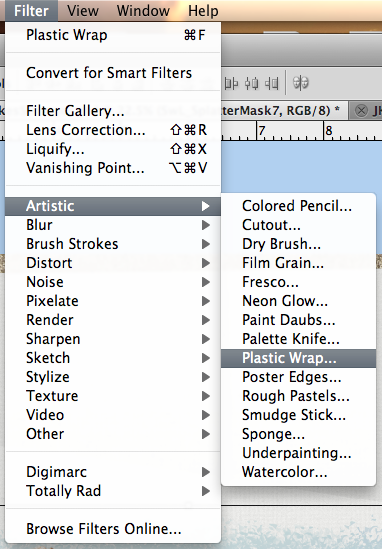
Click on Filter >Artistic > Plastic Wrap (pretty easy, right?)
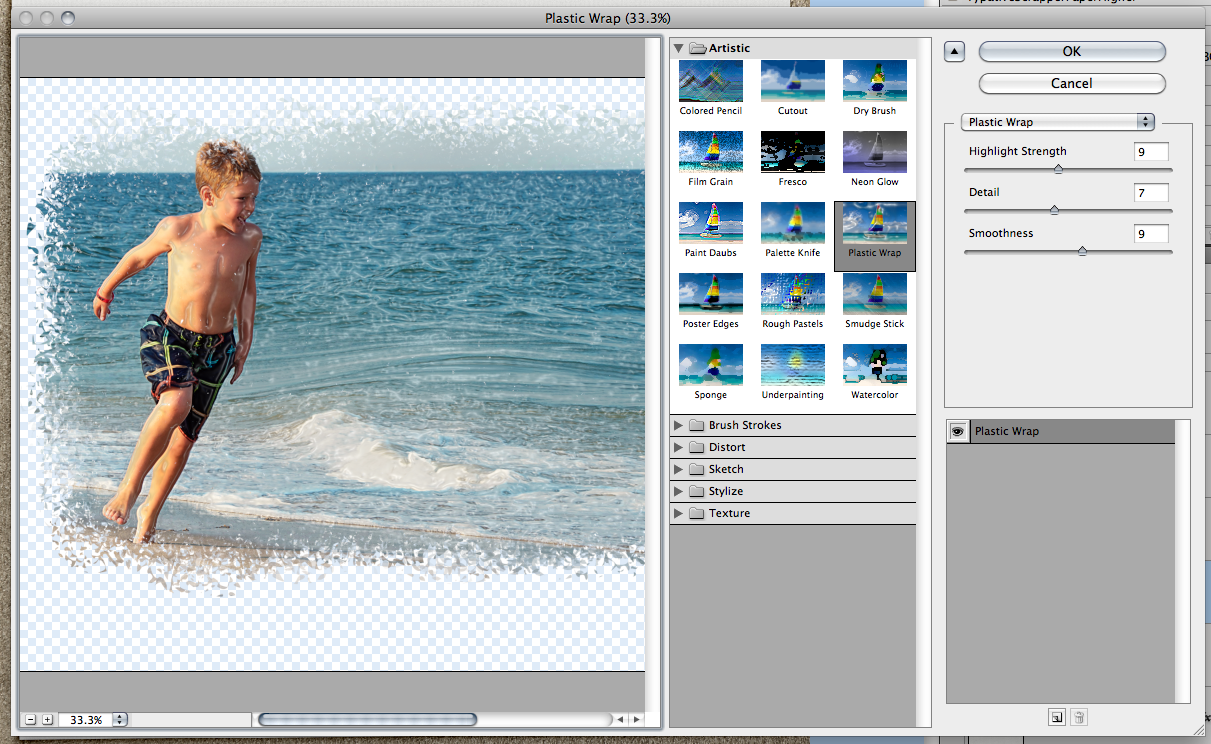
A large sub menu will pop up, and you will see your image on the left. This shows you the default to the Plastic Wrap – Highlight = 9, Detail = 7 and Smoothness = 9.
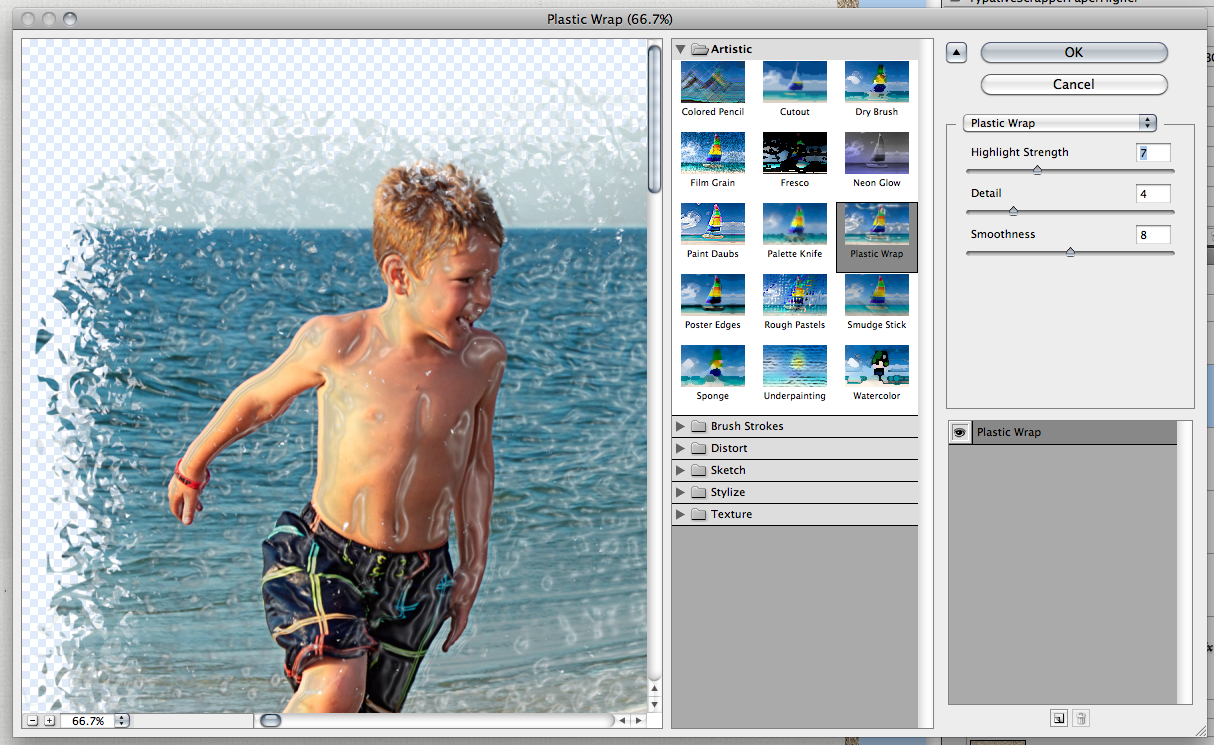
For my image, I’ve tried to zoom in a little to show the details – and my settings are Highlight = 7, Detail = 4 and Smoothness = 8. Play with these!!!
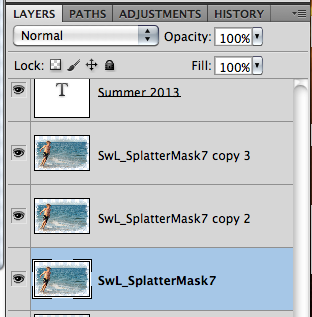
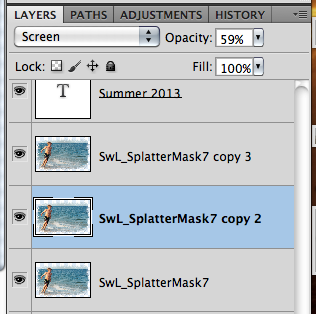
Ok. Remember, I mentioned multiple layering. Here is what I ended up with, all using the Plastic Wrap Filter. Layer 1 is a Normal blend mode, 100% opacity. Layer 2 of my photo is a Screen blend mode, and at 59% opacity. Finally, my last photo layer is Luminosity blend mode with a 80% fill. Right now, since I don’t have any layer styles associated with the layers, Opacity and Fill act like the same thing. If I had layer styles, then that would change things. (I think this might be a tutorial for next month, lol!)
Here are my layers below.

Here is a close up of my image using the above layers, blend modes and Opacity/Fill selections.
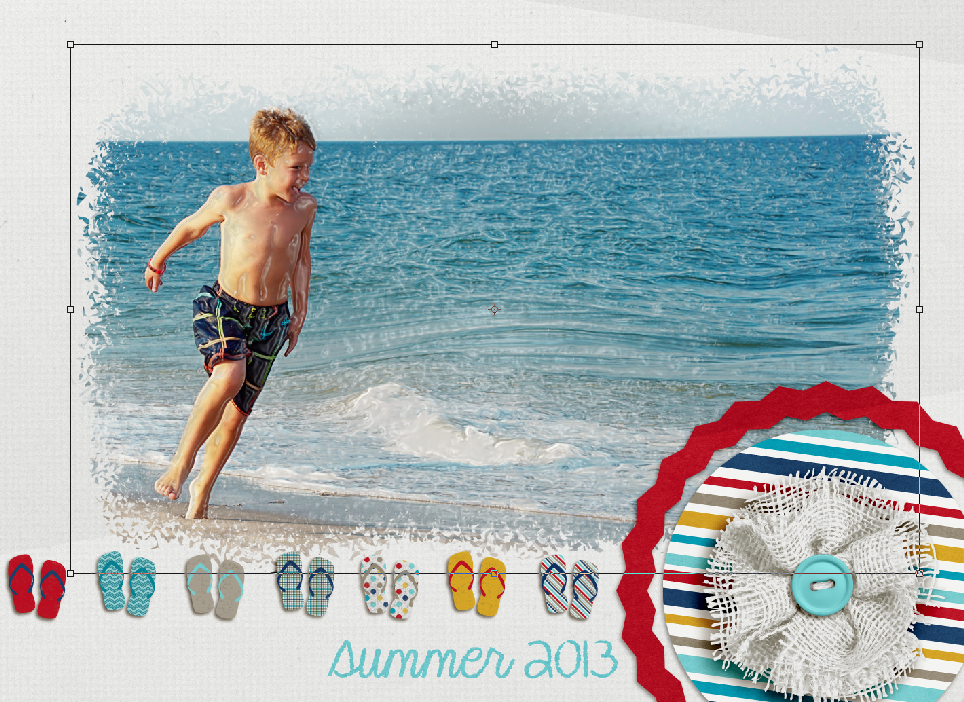
And my final layout…
That’s it! Easy, right – but this can be so much fun! Here is what some of my fellow CT members came up with using the steps above…
Roxana – she used Gone Fishing by Chelle, as well as a template from Scrapping with Liz.

Kassie – created this summer layout using In The Pool by Chelle, and a template by Rainy Dayz.

What do you think?! I hope it’s something new, and fun! Thanks for stopping by and have a great day!


 Hi! I'm Chelle: a 40 something mom of 7. My husband & I live in a rural community in the rocky mountains with our 4 children still at home. In the winters we enjoy sledding & snuggling by the fire. I the cool fall evenings we love relaxing around the campfire & meeting friends at the county fair. Admiring the stars


