


Hi Everyone! This is Jenn, jk703. I’ll be honest. I started this post way differently. I had planned on showing you the tutorial and I was going to create layouts using photos from our recent day trip to the National September 11 Memorial and Museum. The photos that I was allowed to take were beautiful, sad, touching and at the same time, hard to take. While it has been 13 years, it is still a tough subject for me, so I opted to scrap about a fun family adventure. September 11 will be a day to remind me to live each day as it a gift.
Black and white photography can make photos more dramatic, enhance details, lend to a certain emotion, as well as remove the distraction that color can sometimes bring to a photo. Here we go: Easy Black and White Photo Tutorial!
My layouts use Chelle’s Toil & Trouble, and Zoo Crew {Arctic}. Template is Scrapping with Liz’s Daily Life Templates 9. Font is KG What The Teacher Wants.
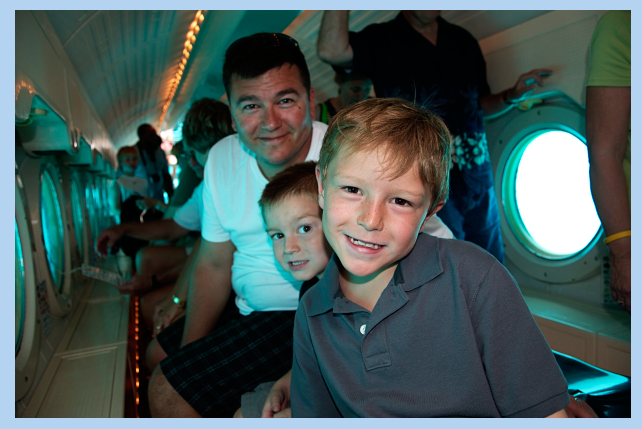
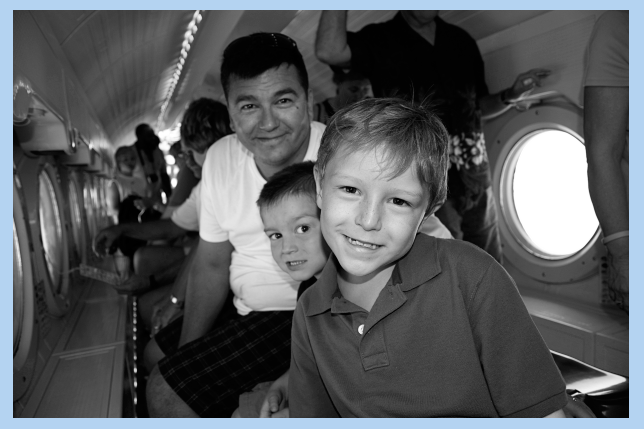
Here is my beginning image. We are on a submarine, yes, a submarine, lol! We were on an excursion from our cruise, and it was nothing like we had ever done before, and not like any Caribbean beach outing that we had been on, lol!  Colors were a little off, and they really weren’t matching well with my other photos.
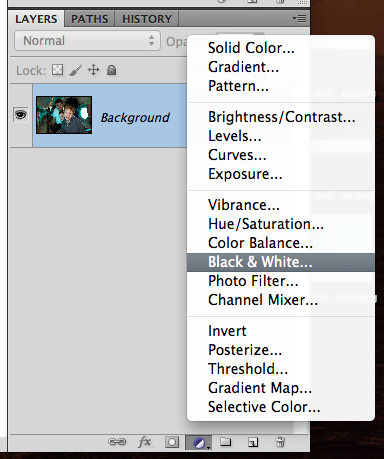
With your photo selected, click to add an Adjustment Layer, and choose Black & White.
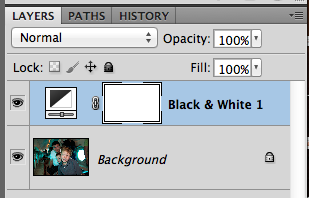
You will see a new layer populate above your photo with a mask (the white box). Below that, is the first shot of the photo changed to black and white. Pretty easy?! Let’s go a little further.
The Adjustment Palette may also open on your screen. If not, you can find it under Window > Adjustments. It will show the sliders for all colors, and have a drop down of different features.
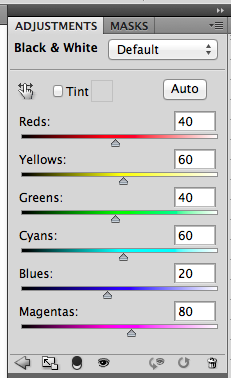
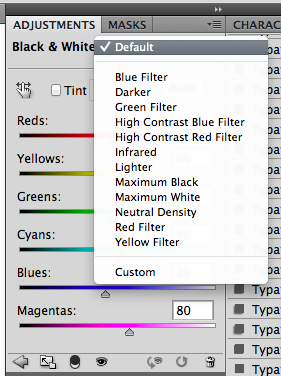
If you click on “Default” there are a number of different options. Play with them, and see what looks best with your photo. Once you have one chosen, then play with the sliders to change the grayscale coloring.
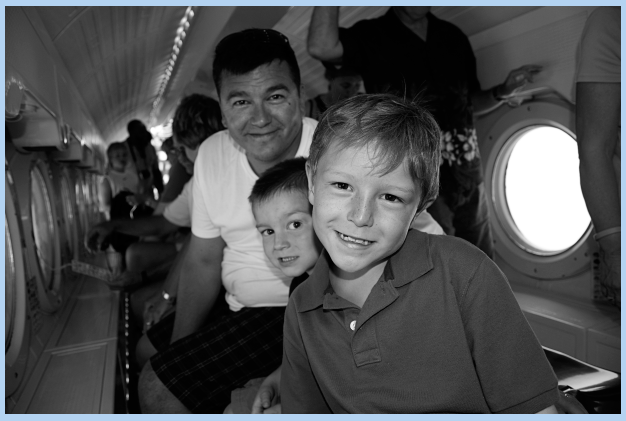
Here is what I ended up with. I chose the “Lighter” option, and changed the sliders on every color. I went by the photos look to determine what was best. The photo with these options is below.
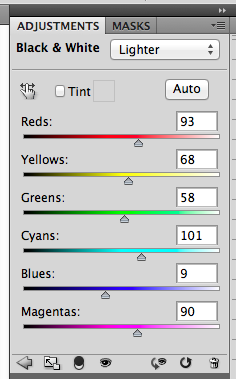
My husbands face isn’t so dark, and the boys are a little paler. I also lightened up the photo a little to get more detail of everyone. The background people are blurry enough that it doesn’t bother me too much! 😛
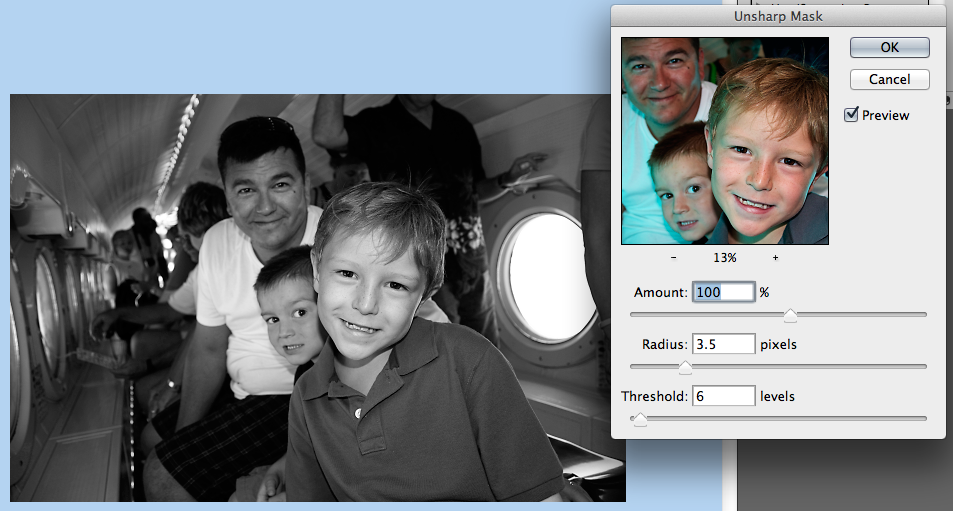
Once I have a black and white photos, I want to crisp it up a little. Here is where the Unsharp Mask works great! Go to Filters > Sharpen > Unsharpen Mask.

Play with the pop up. Mine is set to 100%, 3.5 Radius, and Threshold is set to 6. It just adds a little sharpness, and crispness to the photo.
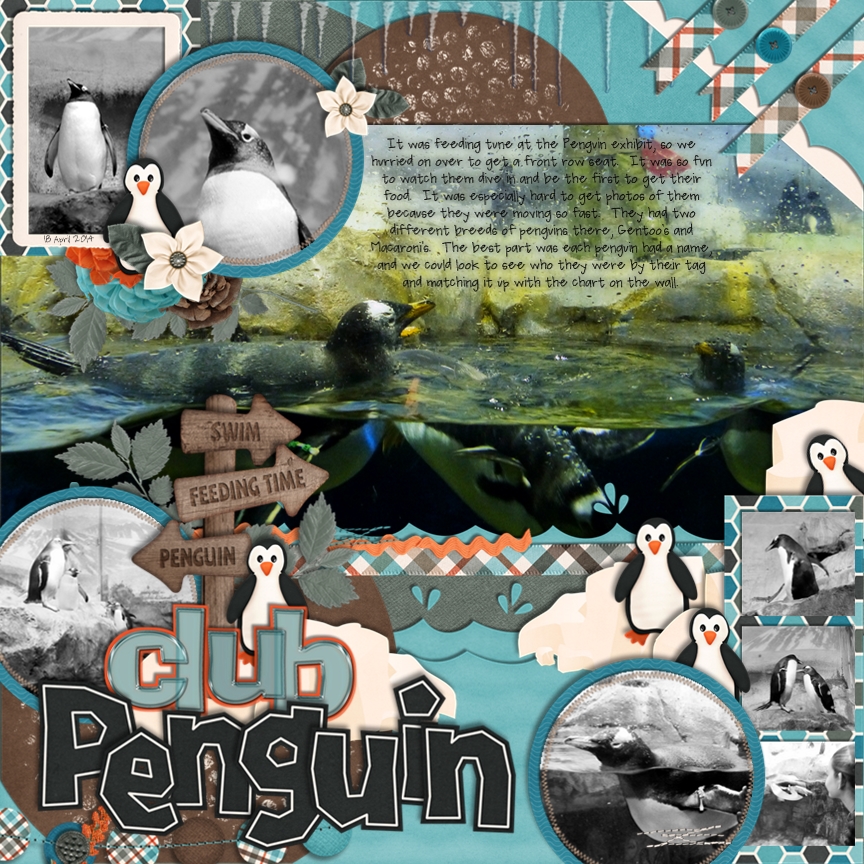
Here is my layout…. I put the black and white photo on the second page toward the bottom.


Jan (QuiltyMom) also created a layout using black and white photos. It was funny that we used the same kit! She used Zoo Crew {Arctic}, Zoo Crew {Arctic} Alphas and Gimme Layers Vol 69 by Cluster Queen Creations.
There it is a super easy black and white tutorial! Hope this helped you learn a new easy way! Thanks for visiting and stopping by Chelle’s blog!


 Hi! I'm Chelle: a 40 something mom of 7. My husband & I live in a rural community in the rocky mountains with our 4 children still at home. In the winters we enjoy sledding & snuggling by the fire. I the cool fall evenings we love relaxing around the campfire & meeting friends at the county fair. Admiring the stars


Pingback: CraftCrave | DigiFree | CraftCrave
Very interesting ..Awesome pictures looked like a great time