Lovin’ from the Oven

Mmmmmmm, don’t you just love the smell of fresh baked goods? Chelle’s Creations has a great classic kit perfect for capturing those sweet baking memories on our digital scrapbooking pages. Lovin’ from the Oven is perfect for savoring those cherished memories of baking cookies in the kitchen with grandma or for recording her favorite recipe. Recently, Chelle even added journal cards and InstaLife cards to the collection making it easy to use her kits in pocket style pages or even from your smart phone. Let’s look at a couple of layouts with these products in use.

First, Karen made a page to record her grandma’s cookie recipe. She used the bundle which includes the word art for her page. I love the way she added the clusters around the recipe card. crescentcookies_600

Jenny made a page about her children baking Christmas cookies with their grandparents. She used Chelle’s 3D InstaLife cards along with the Lovin’ from the Oven kitChristmas-Cookies-2014-1_web

Here’s a closer look at the bundle and the cards in the market. The images are linked. cc_lovinoven_bundlecc_lovinoven_ILcc_lovinoven_JC

All You Need is Love

Well, maybe you need a few digital scrapbooking pages about love, too, but surely THAT is all you need. Right? Pages about loved ones and about things we love are so much fun to make, aren’t they? Chelle’s Creative team members have a few new pages they’ve shared with us all about the objects of their affections.

First, Karen used a template by Scrapping with Liz and Chelle’s Chocolate Lovers to declare her love. Loving him more than chocolate is HUGE.  morethanchoc_web

Helen chose to make her page about the things her daughter loves. I love her list of ten things, and I really love that playing with Mommy made her list. So sweet! She used Summer Lovin and CU Frayed Masks. about-love

Finally, Heather used Lovin’ from the Oven and the coordinating journal cards to make this yummy page about baking cookies with her little one. I’m sure mommy and daughter both loved this activity.   16389269616_4c3ced165a_o

So, maybe all you need is love, chocolate, and cookies along with some digital scrapbooking for good measure.

by_Cheryl

Winter Woodland

Are you in the Northeastern US today? If so, you might be snowbound from the big storm, but I hope all is well with you and that you have power to stay warm and cozy. You might take this time to snap a few photos of the snow and make a digital scrapbook page using Chelle’s classic mini kit called Winter Woodland. It’s full of adorable woodland creatures and warm woolen mittens. But it’s also a great kit to scrap the not-so-snowy photos you might have. Let’s take a look at what Chelle’s talented team members have created with this mini.

First, Heather had some fabulous photos of the snow and ice from a December storm that she chose to use on her page. I love the way she made the title words in a cluster with that cute fox. She used a template from Scrapping with Liz to help her create this great page.  16156765767_923a3ea87c_o

Next, Kimberly has a page to show us how to use this mini kit with non-snow pictures. Living in a warm climate means snow is only seen on a trip to the mountains, but it can still get quite chilly in her neighborhood. I love the hat her sweet daughter is wearing on her way to school, and it’s great the way she included a snapshot from her phone of the thermostat in her car. What a great way to document the times! She also used a template from Scrapping with Liz, and she used a blending mode in Photoshop elements to add snowflakes to the burlap background paper. To spruce up the scallops, she clipped the grungy mitten border to the cream paper.2013_12-SwL_SODec14Template2_edited-1_zps9d3d7cab

Need a closer look at the kit in the market? Here ya go! cc_winterwoodland

by_Cheryl

Framing 101

There are lots of ways to use frames on your digital scrapbooking layouts. Chelle’s CT members have shared a few pages to show you what they like to do. Let’s start with a one photo layout with a stacked frame choice. Jennifer did this to draw attention to her focal point, and it looks fabulous. I love the way she filled the paper frames with the same photo and stacked them one on top of the other. She used See Clearly Now and the coordinating alphaweb_lookingood

Next, Krista made a couple of pages for us. She used Chelle’s Movie Night for her pages, and instead of filling the frames with photos, she stacked the frames on top of a couple of her pictures to draw attention to them. It’s a great technique and very easy to do since the photo doesn’t need to fill the frame but just hang out underneath it. NightatheDriveIn_PopIt_

Finally, Lisa has used a plethora of framing ideas on her page. She has angled frames to attract attention much like Krista’s, mats that frame/outline points of interest, word art tag outlines to frame text, and she has used frames and elements to create scenes. She used Down On the Farm to create her adorable page. 1-14DownontheFarm600x600

by_Cheryl

Chalked: {Snowflakes}

I love chalk and and I love snowflakes, and Chelle has a classic set of digital scrapbooking snowflakes that are chalked. That combination makes them perfect for every winter wonderland scrapbook page I can make. But they’re also perfect for menu boards and subway art style titles on any project. Complete with smudges and smears, they are as realistic as if you had drawn them with chalk yourself, right onto your project. Want to see them in use? Chelle’s CT members have been playing with them and have a couple of pages to share with us.

First Jenny has a page she created with Chalked {snowflakes}, Cozy Christmas, and Chelle’s Chalked {bundle}. The snowflakes are the perfect accent on the chalkboard background paper. I love the way she has combined the flowers and leaves from Cozy Christmas with the chalked elements for her Snow page.snow-2014-3-fffmystified_web

Karen used a more textured background paper for her scrapbook page about winter memories, and the chalked snowflake elements look fantastic on it. The smudges give a realistic effect that would enhance any paper choice. And her placement of the snowflakes in the corners is perfect for this wintery scene. By the way, she used Chalked {snowflakes} with the Snowlandia kit and alphaSwL_SOOctoberBlogTemplate_600

Here’s a closer look at the chalked snowflakes in the market. The image is linked. cc_chalked_snowflakes

by_Cheryl

Clustering 101: Shadows

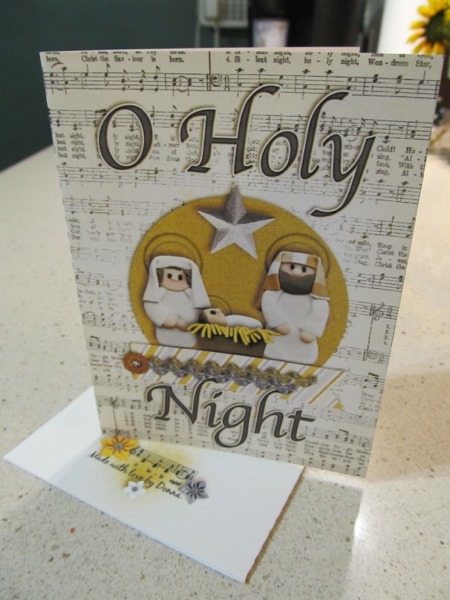
Happy New Year! Are you busy scrapping your holiday memories from 2014? I am trying to catch up on all my digital scrapbooking projects from the previous year. Thankfully, Chelle’s Creations has just the products I need, and she has some amazingly talented CT members who help me know how to get my pages looking realistic when printed. Today, Helen and Karen have given me some tips to share with you on how they make clusters to look pleasing to the eye.

Helen says, “I always shadow down and right, but when I have an element sitting on top of another element I will double shadow. I copy the element then shadow down and right, and next I paste the element so I now have 2 (one on top of the other). I will then shadow up and right and turn down the opacity. I do this as I feel that if I was putting real life objects on top of each other it wouldn’t be flat to the page.”

Here is her example of only shadowing down and right. Look closely at the red flower and the stack of books in the cluster on the bottom right.
noshadow

Now look at the same cluster in the following image in which Helen has added her opposite shadow technique.
shadow

Isn’t that a huge improvement? And it’s not much effort for a big payoff in realism. Here’s her full layout for you to enjoy. By the way, she has used Chelle’s Creations Teacher’s Pet.
Helen-teachers-pet
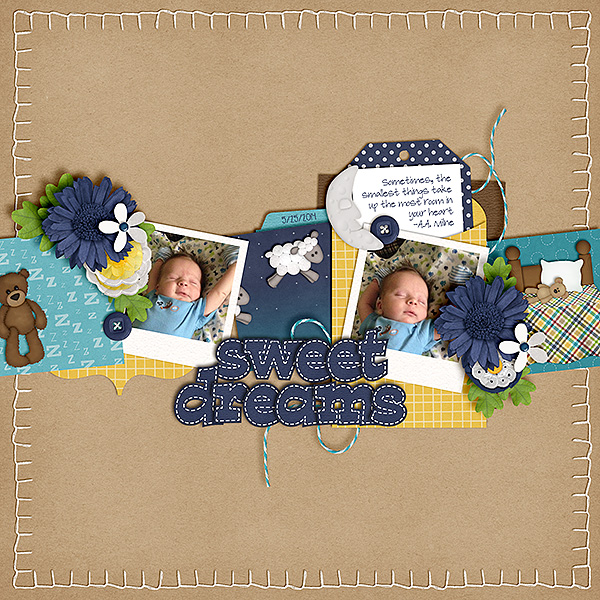
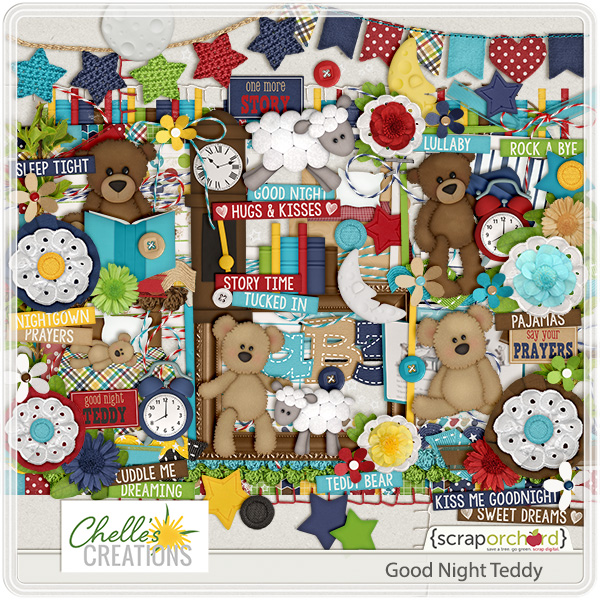
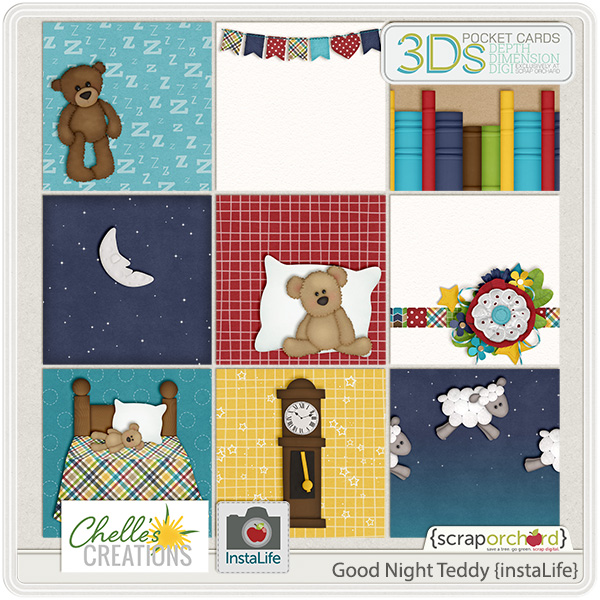
Karen describes her cluster like this: ” When I first started digi scrapping, clustering was what I struggled with the most. I still struggle with it at times, moving and adding elements all around until it pleases my eye. What helped me at first was using templates (which I still use 99.9% of the time). They helped me with where to place clusters. And from there, I tend to keep my clusters simple. I like the rule of three, which I used in this layout. I used three flowers in the cluster, varying in size for balance and used leaves underneath to fill it out.” She began her layout with a Scrapping with Liz template and used Chelle’s Creations Good Night Teddy kit and Instalife cards for the content.

SwL_EnvelopeTemplate7_600


Here’s a closer look at the kits Helen and Karen used.  The images are linked to the items in the store.
cc_teacherspet

cc_goodnightteddy_ep-b1a49dcc4c


cc_goodnightteddy_ILHere’s hoping we can all catch up on our memory keeping!
by_Cheryl

O Holy Night

The most wonderful time of the year is just around the corner, and Chelle’s Creative Team members have been playing with her classic kit O Holy Night. It’s a huge kit with 15 textured papers and 117 elements including adorable clay nativity characters and gorgeous silver and gold elements. There is also an alpha included and 26 word strips. Plus, there’s a coordinating set of word art to help speed up your digital scrapbooking projects. Let’s look at a few examples.

Kayla made a digital scrapbooking page with the kit. Her photos aren’t really Christmas themed, and yet she has used the kit masterfully to tell the story of her sweet little girl all dolled up for a performance. I love that she used the word art for the word “Star” to complete her title.  OurLilStar_Dec12_web

Donna made a couple of hybrid projects for us using templates from Wendy Bird Designs. She created the cards digitally with Chelle’s kit and then printed them, cut them out, and folded them. They were easily done and she had two very special custom cards ready to mail to loved ones.

Here’s a closer look at the kit and the word art in the market. The images are linked.

cc_oholynightcc_oholynight_wa

by_Cheryl

#title

Did you catch that hashtag? The use of the hashtag with a key word is everywhere these days, and the word hashtag was even added to the Oxford dictionary this year. What started as a way to categorize comments in social media has now become commonplace, and digital scrapbooking fans are using them for emphasis on page titles. If you saw Sari’s post here a few days ago, you might have seen that Chelle even had her daughter hold a sign with “#senior” on it for a back to school photo. I love the way scrappers are using them on their pages, and Chelle’s Creative Team Members have shared some layouts for inspiration.

First, let’s take a look back at Chelle’s page. The hashtags and the photos tell the story so well not much journaling is required in addition. 14_08_21_back2school_2post

Helen used Summer’s End papers and alpha to make a page about a trip to the shoreline. Her hashtag adds emphasis to a title that aptly describes the adorable photos. catching-waves

Lisa has used Trick or Treat, Chelle’s latest Halloween-themed kit, to make a page about dealing with all that candy and braces. The kit includes some word art pieces, and Lisa customized them by adding the hashtag to the word “Boo” and by creating some word strips of her own. 11-5TrickorTreat600x600

#happyscrapping

by_Cheryl

Give Thanks

Once a year, I try to spend a month emphasizing the things in my life for which I am thankful. It really helps to keep me grounded and grateful. Chelle’s Creations has a classic digital scrapbooking kit called Give Thanks that is perfect for my 30 days of giving thanks project. It’s also great for recording memories of celebrating the harvest, enjoying a delicious feast, or just spending a fall day with loved ones. Let me show you a couple of layouts so you can see the kit in use.

First, Lisa shows a page she made with this kit. It showcases a cute picture of her children sitting at the kids’ table at the Thanksgiving Dinner a few years ago. I love the cluster she made using the turkey, leaves, and veggies. give-thanks-lo-lisa

Jenny shows us her page highlighting a special family photo. The various colored ribbons she has used as a photo background look fantastic on that blue paper. And I love the visual triangle she formed with her clusters of flowers around the photo. Thanksgiving-2013-2_web

There’s more warm goodness in the kit. Take a closer look! Be sure to notice the little people that are included. cc_givethanks

Thankfully yours,

by_Cheryl

Visual Triangles

Hi Chelle’s Creations fans! Today we’re talking about a method for arranging items on your digital scrapbooking page called visual triangle placement. Simply put, it means placing your photos, or clusters, or combinations of such in a large triangle so the reader’s eye follows your three main points around the page. It can help to either draw your eye to the one large focal spot, or it can help you to see the page as a whole and not miss a single detail. Let me show you a couple of examples.

First, Heather has used a combination of elements from Roller Coasters & Cotton Candy to form her triangle. From her journal box on the top left to the large photo on the right to the title cluster on the bottom, she has the reader’s attention captured in a flow of the story of her memory of taking her children to the carnival. She didn’t have many pictures that day, so she used her one large photo, a large title piece (you can find that word art here), and her words to create a digital scrapbooking page that will elicit fond memories from her family each time they look at it. And isn’t that what we want?  15382411478_fe1d61151f_o

Krista used a slightly different technique for her visual triangle. The large photo on the page tells the obvious story, but it is anchored on the page perfectly by the clusters of beach elements from Chelle’s At the Beach kit, all placed at the corners of her visual triangle. This technique draws your eye to that focal point photo. Just a few simple touches were all that was needed to complete the story: the date, a few bits of word art, and the title art. Life_

If you would like a closer look at the kits used for this blog post, check these out. The images are linked to the store.

cc_rollercoasters_bundlecc_rollercoasterscc_rollercoasters_wacc_atthebeach

by_Cheryl