


Hi Everyone! Happy August 1st! Can you believe this month has already started!? It’s Jenn, aka jk703, here for today’s Tutorial. A fun and different technique that you can use on your layouts! Sometimes learning a new technique gets you to play with tools and other options that you didn’t know were available to you in Photoshop or Photoshop Elements. Today, we are going to look at a mix of cartoon posterizing! Like all of the skills that you learn, remember to play with the options and all the sliders. You never know what might happen!
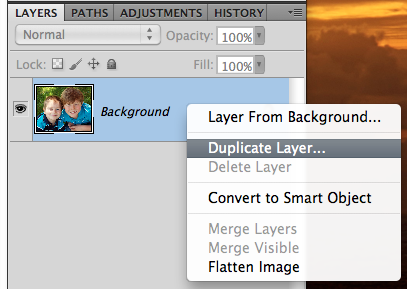
OK. First step is to right click on your image and duplicate it. Remember, use a copy of your image to start with every time, just in case you need to go back to the original!
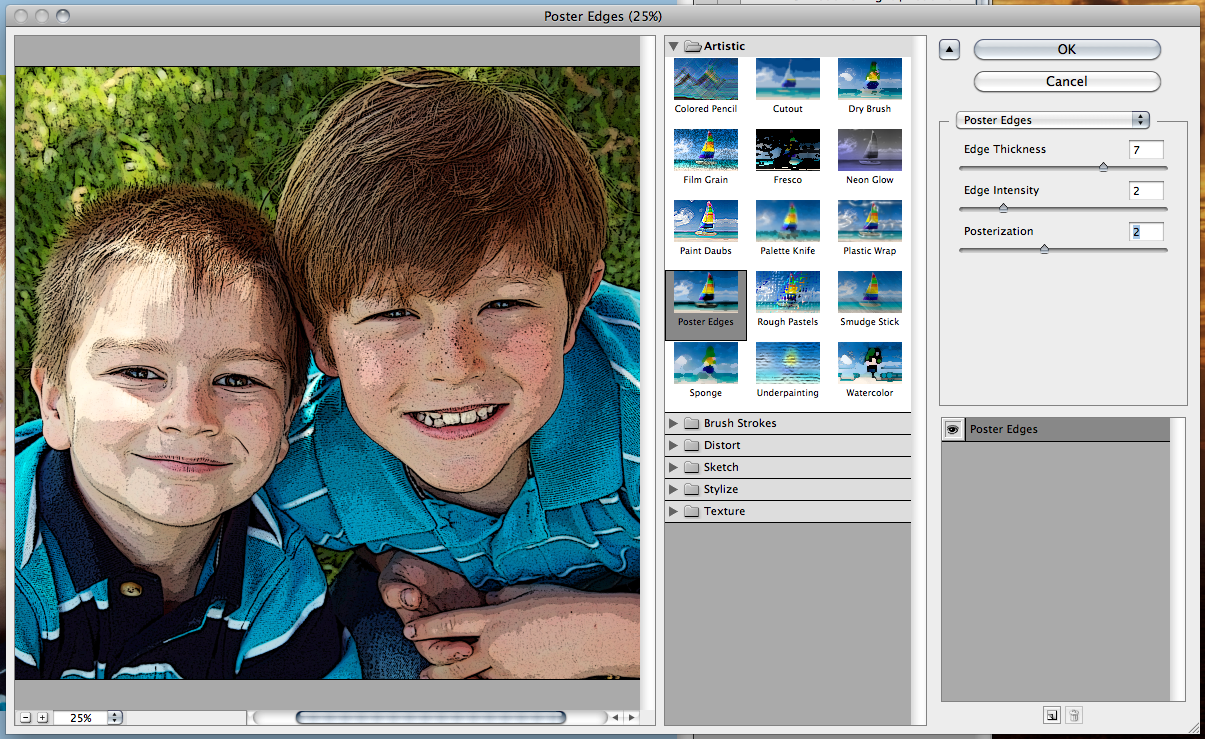
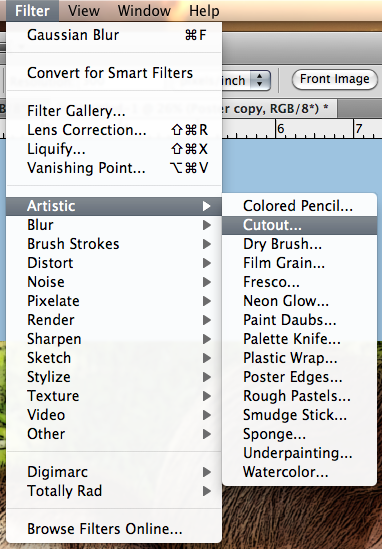
With the duplicate layer selected in the Layers Palette, click on Filter > Artistic > Poster Edges.

A pop up will appear… I have my settings at 7 Thickness, 2 Intensity, and 2 for Posterization. Play with these to see what you like.
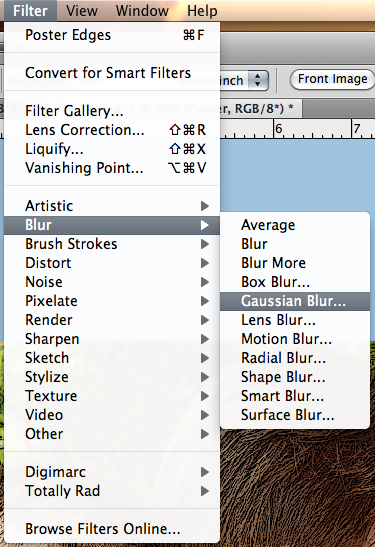
Next, with that same layer selected, choose Filter > Blur > Gaussian Blur.
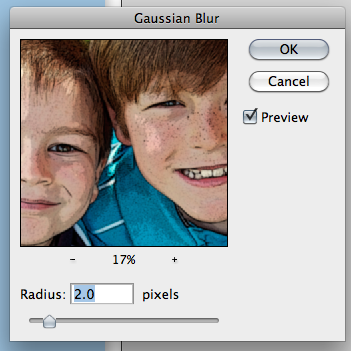
Another pop up will appear, and I’ve moved the cursor to 2.0. Next, duplicate your Blurry Poster Layer in the Layers Palette. Choose this layer if not already chosen.
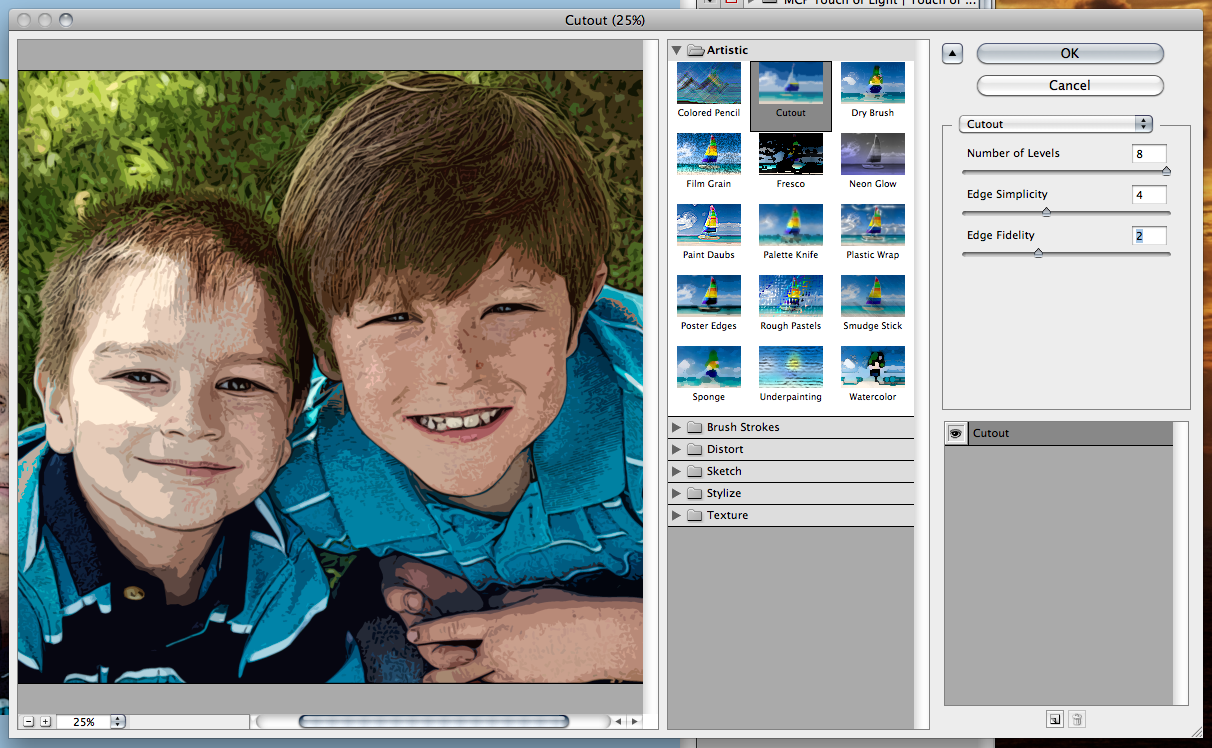
On the Menu Bar, choose Filter > Artistic > Cutout.
The pop up menu will show, and you can make adjustments to the settings. I have mine at 8 for the # of Levels, 4 for the Edge SImplicity, and 2 for my Edge Fidelity. Click ok.
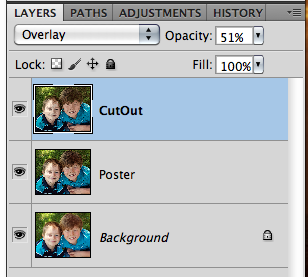
I’ve decided to change the blend mode, and lower the opacity of this Cutout layer – only because my sons face is super light, and I want it to look a bit better. I have it set to Overlay, and 51% Opacity.
Next, use the folded corner box to create a new layer. Move it above the Cutout layer. Double click on the thumbnail of the Cutout Layer to get the marching ants. Then click back to your new layer.
![]()
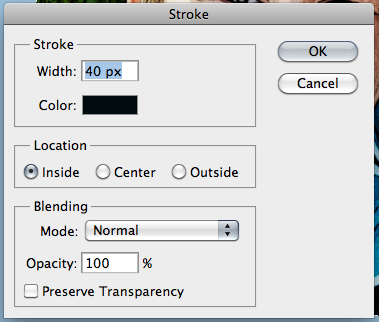
With the new layer selected, click on Edit > Stroke.
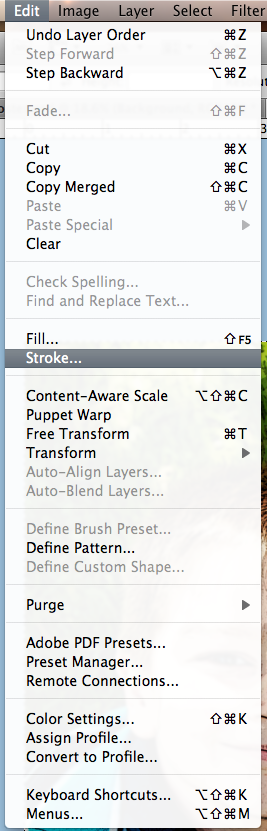
When the pop up appears, I used a black stroke, 40 pixels and it comes from the inside.
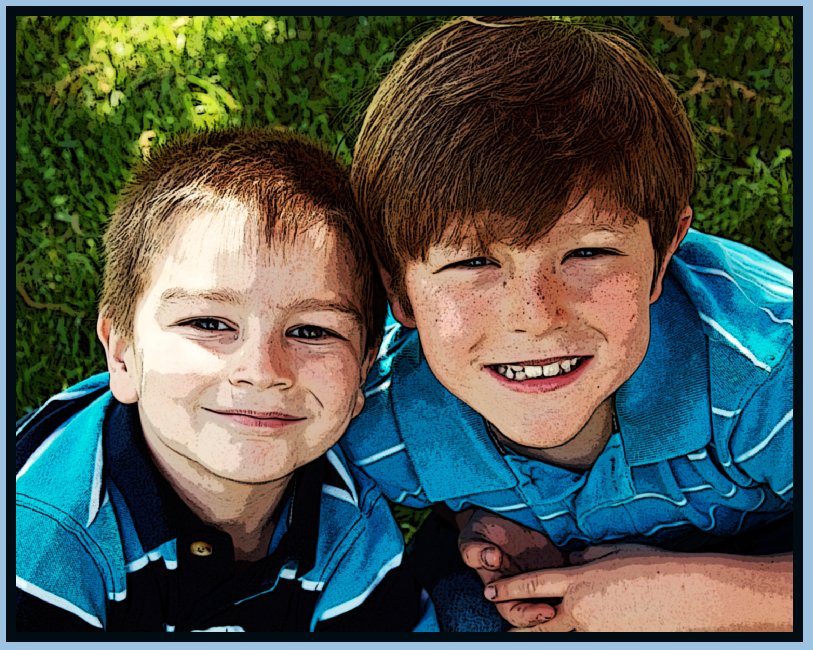
Example
Now, let me show you what the CT made… Roxana changed her main image… and I think it looks awesome! Such a fun photo to try it out on too – since they are statues! She used Letters From Home and Rock the Vote! 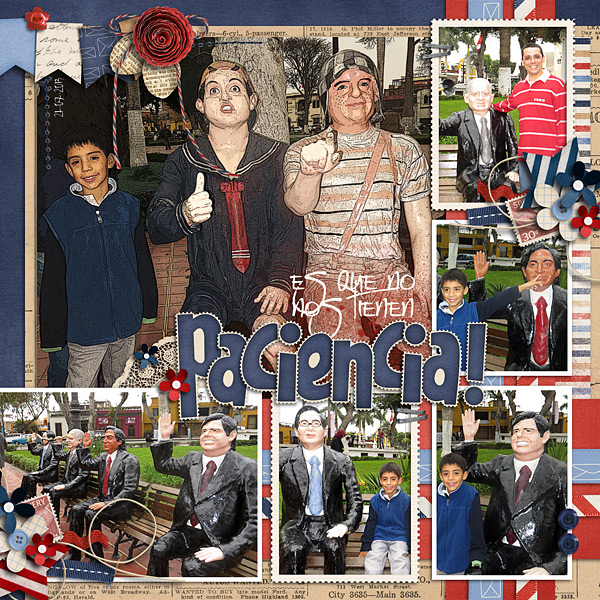
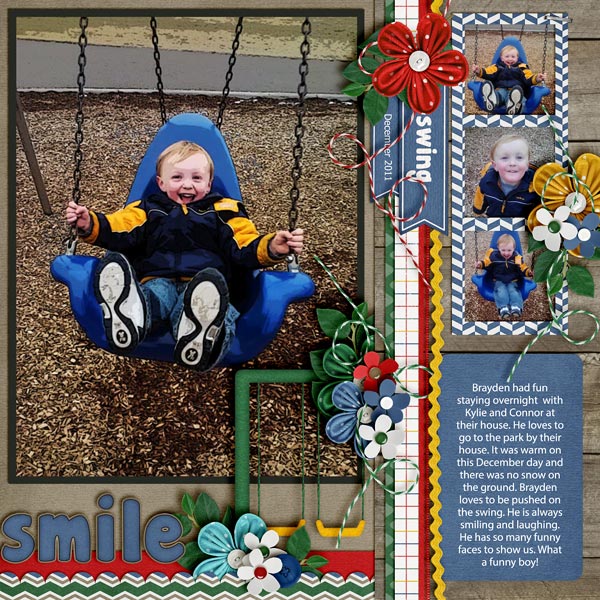
Jenny created this super cute layout using At The Park and a template by Little Green Frog Designs.
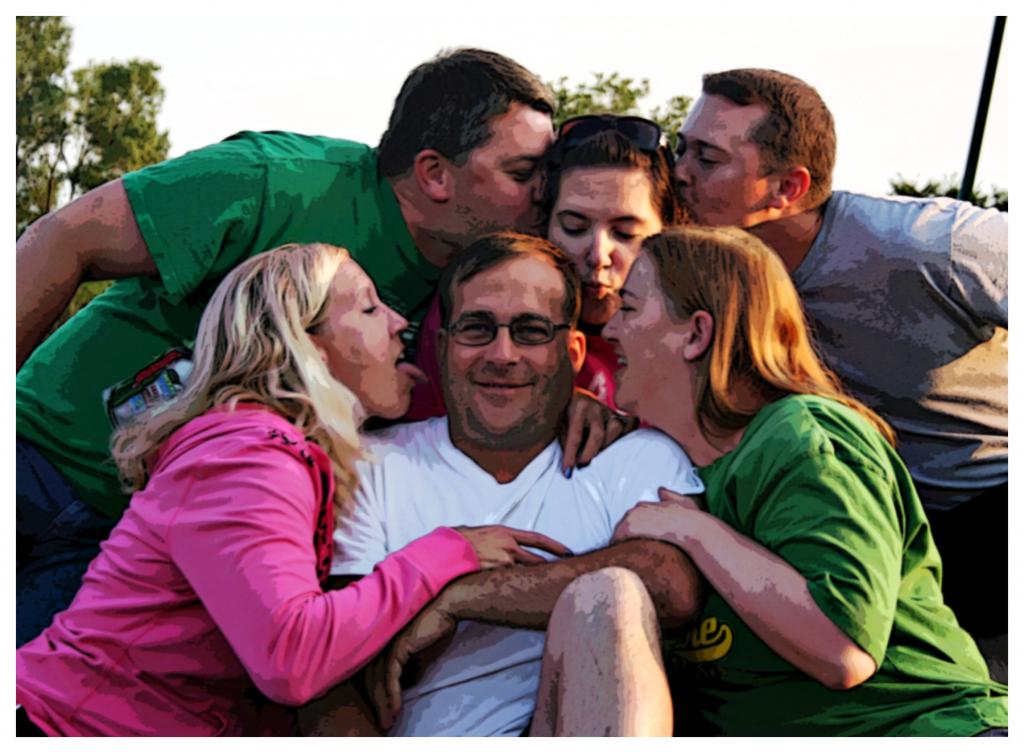
Mel used Summer Lovin’ for her layout and even showed the before and after pics for her image!
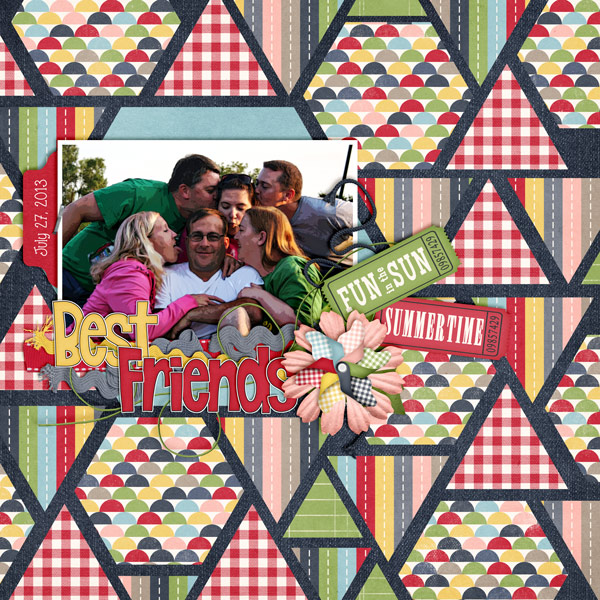
Before

After
There you go. A new idea, and you can play with it to make it a fun one for one of your layouts! See you later in the month! Thanks for stopping by today!


 Hi! I'm Chelle: a 40 something mom of 7. My husband & I live in a rural community in the rocky mountains with our 4 children still at home. In the winters we enjoy sledding & snuggling by the fire. I the cool fall evenings we love relaxing around the campfire & meeting friends at the county fair. Admiring the stars


Thank you! I’ve always wondered how to do this… it’s such a fun effect. I don’t have human kids, so it’ll be interesting to see how it works on the canine variety! ;-p