Tips: One Photo Layouts

Hi Everyone! Hope you are all enjoying this week! This is Jenn, jk703, and I’m loving how the week is flying by! I don’t want to wish my days away, but I always get excited for the weekend! A taste of freedom from the everyday!

Today, I’m going to focus on Tips: One Photo Layouts, and how you can incorporate them into your layouts.

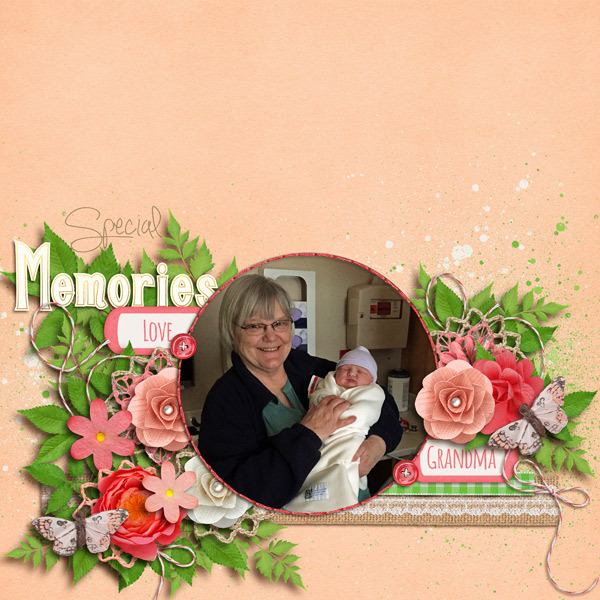
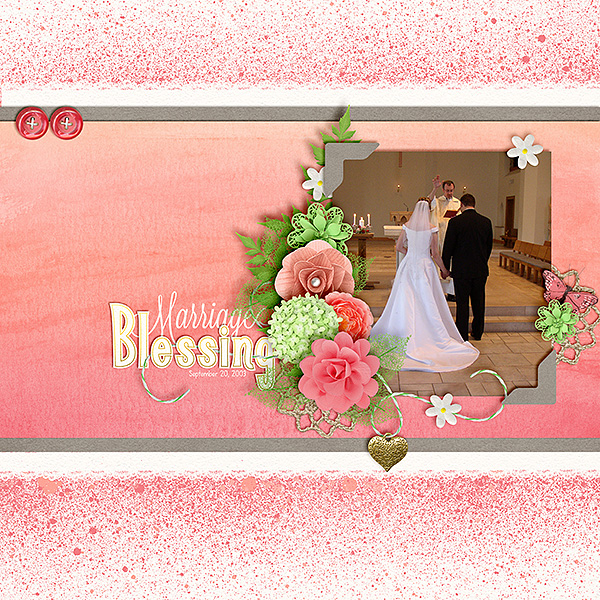
1. Use different shapes. Add a little fun to your layout by using different shapes for your photos. Using a shape brings more focus to your photo and really can make it pop on the page.

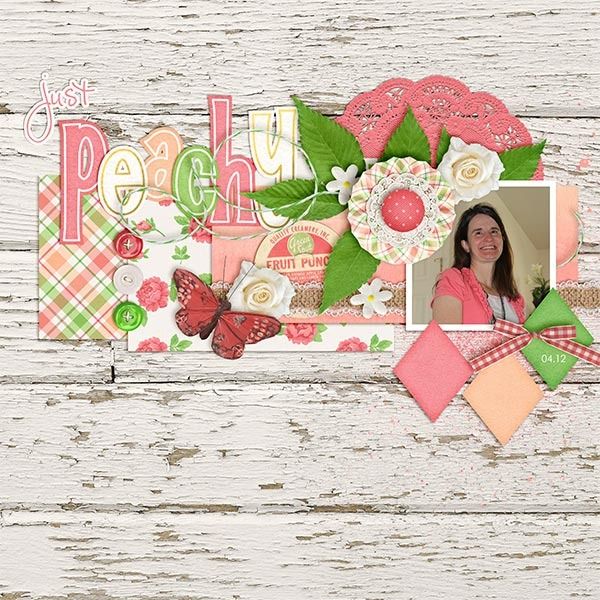
Jenny created this wonderful page using Creme de la Peche and a Fiddle Dee Dee Template. Jenny’s photo really stands out to me because of the white space on top, the colors and because it is the only photo. My mind wants to focus and see what is going on in the image. What a special moment captured.

GranVAubffMasquerade2_web


Here is a layout I created some time ago, but the shape of the picture draws me to the image. It’s irregularity. I used Chelle’s Get Your Grill On and a Scrapping with Liz template.

soswlrecyclechellegrillonjellybeansandsummertimeweb-1405911650kn48g


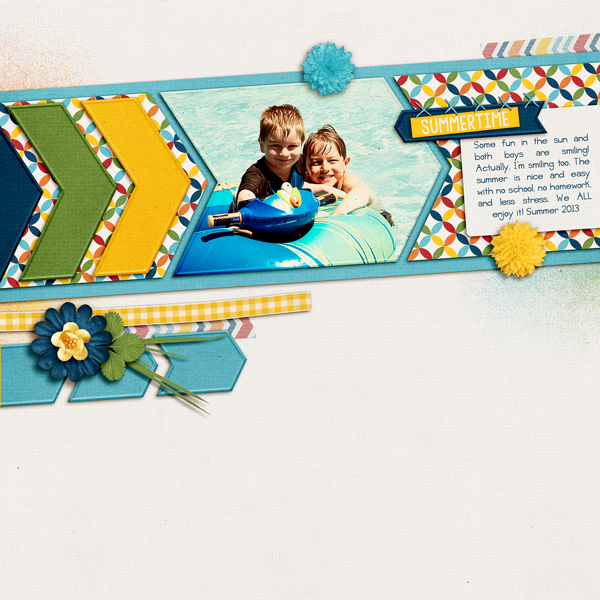
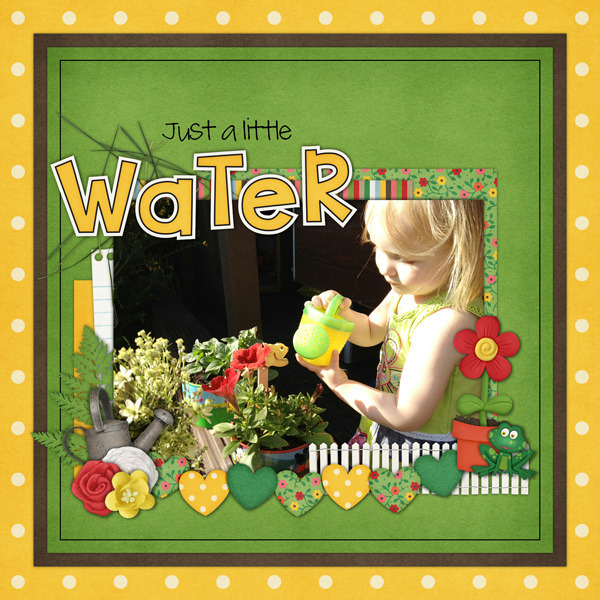
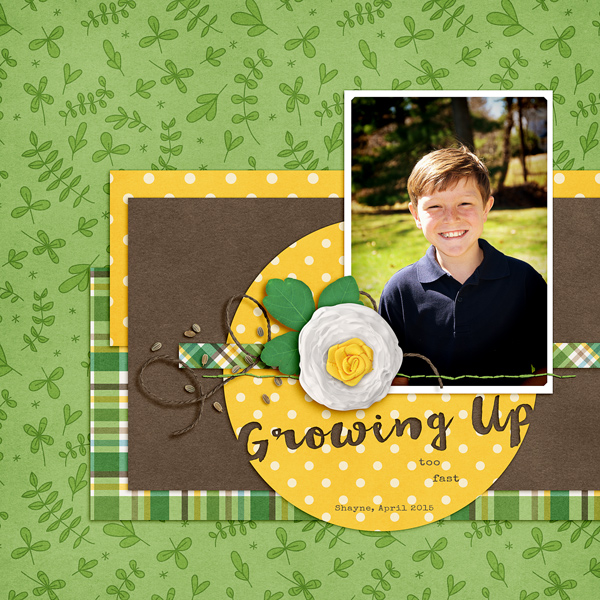
2. Make the Photo Bigger.  Keeping your photo on the larger side lets us see details we might not have noticed the first time around. A big photo can also really emphasize your subject, and reason for the layout. Sometimes covering the whole page or half of the page is a great technique for a one page layout!

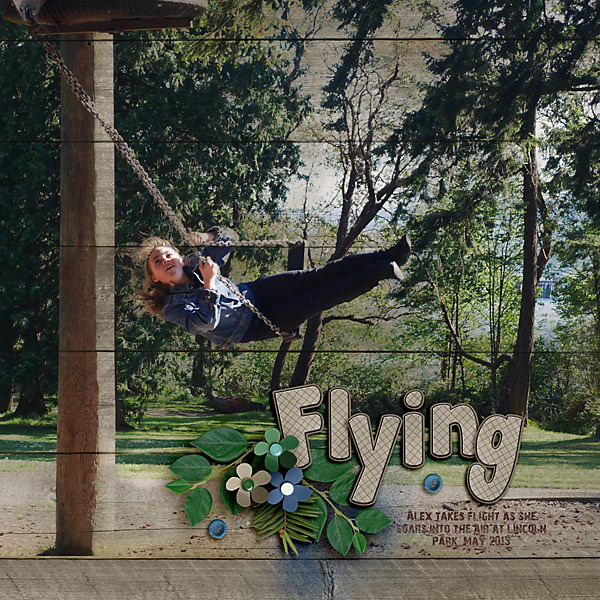
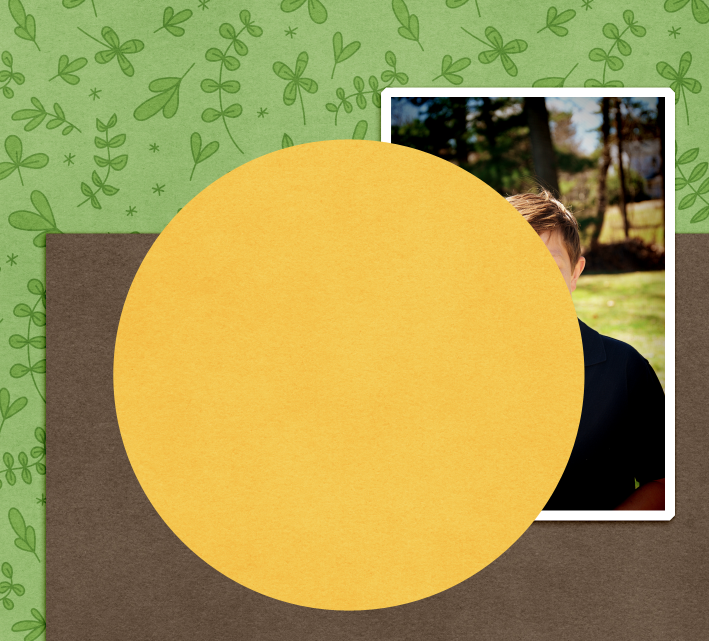
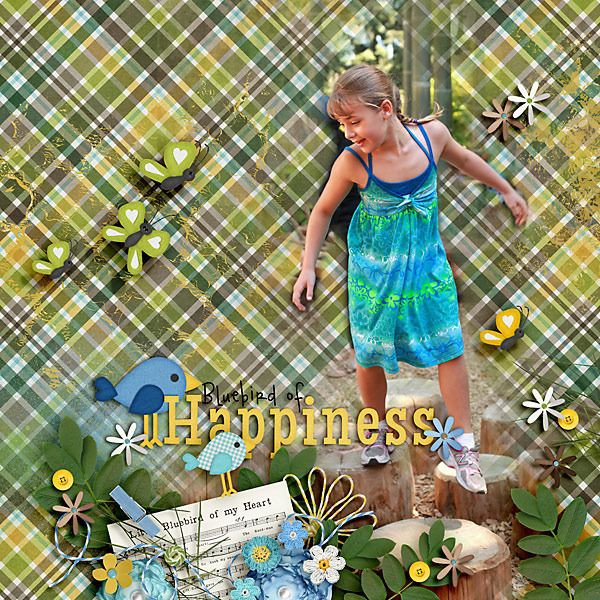
Helen created this perfectly spring page with a larger photo, and a tad off center. She used Green Thumb for her layout. Many times when I scrap with a larger photo, my picture is more of an action rather than a portrait like image. I think this works well for larger one photo layouts.

green-thumb

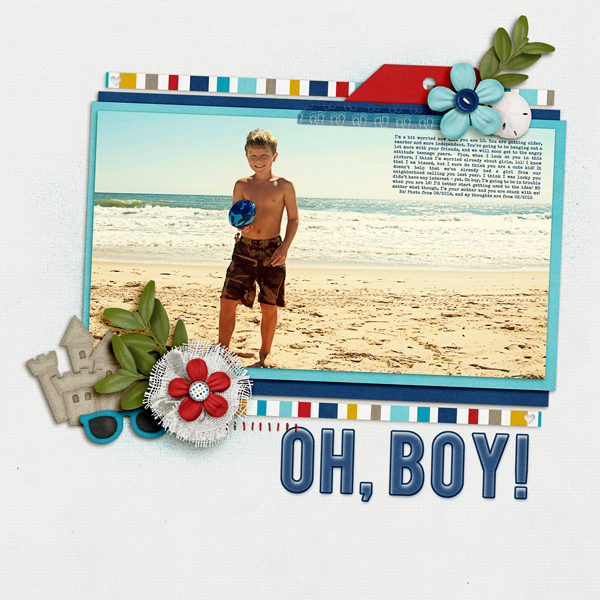
Here is one that I created of my son. He is trained well, and stopped really fast to smile for me. It wasn’t my intent. I was looking for an action shot of him on the beach playing football. The larger photo really shows the location, the weather, my son, and allows me to journal on it too! I used At The Beach and a template by Scrapping with Liz.


soswlfebcalendarccatbeachbebasspeceliteshayneweb-14233711878gk4n


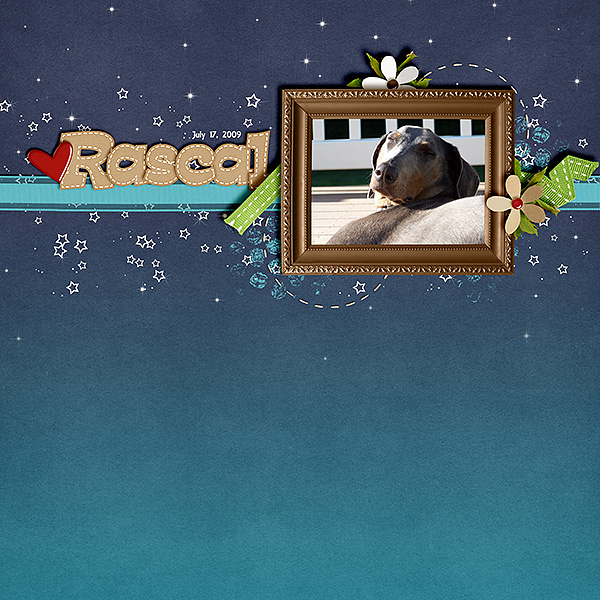
2A. Make the photo smaller. Yes, this tip works both ways. I think the combination of white space and openness are also great ways to keep you focused on the photo. A lot of space sometimes means that my eye will focus on the picture first. Keeping it clean and simple, really allows my eye to focus right to the photo.

Karen used Goodnight Teddy and Home for the Holidays (heart) to create this lovely page of her pup, Rascal! He looks so content basking in the sun! By leaving a lot of space and minimal elements, I focus on the photo.

rascalgoodnightteddy_600_zpstdd13nea.jpg~original


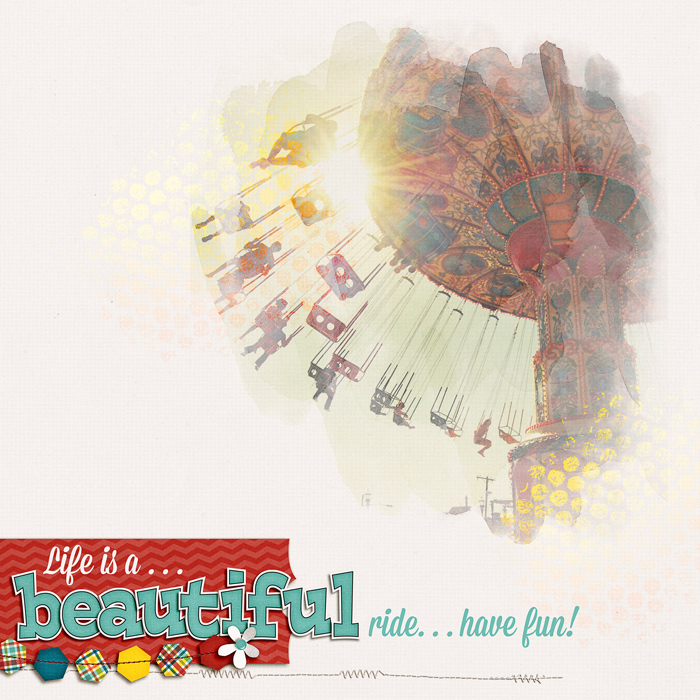
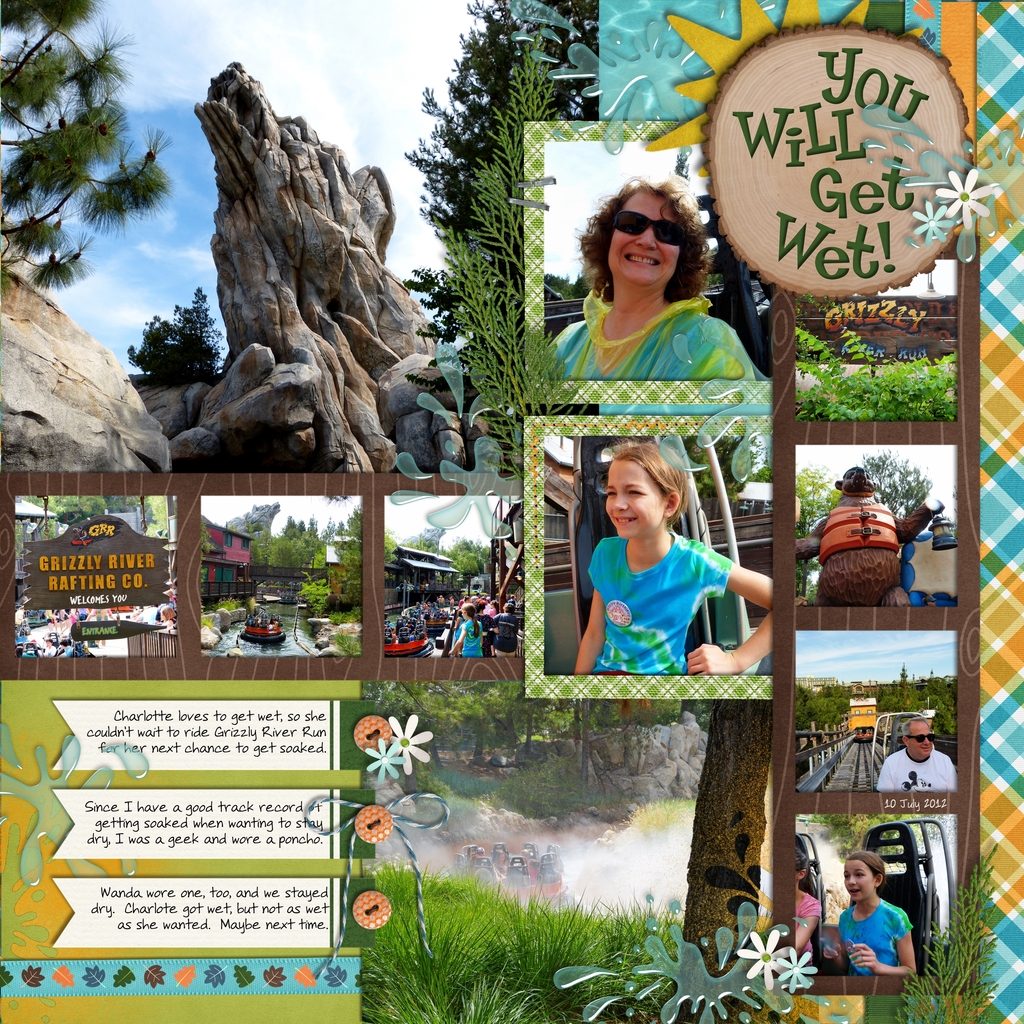
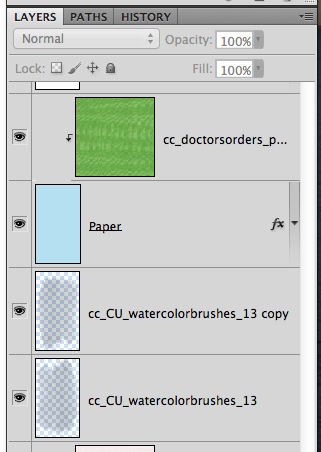
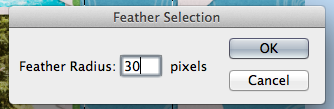
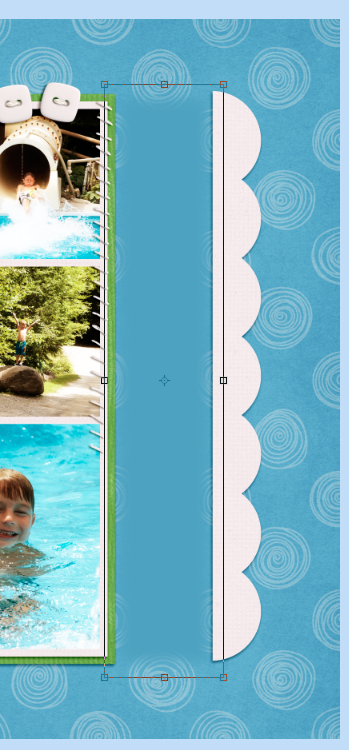
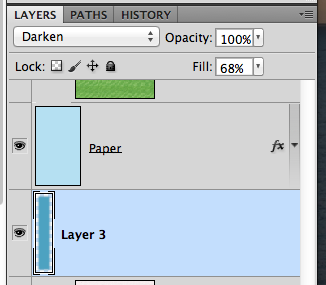
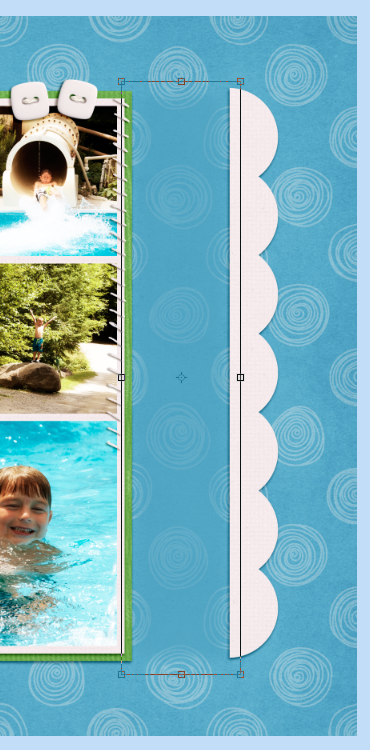
3. Blending. Sometimes a bit of a blend is a great way to use a photo on a page, without any other pictures. The technique as well as the photo, color, and subject can all bring the focus onto the image. Here is a layout I created by blending and painting my image onto the background. I used Roller Coasters and Cotton Candy for this layout.

soccrollercoastermissionscptpaintedridefunsingleweb-1411613010ngk84

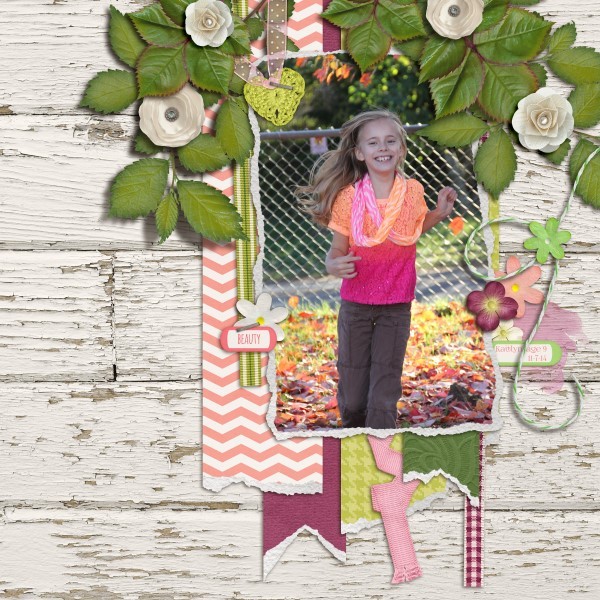
4. Color.  Sometimes color can really change up a layout and change the focus. It depends on the papers you use, and what photo you are scrapping, but using color photos and black and white photos can totally change the tone of the page. Sometimes, emotion is felt based on the color or non-color of the photo.

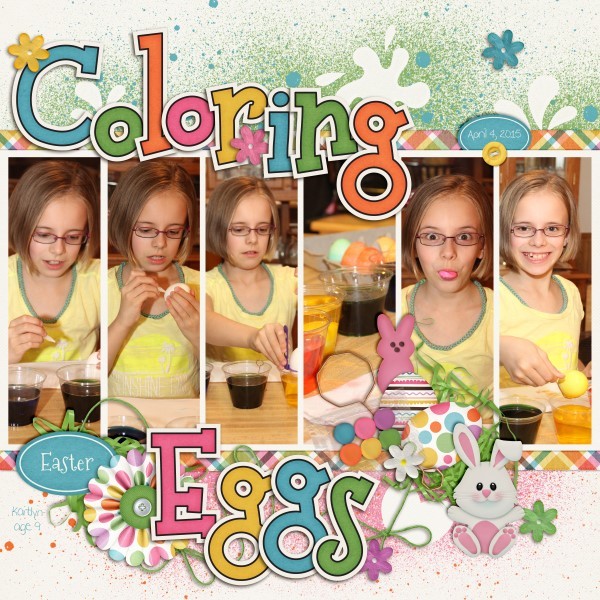
Lisa created this wonderful page and left her photo full of color. I find this is perfect and adds to the layout – this layout also exudes happy from every layer! Just check out that smile! She used Creme de la Peche and Fleur de Violette.

5 Fleur amp Creme 600 x 600

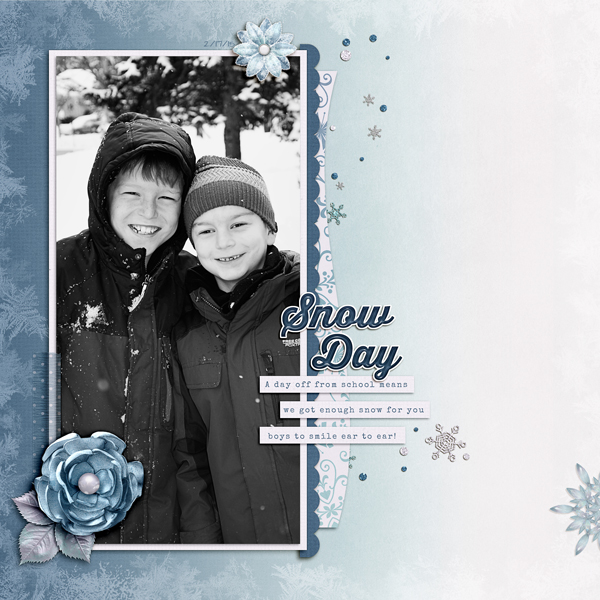
Now, opposite on the color spectrum is black and white. While I wanted to have a picture of my boys smiling, I wanted to convey the coldness of winter, how different it is from other parts of the year around here. Here is my page using Snowlandia and a Scrapping with Liz template.

socczigsnowlandiaswlssbthirstyboldsnwdyfeb-1425862886g48nk

5. Comfort. This one might explain why you scrap the way you do. Depending on what you are scrapping, who you are scrapping, and the particular event may cause you to scrap with one (or many) photo(s). If you are uncomfortable scrapping with one photo, then don’t force it. You many end up not liking the page, wasting that time, and become frustrated. Scrapping is a very personal experience. We all scrap differently, and we all have our own ways. No one way is better than the other.

A lot of scrappers are already one photo layout scrappers. Then there are a bunch of scrappers that have a need to have multiple photos. This was me. I was originally a paper scrapper, and that was how I made my layouts way back when. I now have a mix of layouts and double layouts that have one photo on a 12 x 12 layout. So, it’s ok to scrap how you like, but give yourself a chance to change things up every so often. You might like to break your stride, and mix up the action on your pages. :)

Remember, there is no wrong way to scrap!

Thanks for stopping by!

by_Jenn

Tutorial: Alphabet Fill In

Tutorial: Alphabet Fill In

Hi everyone! Can you believe it’s May?! Holy moly this year is flying by! This is Jenn, aka jk703, here today to share the Tutorial: Alphabet Fill Ins. This is a fun one that can really bring your layouts together! Plus, Chelle has awesome alphabets to fill in! 😛

First, for my example images, I’m using the newest kit – Green Thumb and the Green Thumb {Alpha}. Many of Chelle’s Alphabets will work for this tutorial, as long as they have a lined border. Let’s get to it!

First… Here is the alpha, in it’s original form. I spelled “alpha.” So original, right, lol! It works. :)

1

I have my alphabet letters lined up in my Layers Palette, and I added a shadow. Next, I will use the Magic Wand Tool. Here is what it looks like within the Tools.

2


Once you have the tool selected, you will want to choose the first letter of your alphabet in the Layers Palette. I have chosen my “a.” Now, click on the yellow part of the “a” within your workspace. You will get marching ants around the border of the yellow next to the black. Like this:


3

4


Once you have the marching ants, you will want to create a new layer ABOVE your alphabet. Do this by clicking on the square with a corner folded over. This will add a new, transparent layer above your letter. Here is mine…

5

Now, the marching ants are still marching, and your new layer selected in the Layers Palette. Press Command (Alt on PC) + Delete. This will fill in the alphas marching ants with the background color that you have chosen. Here is mine – white, and what my layer looks like after being filled in. You’ve created a mask. :)

6


7


Now, bring in any of your patterned papers, or a paper that really would work with your page. make sure it is above the new filled in alphabet layer. In my case, that is the white “a” layer. Then right click on the paper, and choose Create Clipping Mask. Here is mine:


8

Neat, right?! Now, you have to go back and do that for each letter. I know it seems tedious, but once you do it a couple times, it goes really fast. AND… the outcome is really cute. Here is a copy of my Layers Palette as I was working on this tutorial, and deciding on papers. I loved them all! You can layer paper after paper, but only the top one will show on the letter, unless you turn the layers “eye” off, so it is hidden.

9


Playing with the different patterns, I came up with these mixes and matches.  Super versatile for any layout, and using the same patterns that are in your kit. You can play with the size of the pattern by making the paper smaller, too!

9a 9b 9c


One more tidbit. With all these layers and papers in there, I might want to switch up the papers later. With that in mind, I leave all my layers unmarked and will group them for easy finding later. Highlight all your layers that have to do with the alphabet, masks, and patterns in the Layers Palette. Then click on the super tiny triangle on the top right corner of the Layers Palette. A menu will appear. Choose New Group from Layers.

9d


After you choose the New Group, you will then see all your layers put into a folder. Super neat, and easy to navigate. 9e


Super easy, fun, and very versatile to your page and favorite patterns. I think this Tutorial: Alphabet Fill In is really a great technique. Give it a try – I’d love to see your layouts. (Link me up – pretty please!!)

Carol helped me out and created this absolutely stunning layout using this technique. She used Chelle’s At the Park and Gone Fishin’ kits for this layout – just check out that big picture blend into the wood paper. It looks so perfect! Her alpha has a pattern clipped in, and uses a little bit of embossing to the layer also. I think it is a beautiful page!

Flying-Alex at Lincoln park 2015_zpsrsefgqvp

Thanks for visiting, and I hope you learned another technique to personalize your pages, give you some versatility, as well as stretch your stash just a smidge!

by_Jenn


05.07 Video Tutorial: Chopped Up Photos

Running a little behind schedule but here is the next video tutorial to share with you. This video Chelle of Chelle’s Creations shares with you how to make it appear as if you have chopped up a large photo and placed it on your page. Take a peek at her video:

As always Chelle’s amazing team has come up with a few examples to share with you.

Jan (QuiltyMom) took a gorgeous mountain landscape photo and used Chelle’s technique and create this fabulous page. For this page she used the Lay It on There {Doubles} 9 & 10 and bits and pieces from Chelle’s kits: In the Forest, On the Trail, and On the Water.

I really enjoy how Jenn (jennschultz) uses a really large photo to compliment the chopped up photo page. That dinner sure does look delicious, no wonder she cleaned her plate. For this yummy layout Jenn used Lay It on There {Doubles} 17 & 18 and Fabulous 50s (Bundle).

This technique is perfect for those stunning landscape shots that you have as Jenny (Jenn18) demonstrates with her layout. Indian Summer’s colors compliment the spectacular color of nature in the red rocks. She also used the Lay It on There {Doubles} 9 & 10.

Chelle has quite the collection of Lay It On There templates that would work for this type of layout. Head over to her store to check them out. Happy scrapping until we meet again.

Tutorial: DIY Circle Elements

Tutorial: DIY Circle Elements

Hi Everyone! Are you ready for iNSD weekend?! It’s so exciting… so much to see, do, and join in on! I (Jenn/jk703) won’t take up too much of your time here, but this Tutorial: DIY Circle Elements is a fun way to add a little fun to your layouts. Here is my final layout, and I’m going to show you how to make that circle with the writing. I’ve used some of Chelle’s Farmer Market releases – Green Thumb – WOOT! Check out her STORE to see what is available for $1 – Farmer’s Market!

SO_CCGreenThumb_WanderlustSpecElite_ShayneApr2015Growing_WEB


First, I used the shape tool to make my circle. Before we start, be sure to Rasterize your shape, if needed. You might get stick at some point. If you do, and your shape isn’t rasterized, do it them. :)

Right now, I have chosen to leave it above my photo, but I will move it below later. It’s yellow… for now. :)

1

Here is my Layers Palette.
2

Next, I’ve chosen the Type Tool. I’ve used a font called Wanderlust. Any scripty, thicker font will look nice with this method. You can try Pacifico or Thirsty Script. I believe both have free versions. I’ve typed it and the layer is above my circle.

3

After my type was good, I used the move tool to tilt my letters a little. I also made sure that my letters overlapped the edge of the circle a little bit. This way, when I cut them out, I will cut a part of the edge off.

4

For the next step, you will have the text selected in the Layers Palette, and double click on the thumbnail. You will get marching ants around the letters on your layout.

5

After you have the marching ants, turn off your Type Layer. This is what your type should look like on your layout.

6

Now, you will choose the shape, and press delete. You will see where the marching ants was, the paper/shape inside will be deleted. Here is what mine looks like. Press D to remove the marching ants. Add a shadow style, and you are done.

Note – when you move the shape, paper and type, be sure to lock the layers together, so that they move together. In case you need to make changes for later on edits.

8

Now, I’ve tried out a couple of other paper layers and ended up with the yellow polka dot. Here is my final layout. Easy DIY Circle Elements. You can even add styles to them to make them look letterpresses, or acrylic!

SO_CCGreenThumb_WanderlustSpecElite_ShayneApr2015Growing_WEB

Hope you enjoyed this tutorial. Have fun during iNSD! Get all you can for the $1 Farmer’s Market!

by_Jenn

04.23 Video Tutorial: Using Layer Masks w/ Big Photos

So sorry this is running a little late today. I have been busy getting outside with my two girls while the weather here in Florida is still a little reasonable. Soon it will be too hot to do much of anything but be in pool. Speaking of a pool watch as Chelle of Chelle’s Creations demonstrates how to get the look of her pool layout in the the video. In this video she is going to share how to use layer mask to use a larger photo in the background of a layout.

Carol (Iowan) shows the same technique on her gorgeous layout using Bluebird on My Shoulder. I really like how Carol positioned her cluster so that is appears as if her daughter is look at it.

If you loved the kit that Chelle used in her video head over to her store to check it out along with the coordinating Little People.


Tutorial: Stenciling

Tutorial: Stenciling

Hi Everyone! It’s Jenn, aka jk703, here to bring you another tutorial! A lot of times I try to recreate what I can create on a paper layout! One thing that I always liked was paint and splatter…. but then I also liked the opposite. What is the opposite? Today’s post – Tutorial: Stenciling! :)

For my layout, I’ve used Chelle’s newest delight – Creme de la Peche! It is a gorgeous kit… but make sure you give it a chance, it is very versatile. I’ve used it today on a spring layout of my boys! My layout also uses a template by Scrapping with Liz, and the fonts – Special Elite and Wanderlust. Here is my final image: SO_Swl_Rcyclb36_CC_CremePeche_Wanderlust_SpecElite_FinSpring_Apr2015_WEB

Start out with your blank page (by blank – I mean paint-less, lol!):
Screen Shot 2015-04-06 at 8.37.54 PM

Add your paint – I have 3 layers here.
Screen Shot 2015-04-06 at 8.40.17 PM
Next, you will place your shape above the paint. I’ve chosen leaves. Here are my two leaves layers, and my 3 paint layers:
Screen Shot 2015-04-06 at 8.42.45 PM


Next, you will choose one of your leaves. Double click on the thumbnail image, and you will get marching ants around the shape. Now, On EACH paint layer, click on the layer and delete. The paint within the shape will be taken out. Do this for each shape you have, as I had to do it for each leaf, on each layer of paint.

Screen Shot 2015-04-06 at 8.42.30 PM


Once you are done deleting paint, turn off your shape layers. And my page after deleted paint, and turned off leave layers:
Screen Shot 2015-04-06 at 8.43.16 PM

That’s it!! :)

Really. That’s all that you have to do to mimic a stencil. You can do this with flowers, doily, and so much more. Here are some layouts the CT came up with for stenciling.

Karen made this lovely creation! Just look at the lacy edgers – perfect stenciling. :) Plus, I really like the mixed font and alpha title work. She used Creme de la Peche and SWL template Recyclables 29.

cremedelapeche_600


Lisa used Bunny Hop. She used the splashes and eggs to make her stenciling! Look at that line of pictures. My favorite is the candid silly one!

4 Assign1 Bunny Hop Stencil 600 x 600

Jan made this super fun page from the Grizzly River Rafting Co. Ride – perfect for the water splash out of the spray – put on top of the bottom photo and behind the journaling tags. She used In the Forest and In The Pool, plus a retired Little Green Frog Designs template.

grr2

This Tutorial: Stenciling doesn’t have to be messy, and you will love the results! Give it a try.

Thanks for visiting and hoping to see layouts using this technique.

by_Jenn


04.09 Video Tutorial: Adding a Pattern to Accordion Flowers

You can never have enough flowers in a kit can you? I’m here today to share a video tutorial by Chelle of Chelle’s Creations showing you how to add a pattern to her CU Accordion Flowers. This way you can create flowers to match whatever kit you choose to scrap with. Enjoy learning something new!

Have you seen Chelle’s newest kit released today, Creme de la Peche? It is gorgeous and these flowers are perfect to add. Kayla (keepscrappin) used them on her beautiful layout along with Chelle’s CU Accordion Flowers and a modified Fiddle-Dee-Dee Designs template.

Head over to Chelle’s store to check out her new kit along with the accordion flowers. While there browse her other kits and pick up a few or create a wish list.

03.26 Video Tutorial: Scrap On Your Phone

Spring has official arrived and we are almost done with another month in 2015. I can’t believe how quickly time goes by. If you are anything like me you try to capture as many memories as you can. With the boost in technology a lot of phones these days take really decent photos. Have you ever thought about using your phone to scrap those photos? Chelle of Chelle’s Creations is going to show you how to create a layout with in your phone in about 10 minutes. Have fun learning something new!

There are so many different programs that can help you scrap a layout besides the ones Chelle mentioned in her video. Here are a few the ladies used and the layouts they made.

Krista (kc71595) used Phonto and Photo Grid using a android device and created this adorable layout. I wish after a few videos I was able to create something so cute. She used the Down on the Farm kit, Down on the Farm {instaLife}, and Down on the Farm – Sounds {instaLife}.

Using the Zoo Crew Arctic {Journal Cards}, Karen (zippyoh) created this layout of a memorable vacation. She used PicStitch and Over on her phone.

I love to see personality in a layout. You can just feel the love between this mother and daughter in Jan’s (QuiltyMom) layout. For her layout she used Toe Picks & Figures 8s and PicStitch and InstaQuote. After playing around with it Jan found out that she didn’t care for the InstaQuote because it didn’t allow her to use the full image and if you look closely there is their logo on her page.

With so many different apps out there these days for you phones there is bound to be one that will fit your needs. When you have some free time pick up your phone and see what looks interesting to you and play around. You might just find a new way to quickly get some layouts done.

See you again in April.

Busy Background Journaling

Busy Background Journaling

Hi Everyone! This is Jenn, jk703, here with a fun and easy tutorial for your journaling! I’m here today to share Busy Background Journaling… or Not So Busy Background Journaling! :) Don’t groan yet! I get it, journaling is hard for some, easy for others, but if you put the effort in, you want to be able to use the papers you like, AND read your journaling! Right?!

For my layout, I’ve used Chelle’s Doctor’s Orders, Chelle’s CU Watercolor Brushes, a Scrapping with Liz March In Review template, and the font Special Elite. I’m super addicted to this font, and have used it since January on almost every layout. I’ve never done that before.

Method #1

I’m working on this page. You can see my grey spots over on the right. That will be where my journaling will go. I’ve used the water color brushes (two of them), and lined them up how I like.

Brush1

And my Layer’s Palette:

Brush2

Next, I merged them together. This way, they become one watercolor shape/spot.

Brush3

Next, I brought in a solid paper, that matched my background paper with the swirled circles. (Say that 10 times fast!) This paper is above the watercolor shape.

Brush4

Next, I will clip my paper to the Watercolor paint. Just have the paper selected in the Layers Palette, right click and choose Create Clipping Mask. Like this:

Brush5

Once you clip the mask, it may or may not show up a lot if you’ve used the same color as the pattern paper. That’s ok and normal. Just like mine, right now. :)

Brush6

So, here is a quick fix. First, select the watercolor brushes layer, and go through each of the Blend Modes to see if any will work for your journaling needs. They did not for me. That’s ok. Select the watercolor layer, and the paper layer, and DUPLICATE them. That’s right. Duplicate – once selected, right click and choose Duplicate. Then your Layers Palette will look like mine below. The watercolor part has darkened the white swirls, just a bit more.

Brush7

And my duplicated watercolor spots.

Brush8

Here is what my final layout looks like. Even with the small size, you can see more journaling than paper where I’ve used the watercolor brush, and paper.

Brush9

Method #2

I’ve got one more trick up my sleeve. This one is super easy, especially if you don’t have a solid paper in a specific color! Again, I’m working on my layout. I’ve used the Marquee Tool, and drawn a box where I’d like my journaling to be. You should see marching ants.

Feather1

Next, you will change your Background Color to the color you want to be prominent for your layout. In my case, I want a darker color to cover the light white swirls. So, I choose the solid teal. Here is my background Colors.

Feather2

Your marching ants are still marching at this point. Next, you will create a new layer on top of the background paper (or right where you want your journaling to be. This layer can be moved later if you need. With that new layer selected, and your marching ants marching, you will choose Select > Modify > Feather. Feathering is expanding the edges of the selection, but more of a blend will occur as the edge moves away from the center.

Feather3

A pop up will appear. I chose to feather by 30 pixels.

Feather4

After you click ok, you will then press Command + Delete (Alt plus Delete on PC) and you will fill in the selection with the Background Color. See below. A filled in area that does not have distinct edges or really a total square-ness.

Feather5

To make this seem less solid, all you have to do is play with the Blend Mode, and the Fill or Opacity. For my example, I chose Darken and a 68% Fill.

Feather7

Feather6

That’s it. Not too hard, and a super fun way to use all those wonderful backgrounds on your pages, but still allows room for readable journaling. :) Here is my final layout:

SO_SwlMarchReview_CCDocOrders_SpecElite_SmuggsStart_Jul2014_WEBDbl

SO_SwlMarchReview_CCDocOrders_SpecElite_SmuggsStart_Jul2014_WEBLeft

SO_SwlMarchReview_CCDocOrders_SpecElite_SmuggsStart_Jul2014_WEBRght

There are loads of ways you can journal on busy backgrounds. Journal cards, words strips, paper pieces, tags, or even darken and make your font bold.

Karen (zippyoh) used Doctor’s Orders too, and the Artsy Journal Templates by Scrapping with Liz. She used the word strips to journal for her layout.

doctorsorders2014_600

Thanks for visiting! Hope these techniques will get you using a bit more of those fun patterns that Chelle makes!

by_Jenn

03.12 Video Tutorial: Emphasize Your Journaling

How’s the weather where you are? I hope some of the states that received a lot of snow are starting to thaw out. Here in Central Florida we are back to nice and sunny 80 degree weather. Today I am going to share Chelle’s Creations video tutorial on how to make certain words in your journaling really stand out. Take a moment to watch as Chelle explains how to use her set Mark My Words.

As always Chelle’s talented group of ladies created a couple of layouts to show you what the learned from the video and put to use.

Christine (Carolina Scrapper) used a template by Scrapping with Liz to create this adorable layout. Chelle’s Creations At the Beach kit is perfect and just look at how Christine used the Mark My Words to emphasize part of her journaling.

Check out Helen’s (winipeg1) layout. It looks as if Chelle designed the Fabulous 50s kit colors for that photo. Helen recolored the pieces of Mark My Word to match the kit so her journaling still stands out but it also coordinates. What a great idea Helen!

Are you ready to use what you learned in your very own layout. Head over to Chelle’s Creations store and pick up Mark My Words today.

Happy scrapping until next time.